
When I was moving from the “should I build this plane” to the “I’m going to build a plane” phase of the building journey, I knew that I needed a convenient and comfortable place to work. This post will break down my decisions for my first workshop (which, spoiler alert, won’t be where I finish my airplane, in fact, it’ll only really work for my empennage and wings. Warning: Long post ahead.
Location, Location, Location
We have the good fortune of having two garages in our home, our main garage and an attached ‘garden garage’. The garden garage is essentially a single car garage that is within our walkout basement. We were using it for it’s named purpose, it had our lawn mower, outside tools, dirt, fertilizer, and a bunch of crap in it. The room wasn’t terrible, but it wasn’t great – it had rough taped drywall, terrible lighting (1 shop light and 1 lightbulb), access to a single shared 15A circuit, and did I mention it was filled with a bunch of stuff? However, it was conveniently located in our house, it already had A/C and heat run to it, and it had easy exterior and utility access – so we decided that it would turn into the airplane factory. Here’s the work that went into converting the workshop:
- Added 6 can lights (down-lights) and removed the old single light and shop light
- Patched a bunch of drywall, they sprayed knockdown texture on the ceiling and walls
- Routed the safety wires for the garage door sensors through the ceiling (I used Cat5 jacks to ‘punch down’ and make easy connectors for each sensor and for the central garage door unit)
- Added a new 20A circuit in the ceiling
- Moved in the EAA workbenches I made (I’m starting with two of the standard plan tables and I have a smaller tool-caddy table I made, plus a small tool cart I refurbished as well)
- Ran an airline from my upper garage (where my compressor is at) down into the lower garage so I have a quiet source for compressed air. (I used the Rapidair kit, and it’s been pretty great so far)
Workbenches, Storage, and Tools
Workbenches: I built two of the classic EAA 1000 style tables (everyone online refers to these and the plans are available here: http://www.eaa1000.av.org/technicl/worktabl/tablefig.htm). I did not put a lip on the table-top; if I were to do this again, I probably would’ve modified the table so I would have a 1″ lip on at least 1 side to make clamping a bit easier. I also put wheels on my tables, which makes them slightly less sturdy, but it does allow me to easily move them around (plus I got the locking casters that lock swivel and the wheel at the same time, which helps). With the plans and a few more 2×4’s, you can easily make a tool cart (I don’t have the exact dimensions but it’s something like 2′ by 3′)
Storage: I picked up a couple of wire racks, one from Amazon Basics which is the 5-shelf 36×14 unit (which I don’t recommend as the tolerance on the racks are about +/- 1″, which means the rack is pretty not-square). It works, but I wasn’t about to buy another one of them. I then picked up a wire rack from Webstaurant, which is much better (I got this unit) and it far more solid and much higher quality. For new builders – don’t underestimate the amount of storage you’ll need for the parts both before AND after you assemble them. My shelving also does double-duty as where we can start our garden seeds.
I also added some shelves harder to see in pictures, but they’re to the right of the garage door) to make a couple of ‘homes’ for the smaller power tools to keep them out of the way (namely the belt sander and bandsaw) – it makes for easy access and they’re off the workbench when I don’t need them. They’re simple shelves, just a couple of boards across two shelving brackets (the kind that have the metal vertical runners where you can move the shelving brackets around).
Tools: Well, this could be an entire novel, so I’ll try to summarize this as much as possible. I had many of the ‘basics’ already as a function of the various DIY and home renovation/wood working things I like to to do. However, I haven’t worked with metal extensively, and have certainly never built a plane – so that entailed picking up a bunch of tools. Here’s what I went with, and why:
- Cleaveland Tools: RV-10 Starter Kit – This is a most excellent starter kit, I personally went with the pneumatic squeezer (for ease of use, especially with dimpling) and the DRDT-2 dimpler (mainly for the quiet factor vs. the C-frame). Cleaveland has been an awesome vendor to work with, I appreciate that they’re somewhat local to me, and their attention to quality tools is second to none.
- Other things I bought (mostly from Cleveland) that I’d recommend (Plus, an unsolicitied pro-tip: If you think you’ll need it, just get it from Cleaveland – I did this over 3 or 4 orders and in hindsight, I should’ve done it all at once):
- 3M Light deburring Wheel – I put each of the deburring wheels on my grinder and it’s a dream for deburring edges). Pro-tip, if your wheels seem out-of-true, there’s a good chance it’s your grinder. It’s pricey, but I picked up the Oneway Balancing System (1 set is good for two wheels), and while it’s likely overkill, it let me dial in the wheels so they’re super smooth running now.
- Deluxe Airhose and Manifold Block Kit – The starter kit comes with some of the lightweight airhose and mini connectors, and they’re great – so I picked up the manifold so I can have multiple pneumatics easily ready to go.
- Edge Deburring Blade – It’s small but helpful on deburring skins, not a necessity, but a good time-saver.
- Die-Grinder Kit – I didn’t have a die-grinder, so the kit was good for me, I got a couple of deburring wheels and cutoff wheels with it, which has been put to use already on the empennage in cutting down some of the angle aluminum pieces for the Rudder, as well as deburring the lightening holes in spars.
- Pneumatic Cleco Gun – I work on a computer all day, the last thing I wanted was more repetitive use of my hands/wrist, so this was some of the best $70 I’ve spent so far. Still, get the cleco pliers (as there are some spaces you’ll need/want them, but this installation tool has been great (note: there’s a pistol and inline grip style, I have the pistol style and it’s been solid).
- Hex Shank Hold Deburring Tool – This thing is awesome, I picked up a spare to chuck into a longer driver for some of the harder-to-access locations where my electric drill gets in the way.
- Other Tools I bought or had:
- Milwaukee Electric Screwdriver – Navigating through Milwaukee’s product line is annoying at best, but finding the right tool issues aside, this thing is great for the debur bit; it’s small and lightweight, and is far nicer than using a manual handle or a full blown drill for the easy job of deburring holes.
- Milwaukee 12V Drill – I picked up a 12V drill, I already have their heavier/larger M18 system, but for the repetitive drilling on this kit, the lighter weight drill and smaller battery options has been nice. Honestly, any small drill will work, I just happened to pick up new one because it was a decent sale and I could justify the 1.5lb difference between the M12 and M18. If you do go w/Milwaukee – just take a peek at ALL of their 12V units and make sure you’re happy with the size/weight of them (as the specs/sizes aren’t always logical)
- Grinder – I have a variable speed unit (Porter Cable, I think) – it’s a decent grinder on a stand and after the Oneway balancing set on those 3M wheels was on it, it’s a dream-machine.
- Drill Press – I haven’t used this yet, but I’m sure I will – you can likely get by with a handheld drill, but there are probably a few areas where a drill press can’t hurt
- 30 gal Air Compressor – This I upgraded because of the plane – I previously had a little oil-free 2.5 gal pancake unit, I replaced it with a oiled 30 gal unit and it’s much quieter and much nicer.
- Grizzly Bandsaw G0803Z – I have the tabletop version, it’s a solid unit and I’ve used it for a number of different cutting of aluminum so far, pretty handy to have when you need it.
- Grizzly Combo Belt Sander (H8192) – I’ve used this on some of the deburring jobs, but I only use it when it’s something I can’t do with my 3M wheels as the wheels are just so convenient and forgiving.
- Air Filter – Sounds (potentially) silly, but the grinder wheels will kick up a decent amount of metal dust – it’s probably not great to inhale, I have an older Coway unit that’s a HEPA filter which has been handy to keep the air good a relatively dust free.
- Vise – I definitely over-researched this, but I ended up with a Yost 5″ unit (the 750-E model); so far I’ve been quite happy with this unit (I have a Wilton 6″ in my other garage, and the 5″ seems to be just the right size for my smaller shop now). I anchored this on my small tool cart for now, which keeps my large workbenches clear.
- Grypmat – I picked up the three pack of these, mainly for when I start working in enclosed spaces/engine compartments, etc., but they’ve been a good way to keep the tool chaos down to a minimum.
Conclusion – Kinda, for now
That’s my workshop, and I’ve put about 20 hours into my practice kits/ pre-work in the shop, and about 40 hours of actual plane assembly in there so far. I haven’t discussed all of the 3D printed organizers/tools/etc. yet – that’ll be another post, but I’m overall very happy with my shop. It’ll work great for the empennage, and should just barely work for the wings. After that point in time, we’ll either need to build an outbuilding, condition our upper garage, and/or move to a new place – but for the next few years – this will treat me quite well.
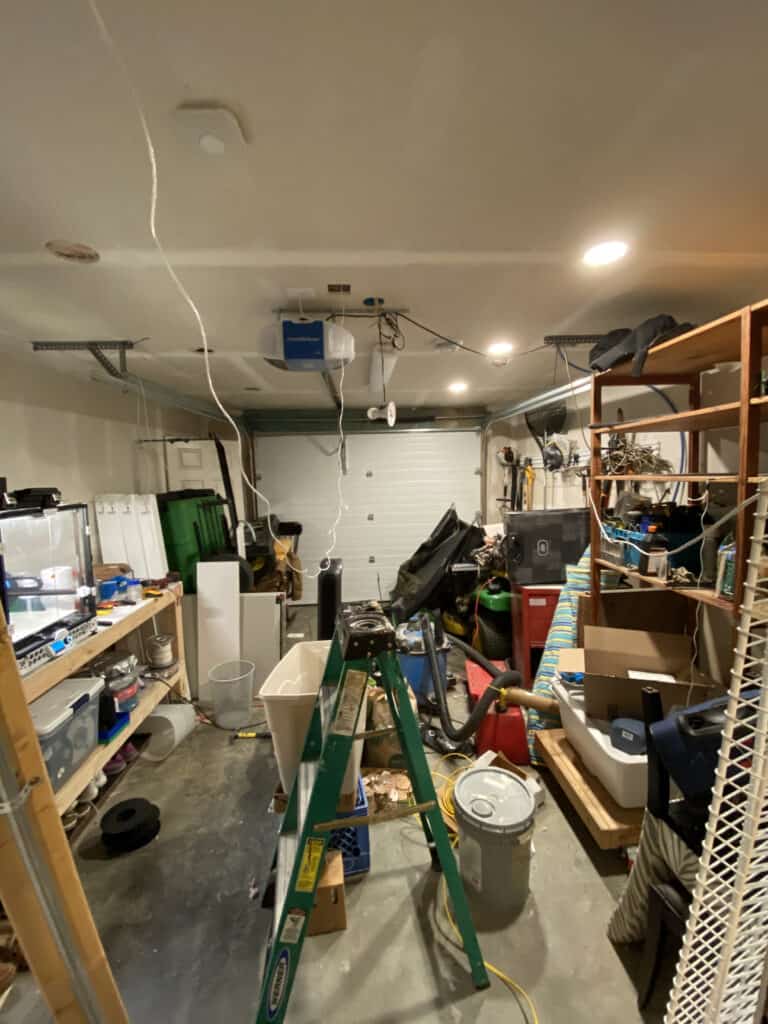
The ‘before’ of the airplane factory; I’m not proud of this – and this was during the lighting addition phase (those down-lights weren’t there before, this was taken as I was 1/2 way through adding the lights) 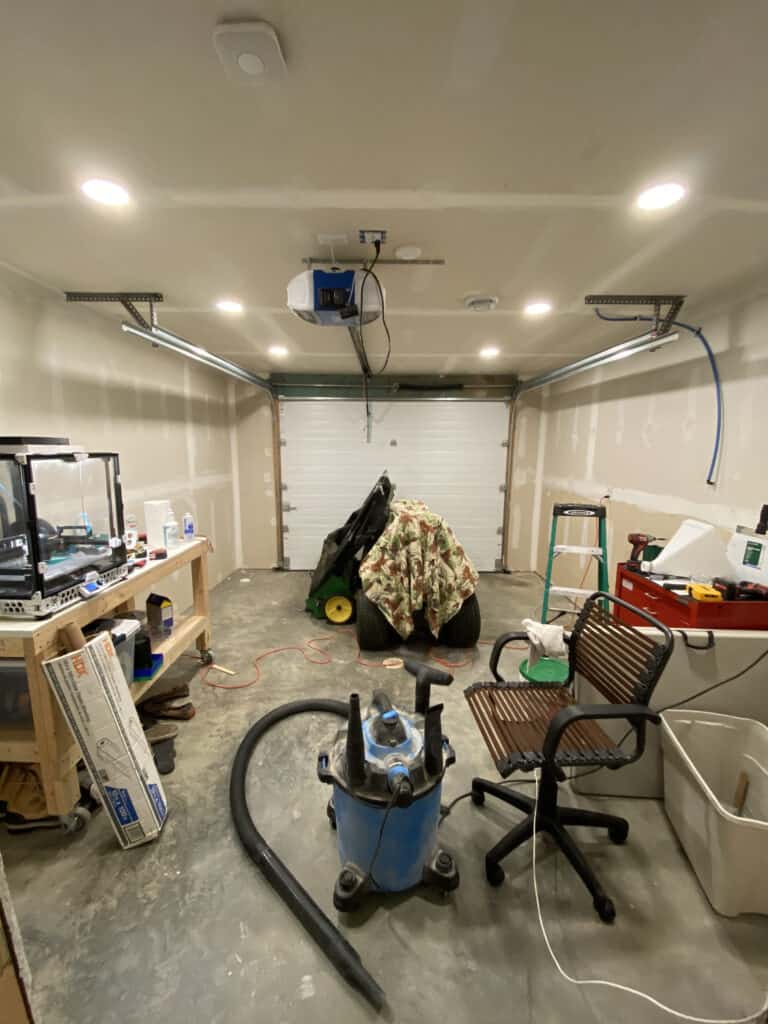
Progress shot after getting all of the electrical and most of the patching and cleaning ready 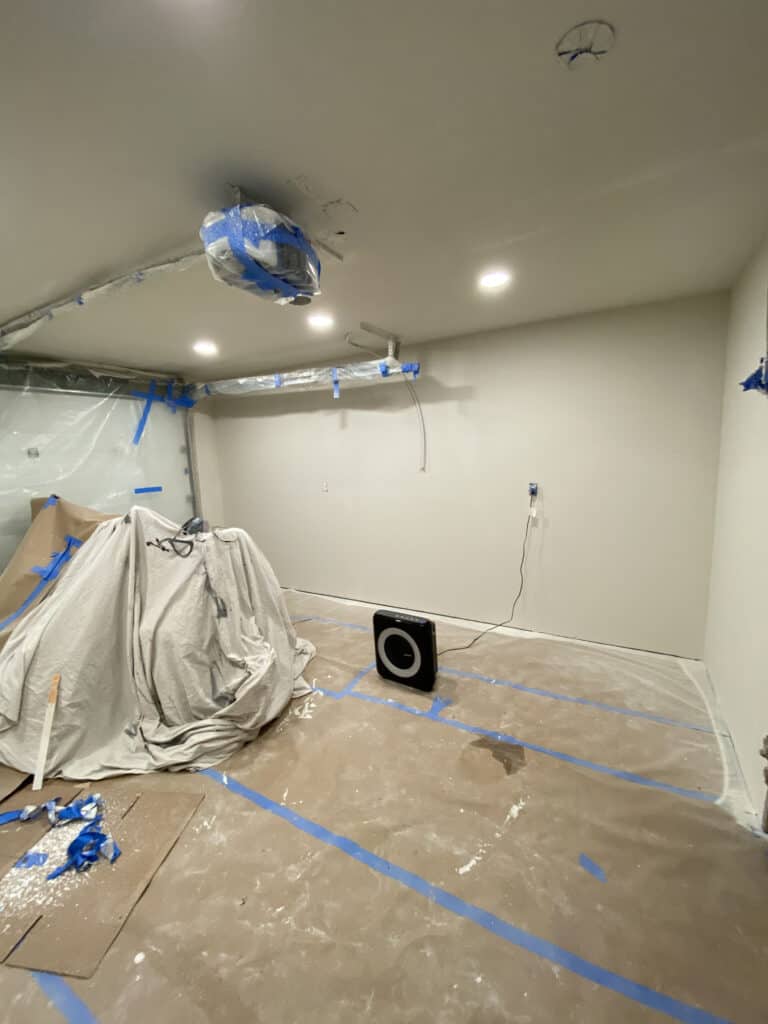
I really dislike drywall, and I tolerate painting, but the result was worth it. 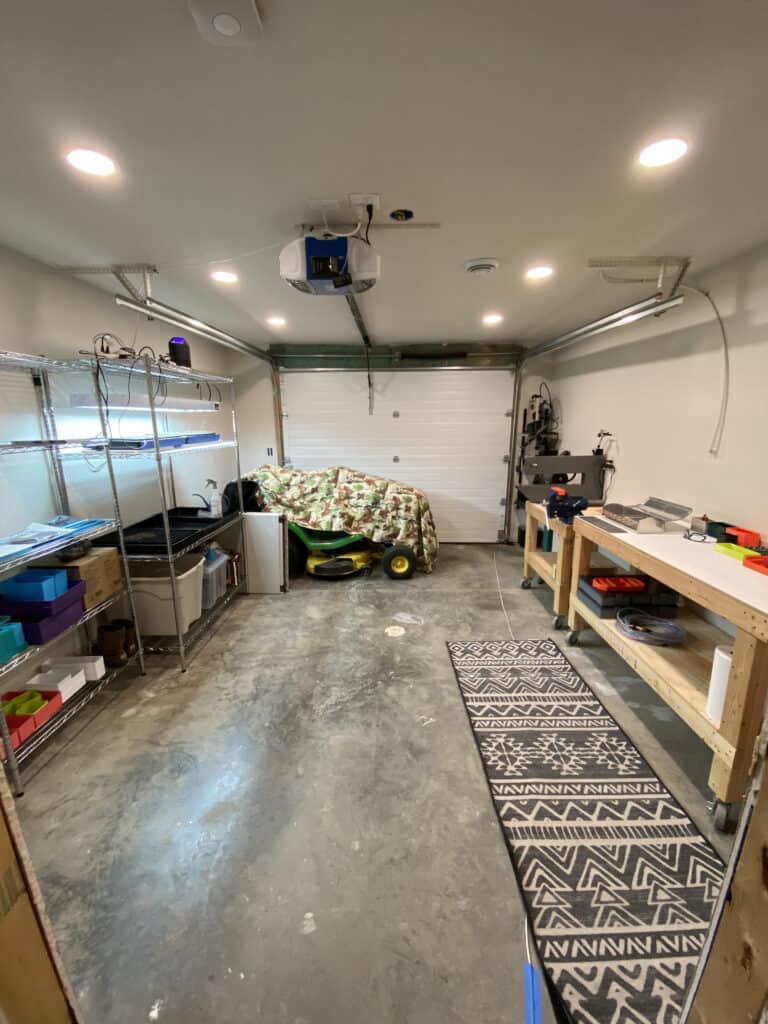
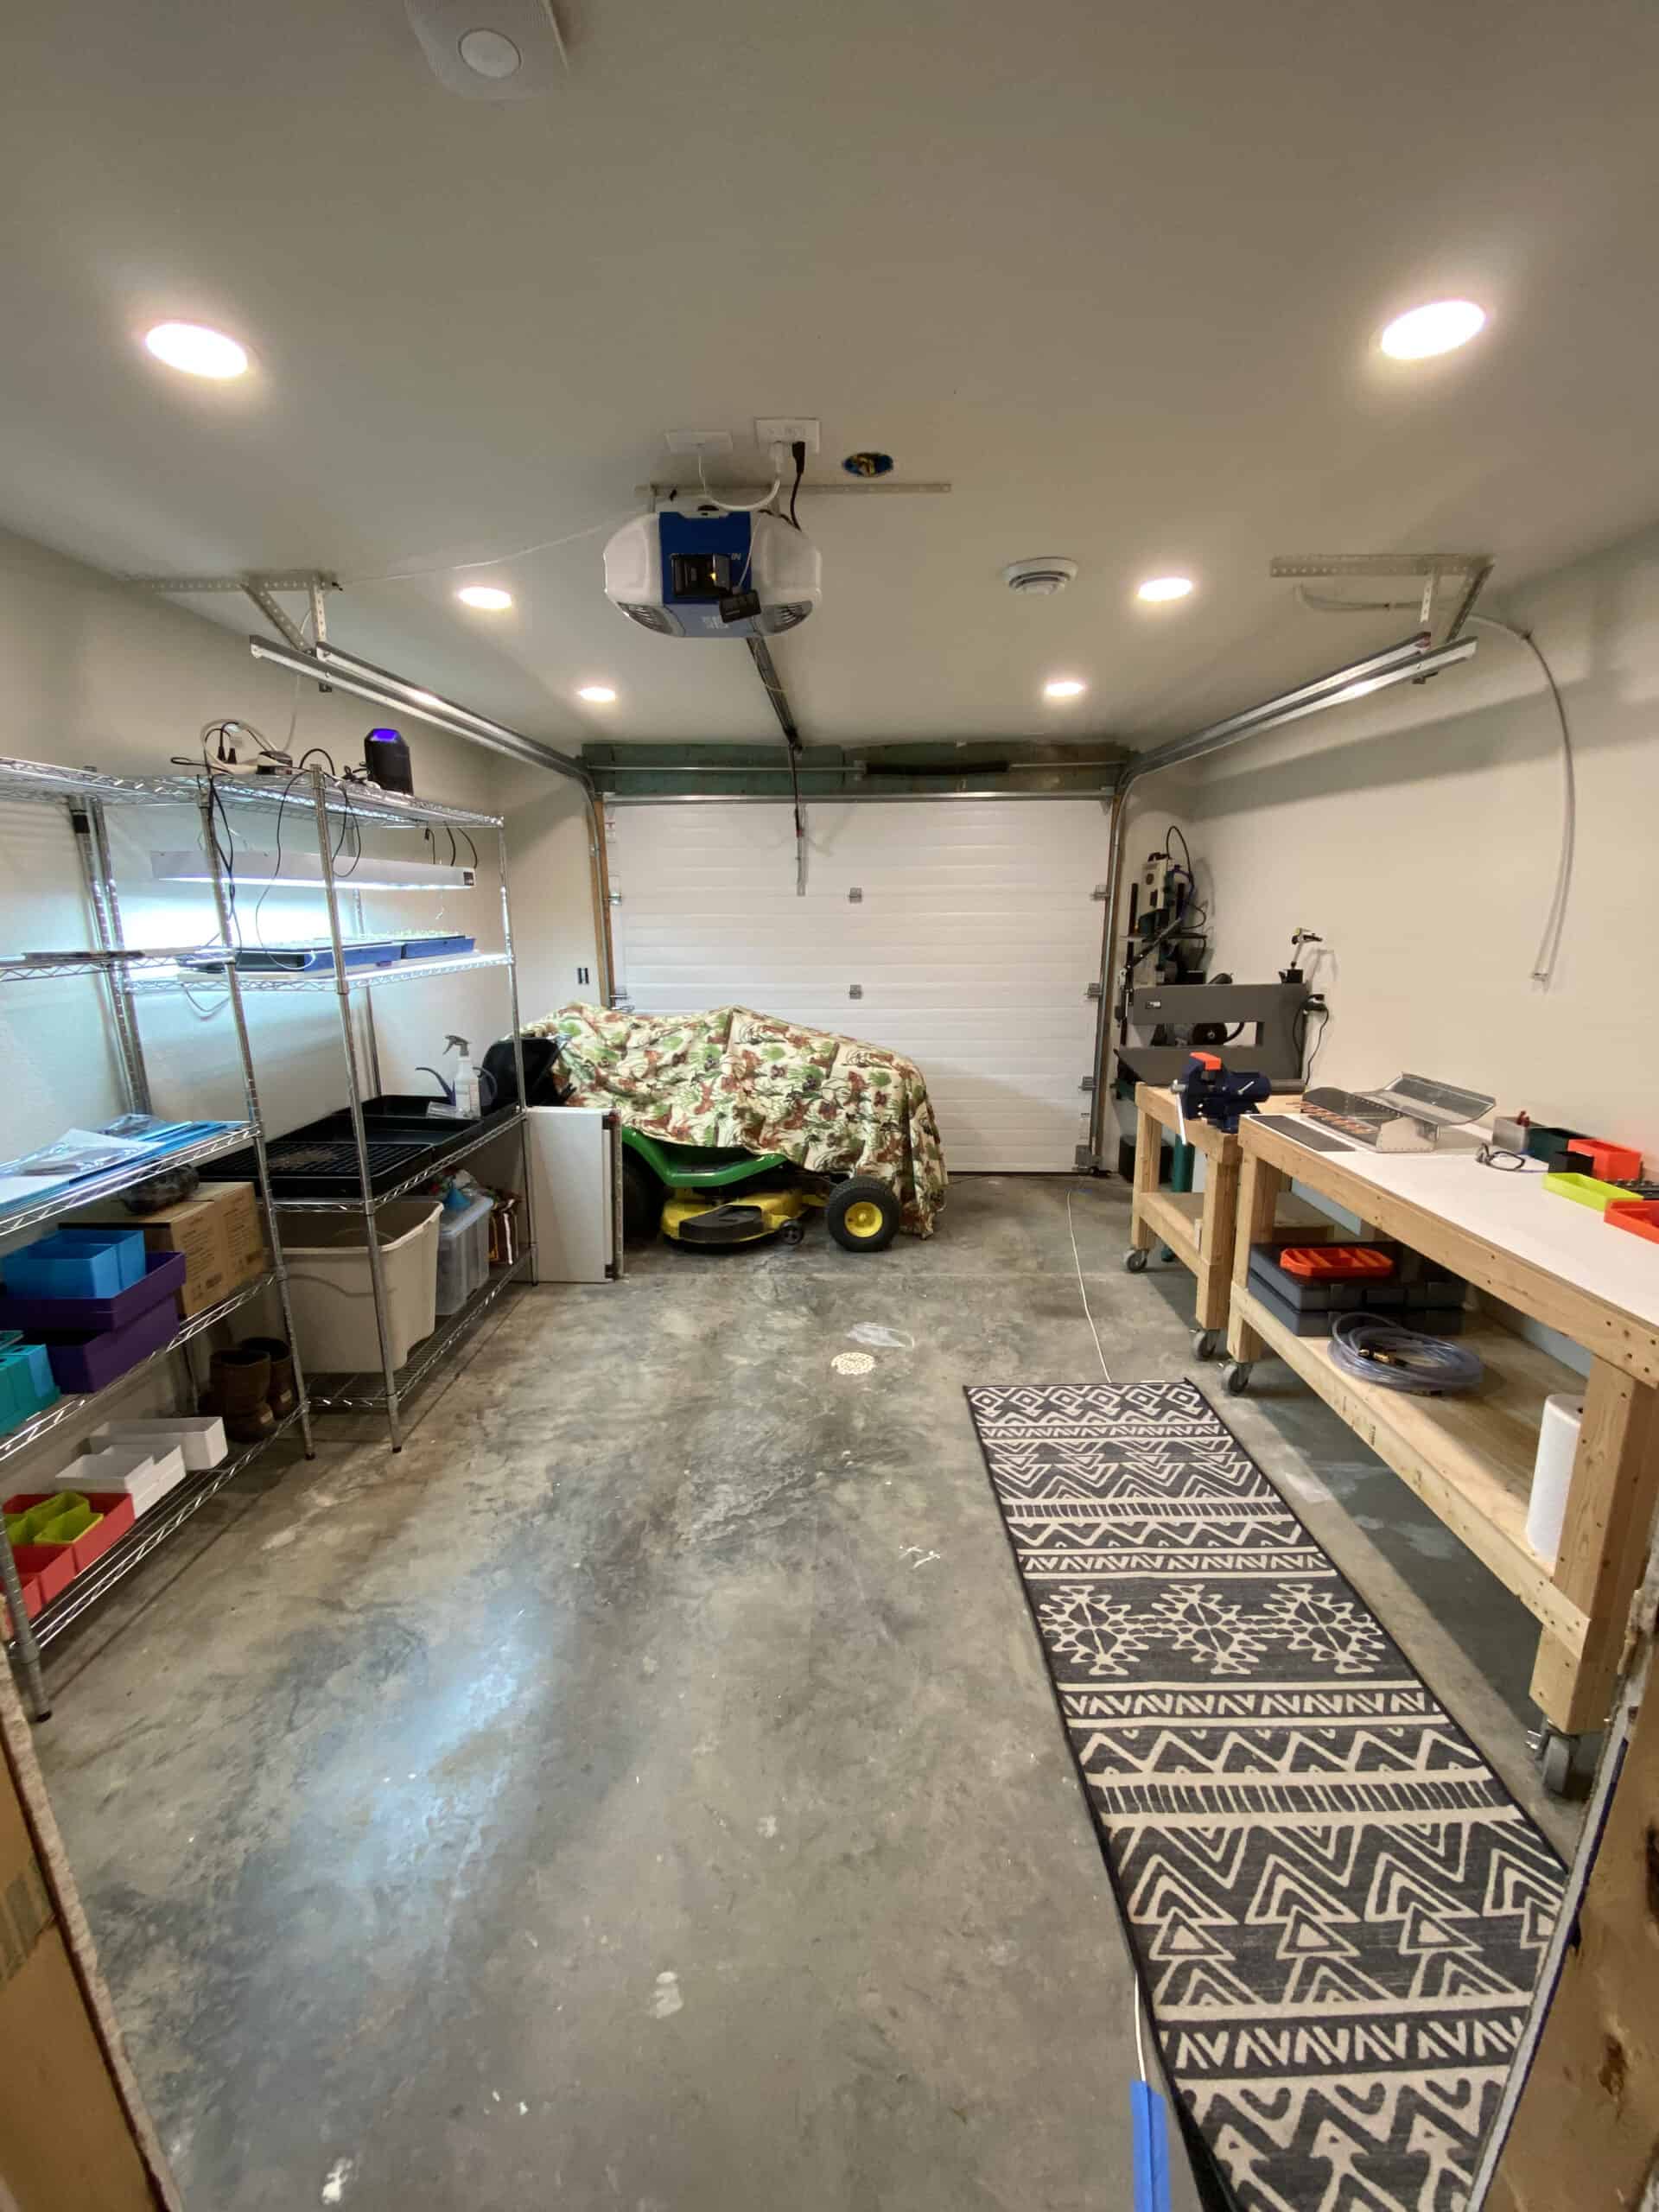
Workshop with one workbench, the two tool carts, and my two wire racks for storage (and starting seeds for our garden) 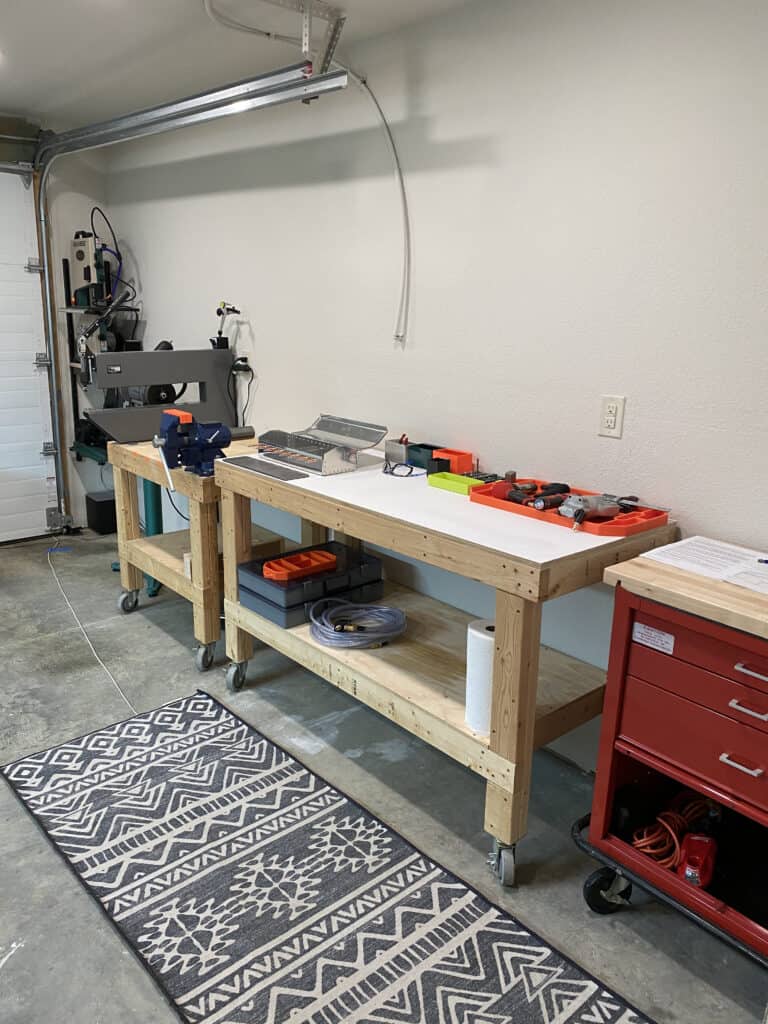
Detail of the workbench ‘wall’; not shown is the other work table, which I usually have just on the other side of that rug.


