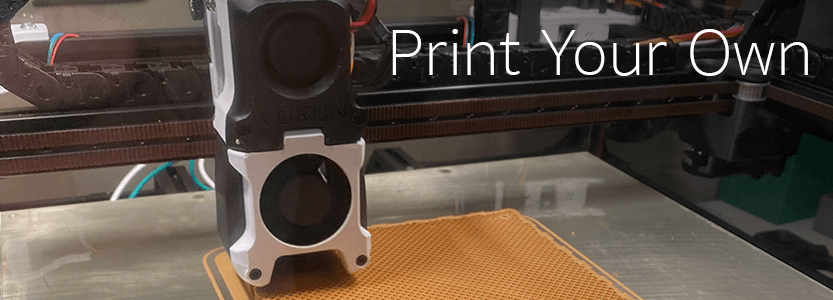
One of the hobbies I picked up during the early pandemic was 3D printing- it’s something I always wanted to do and never went after years ago. I started with a Ender5, modified the crap out of it, and then built a Voron 2.4. For those that aren’t familiar, Voron’s aren’t super cheap to build, but they’re an amazing printer and I’d highly recommend it for your 2nd printer (you’ll want to get your bearings with a simpler printer first, plus you have to print parts to build a Voron – so having your own printer available is helpful). Alas, I digress – because I have ready access to a 3D printer, and I enjoy working in CAD (it’s my version of doodling), I’ve been creating a number of helping ‘tools’ to support my build. This post will detail all the things that I’ve designed so far (up through mid-Aug 2021). Reach out if you have questions or want a .F3D or .STEP file to make modifications. Or, if you want me to print you some of these parts, I can likely do that as well if there’s interest. You can pick up all the STLs on thangs.com, here’s a direct link: https://thangs.com/jwilliams2020/JerAero-RV10-Assembly-Tools-23840
For each part, I’ll describe the part, show the design, and then a picture of each part in the wild – I’ll also share the material I’m printing in, for the most part it’ll be one of the following materials:
- PLA – This is a really forgiving plastic to print with, and most entry-level printers will start you with this. PLA is great, it has decent chemical resistance, though it’s somewhat brittle. It also has a low melting point (makes for easy printing, but also means it melts in sun and warm environments). I can print PLA in the Voron, but it’s actually harder to do so as I need to keep the print area cool (PLA hates enclosures)
- ABS – This is a somewhat more difficult (though still relatively easy) plastic to print, the trick here is you need to print in a chamber that is draft free and somewhat warm (40 degrees C or higher) to prevent warping. ABS is less brittle, does better in heat, and is ideal for functional parts (ABS is a popular plastic in the wild too, Legos are made out of the stuff). ABS does have decent chemical resistance…except acetone – acetone melts ABS, which is helpful to weld ABS to ABS, but it is something to keep an eye on (e.g. don’t use ABS where acetone will be). ABS is Voron’s jam, I can run the printer almost twice as fast as when I print PLA.
- Nylon – I haven’t printed anything with this (yet), this material needs to be exceptionally dry to print well, but has the advantage of being more flexible, and having excellent wear resistance. I’ll likely print some functional parts along the way in this material (especially for wire chases if I need any bushings/etc.)
01 – Angle Aluminum Jig
This is a pretty simple piece, it’s a simple jig that holds the rudder stiffeners that you cut out of the aluminum angle pieces. I made a foolish marking while laying out the pieces that required me to cut all of the angle edges out with an edge on the table instead of a face. I figured that I would probably hurt myself if I tried to hold it, so I made a simple jig and it works great. Plus, it’s also a useful thing to hold pieces of aluminum to the table as I’m working on it. I printed this in PLA since I didn’t think it would fit on the first go, but it did – so I just used it. Ideally, this would be in ABS as the extra flexibility will help with fitting the aluminum in between the two edges, but PLA has been working quite nicely so far.
Angle Aluminum Design Drawing 
Angle Aluminum Holder, printed in black PLA 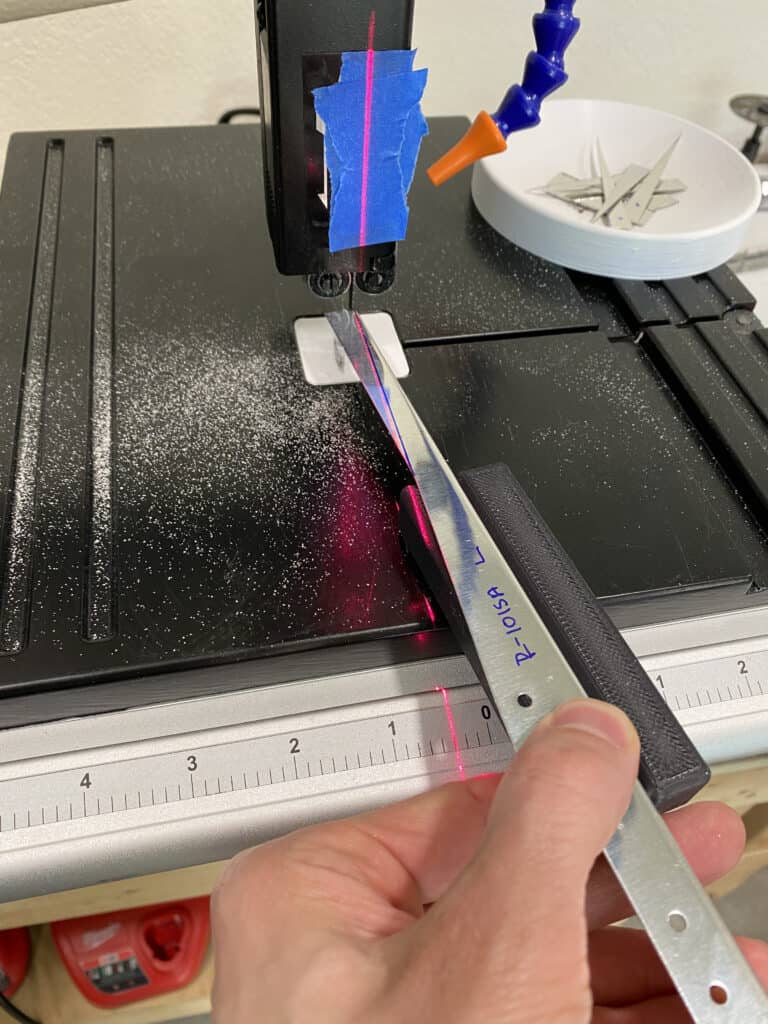
Angle Aluminum holder in use
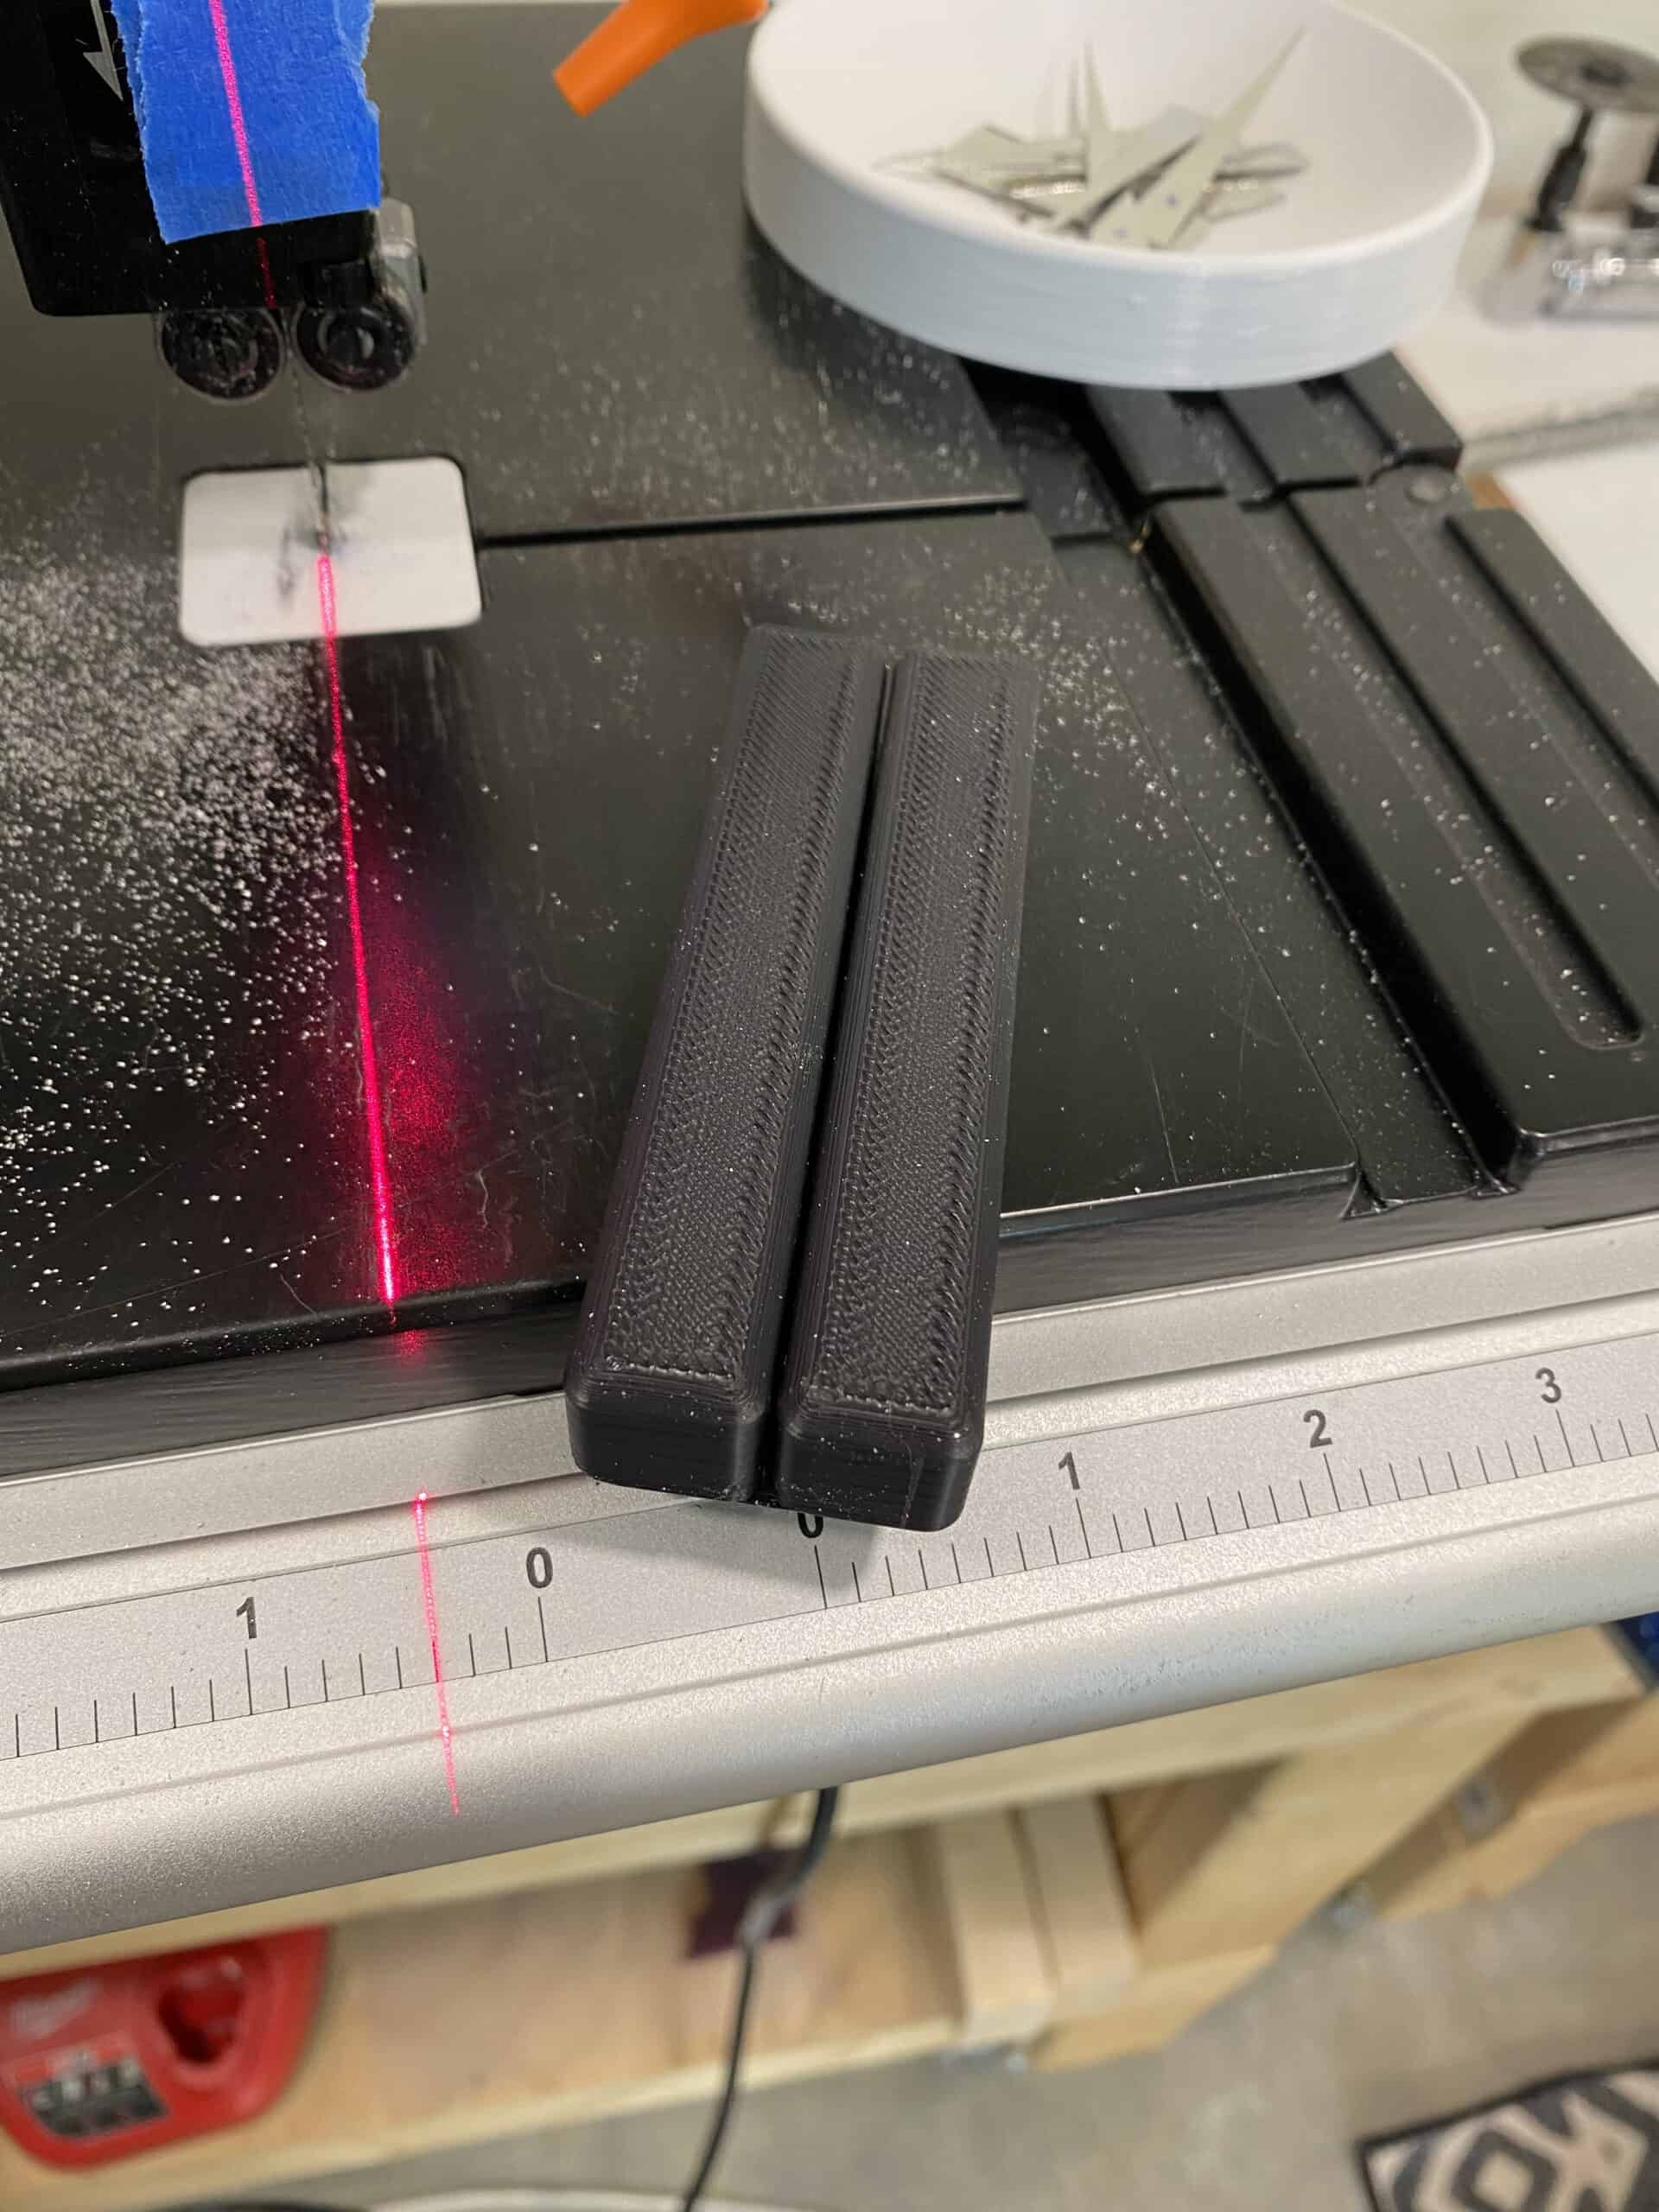

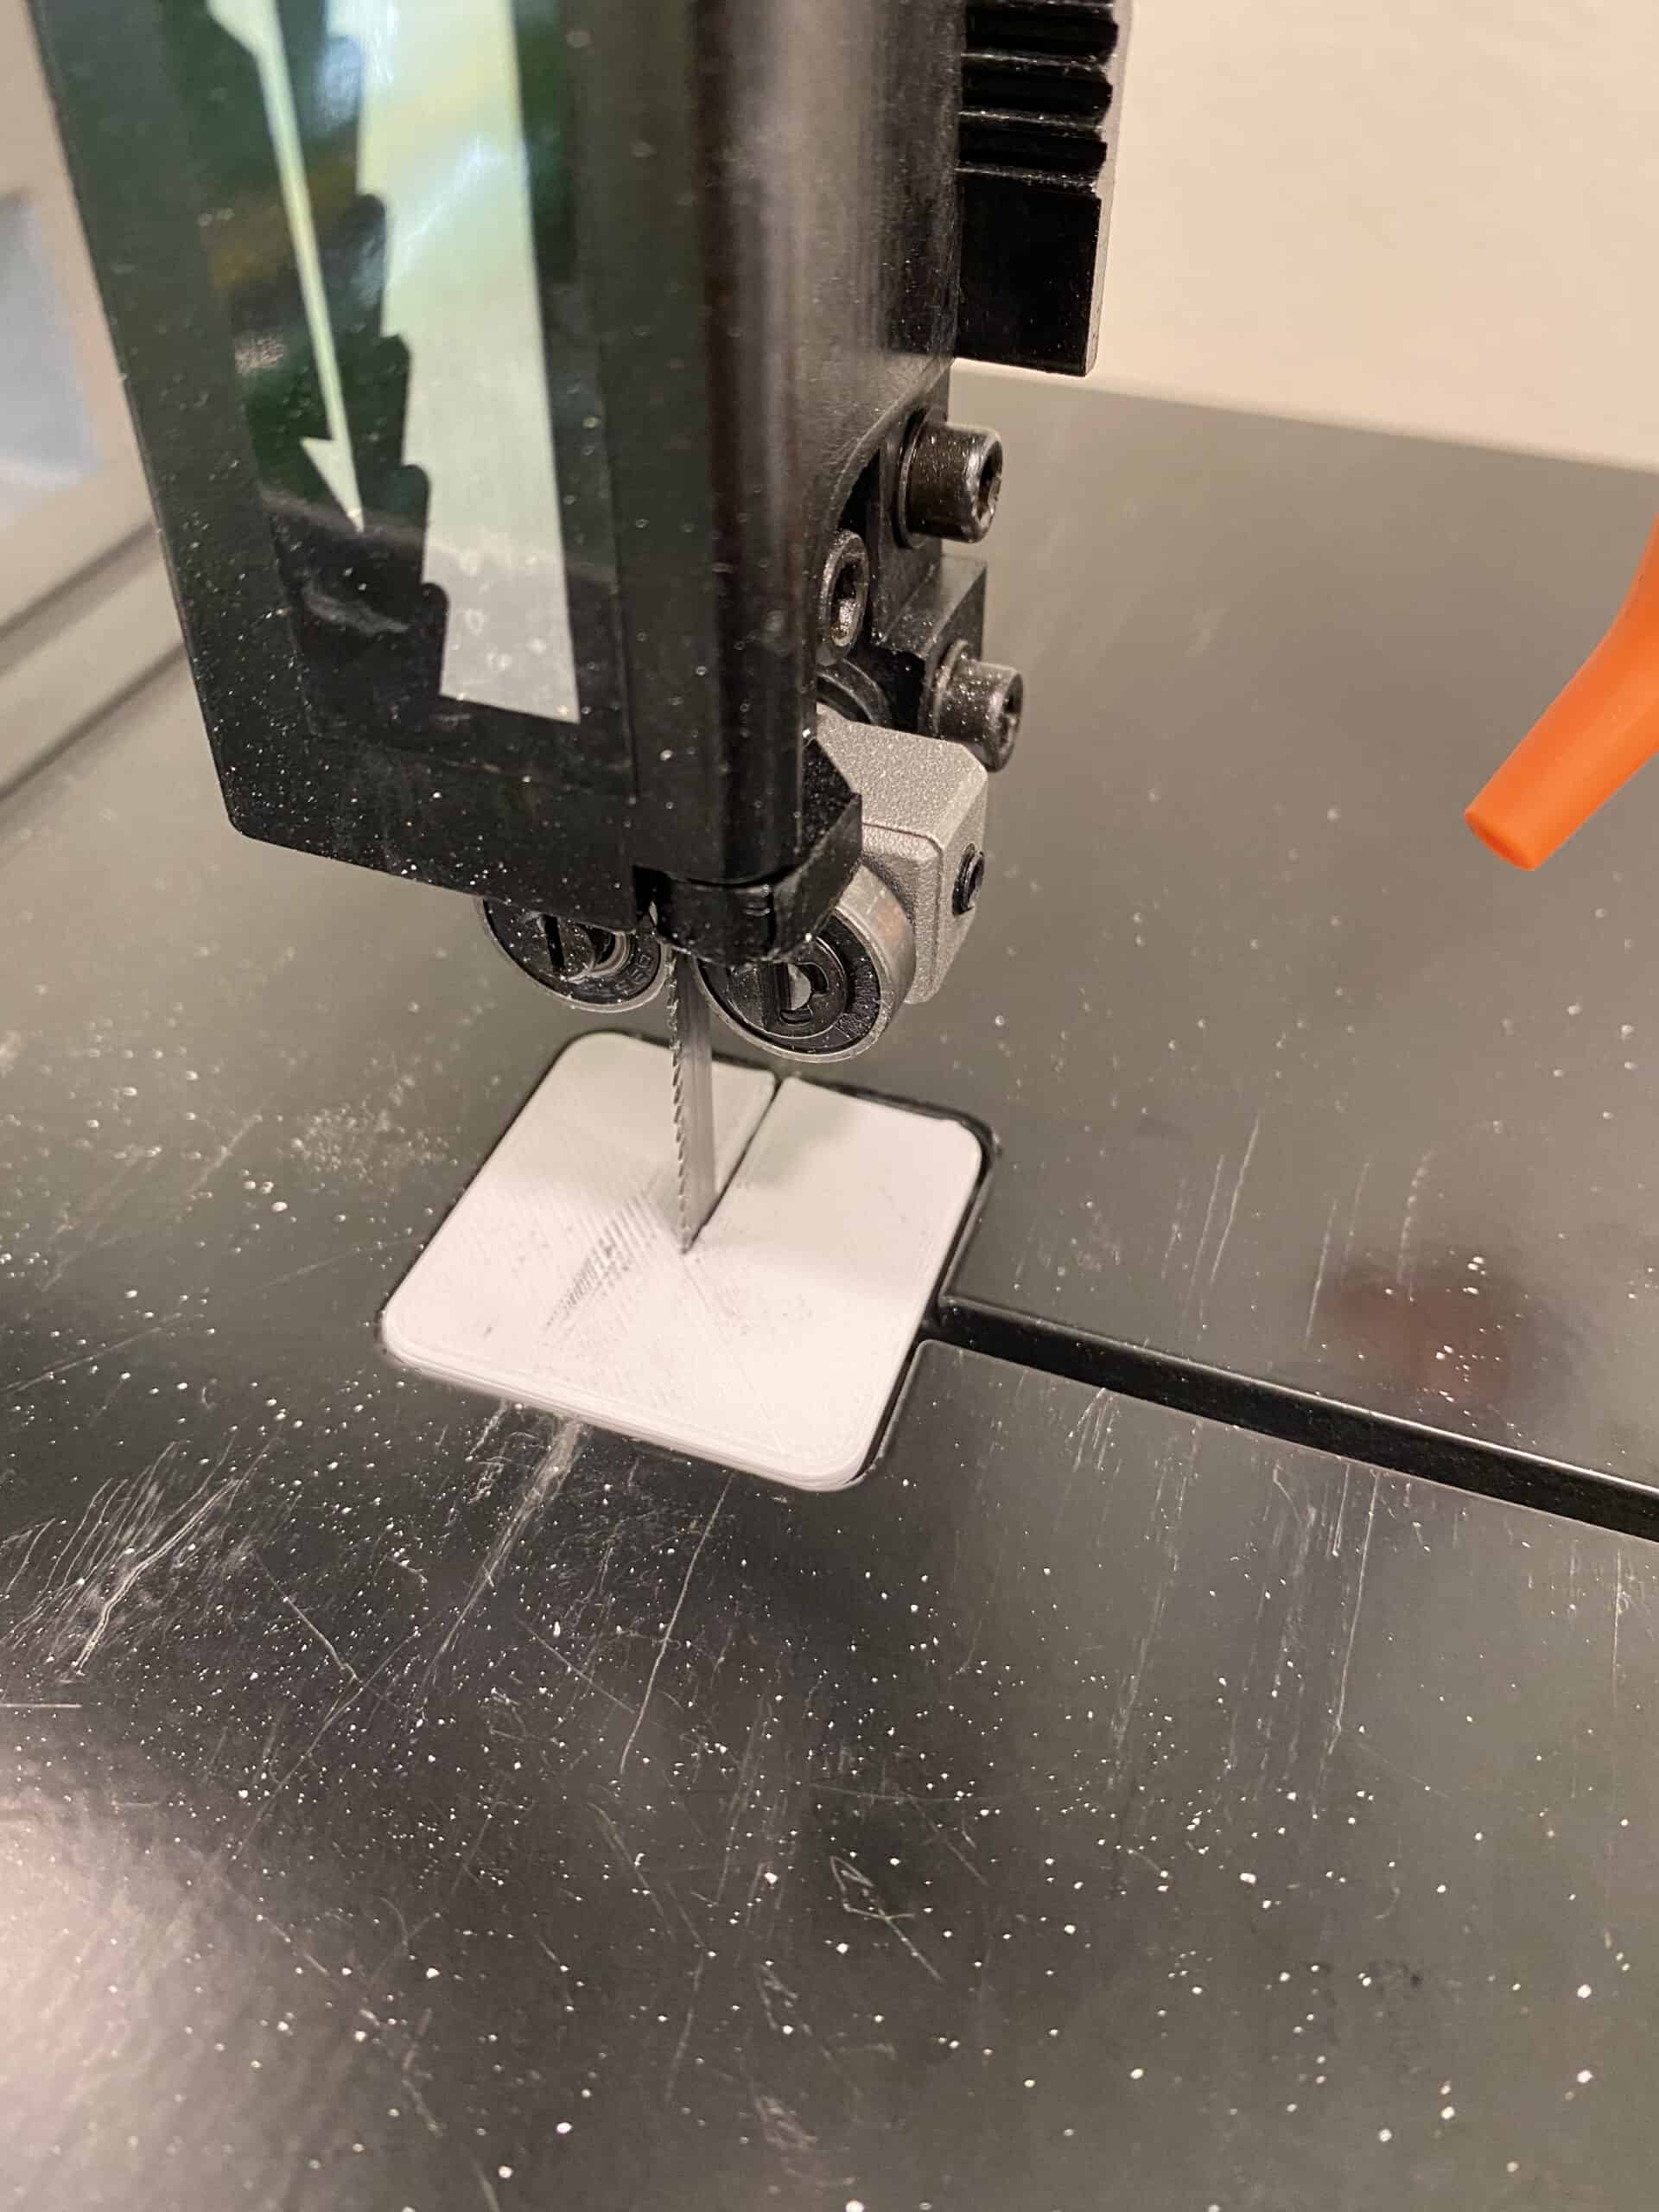
02 – Band Saw Zero Clearance Insert
The insert that came with my grizzly table-top bandsaw is…quite large in terms of blade tolerances, so I printed up another insert that was as close to zero clearance as possible. This has drastically increased cutting accuracy (it helps prevent some of the blade walking my poor technique was causing), and it prevents a bunch of aluminum cuttings from getting into the saw inner-workings (which, is good considering that the bandsaw isn’t really designed for anything but wood).

Band Saw Zero Clearance Insert Design 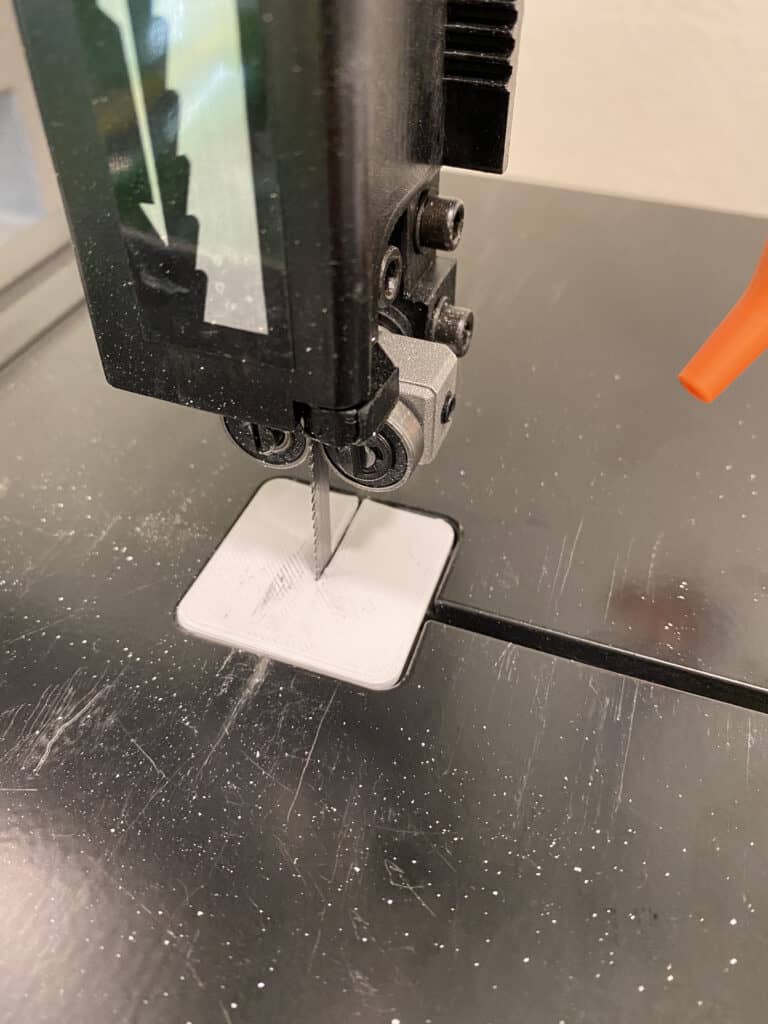
Zero Clearance plate installed
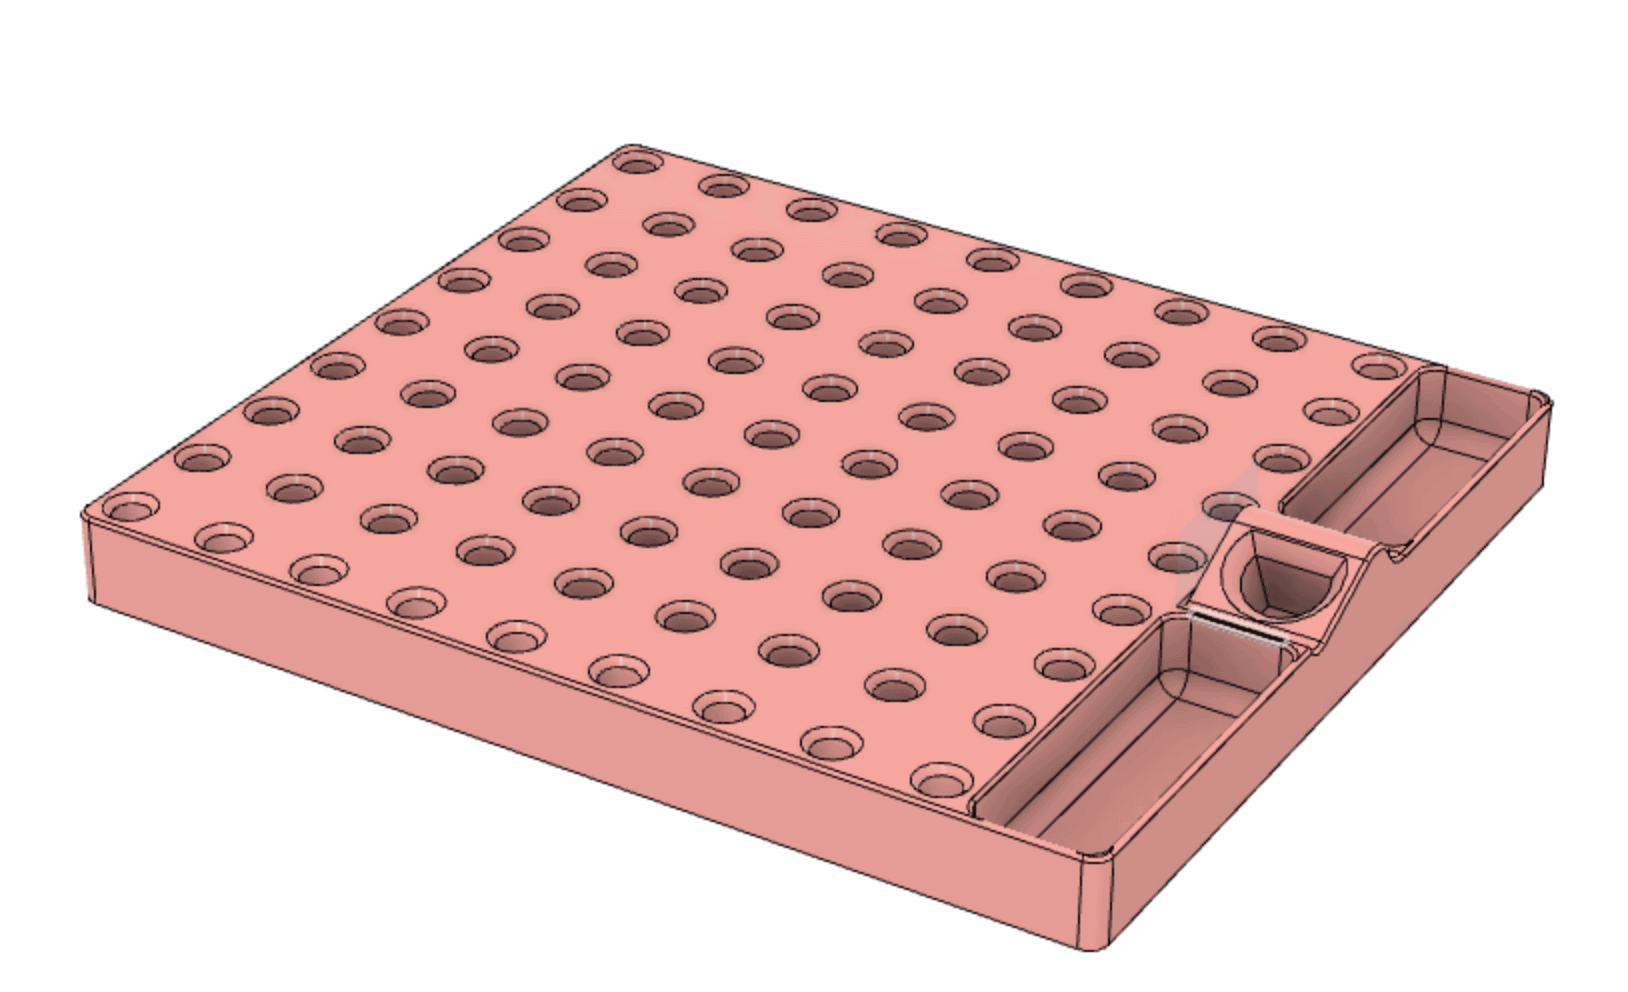
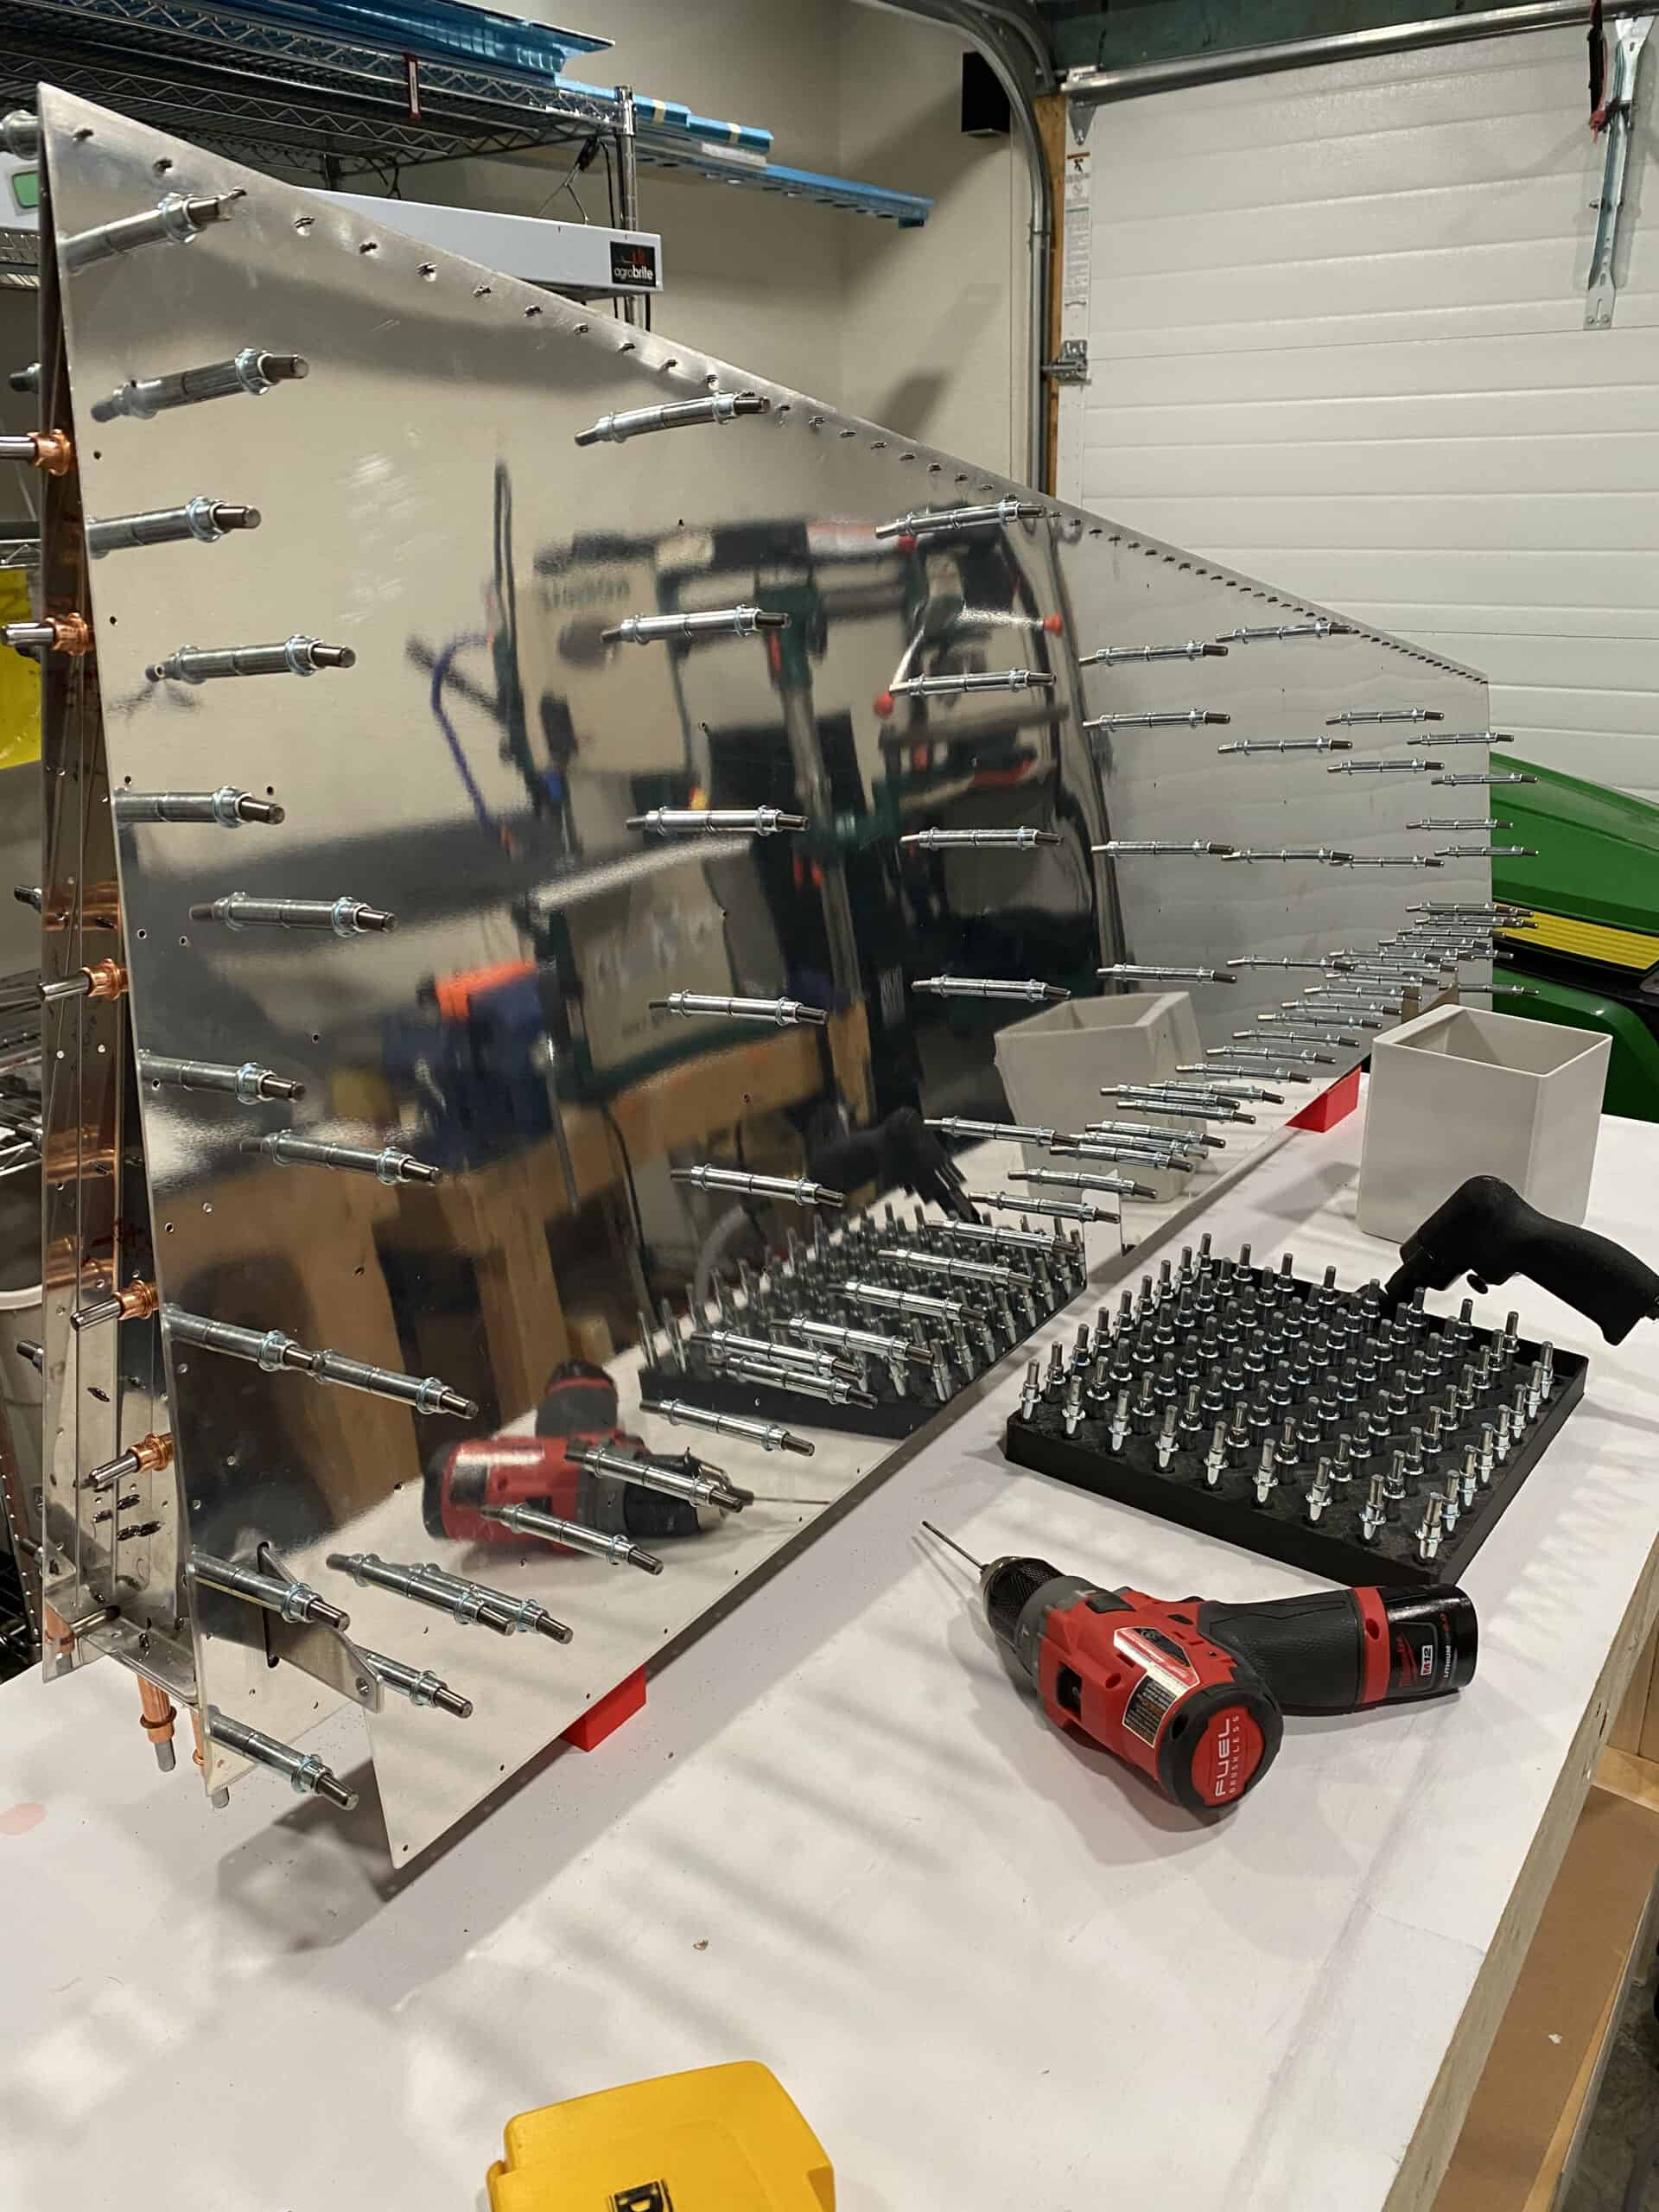
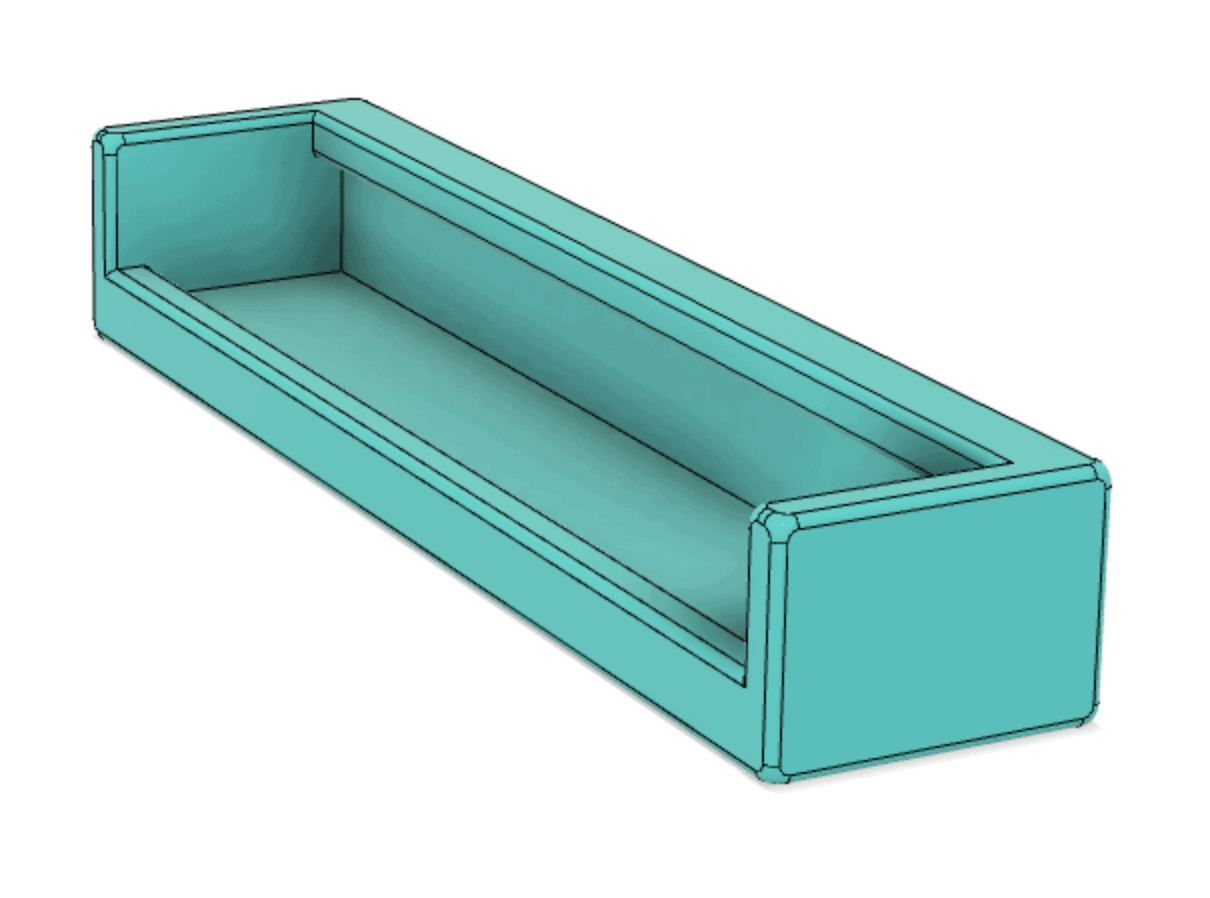
03 – Cleco Tray
This item can into my mind when I was working on the rudder and attaching the skins; with the thin skins and the fact that I had the rudder sitting atop blocks on the spar, it meant I needed to have 1 hand on the Cleco gun and the other on the rudder so that I didn’t knock things over. This became problematic when I needed to grab another Cleco, as I had to let go of the skin and rudder, load a Cleco, and then hold the rudder again and insert the Cleco. This tray holds 81 Cleco’s in a position that enabes one to ‘scoop’ each Cleco with the gun, meaning you can insert a bunch of them much more quickly. I also added a couple a trays and a holder for the cleco gun, which is handy both while working and while storing the tool. This is currently printed in ABS, but that’s really just because it was the faster material to print in (this is a long print, it took me 17 hours)

Cleco Tray Design 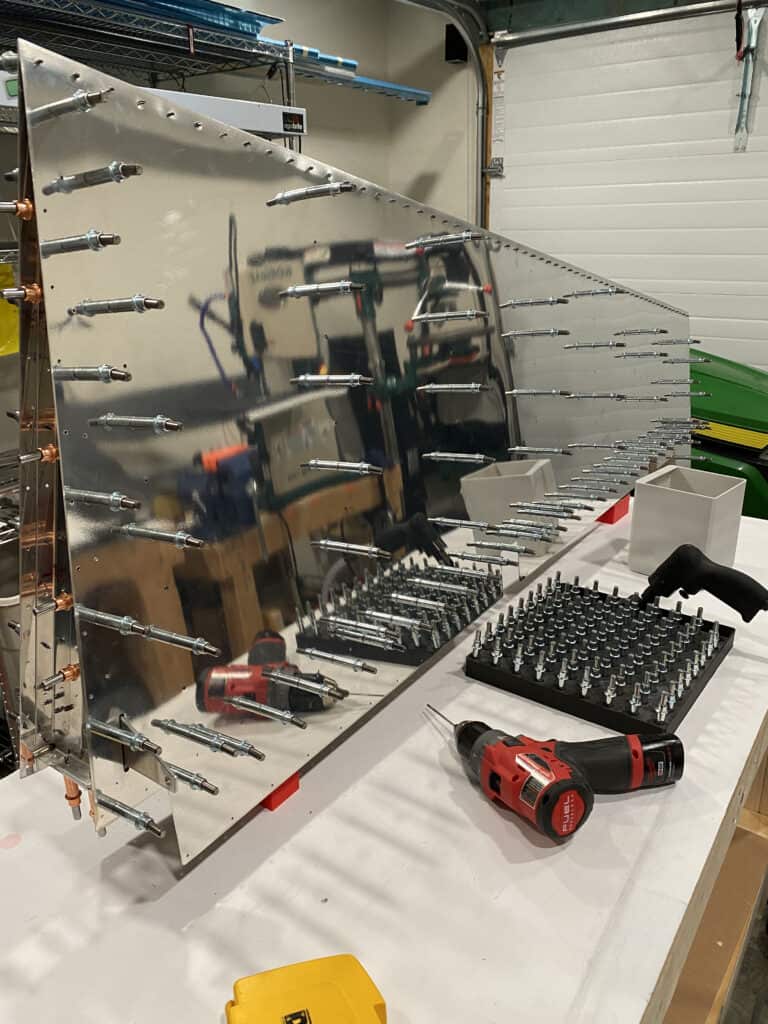
Cleco holder, in situ 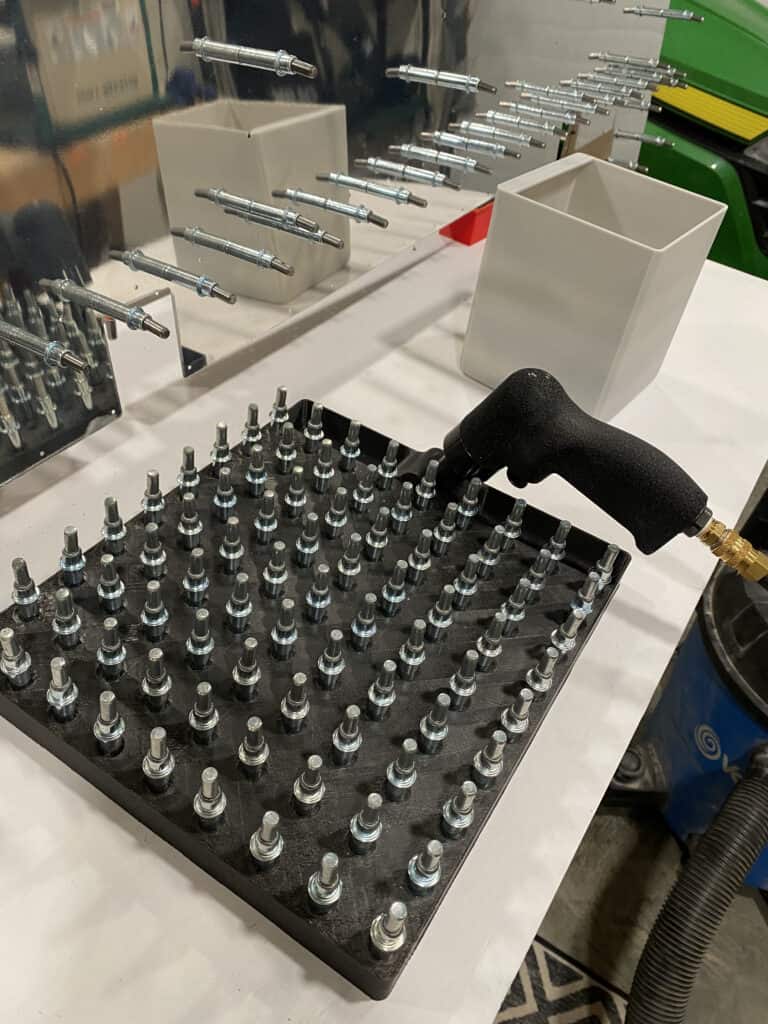
Cleco holder, fully loaded

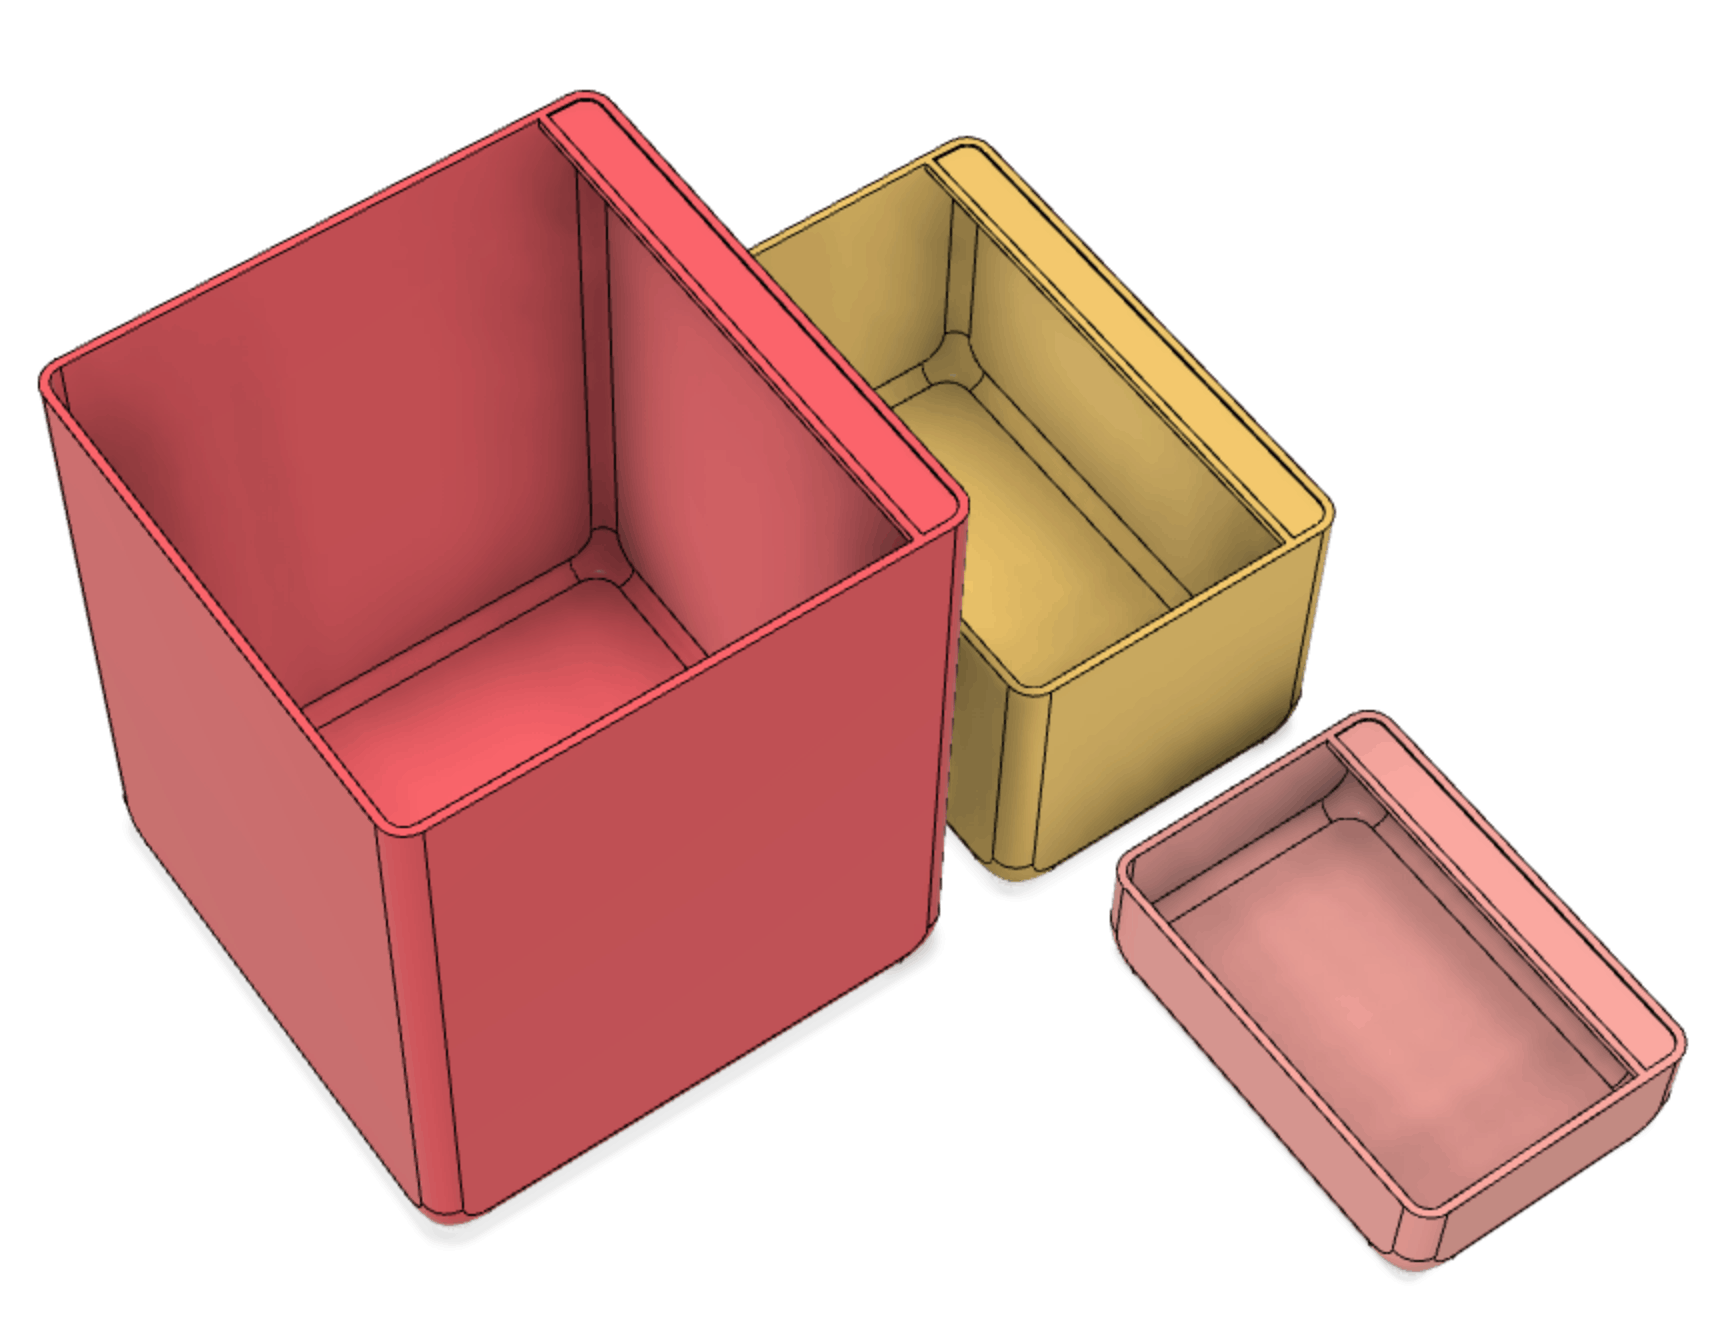
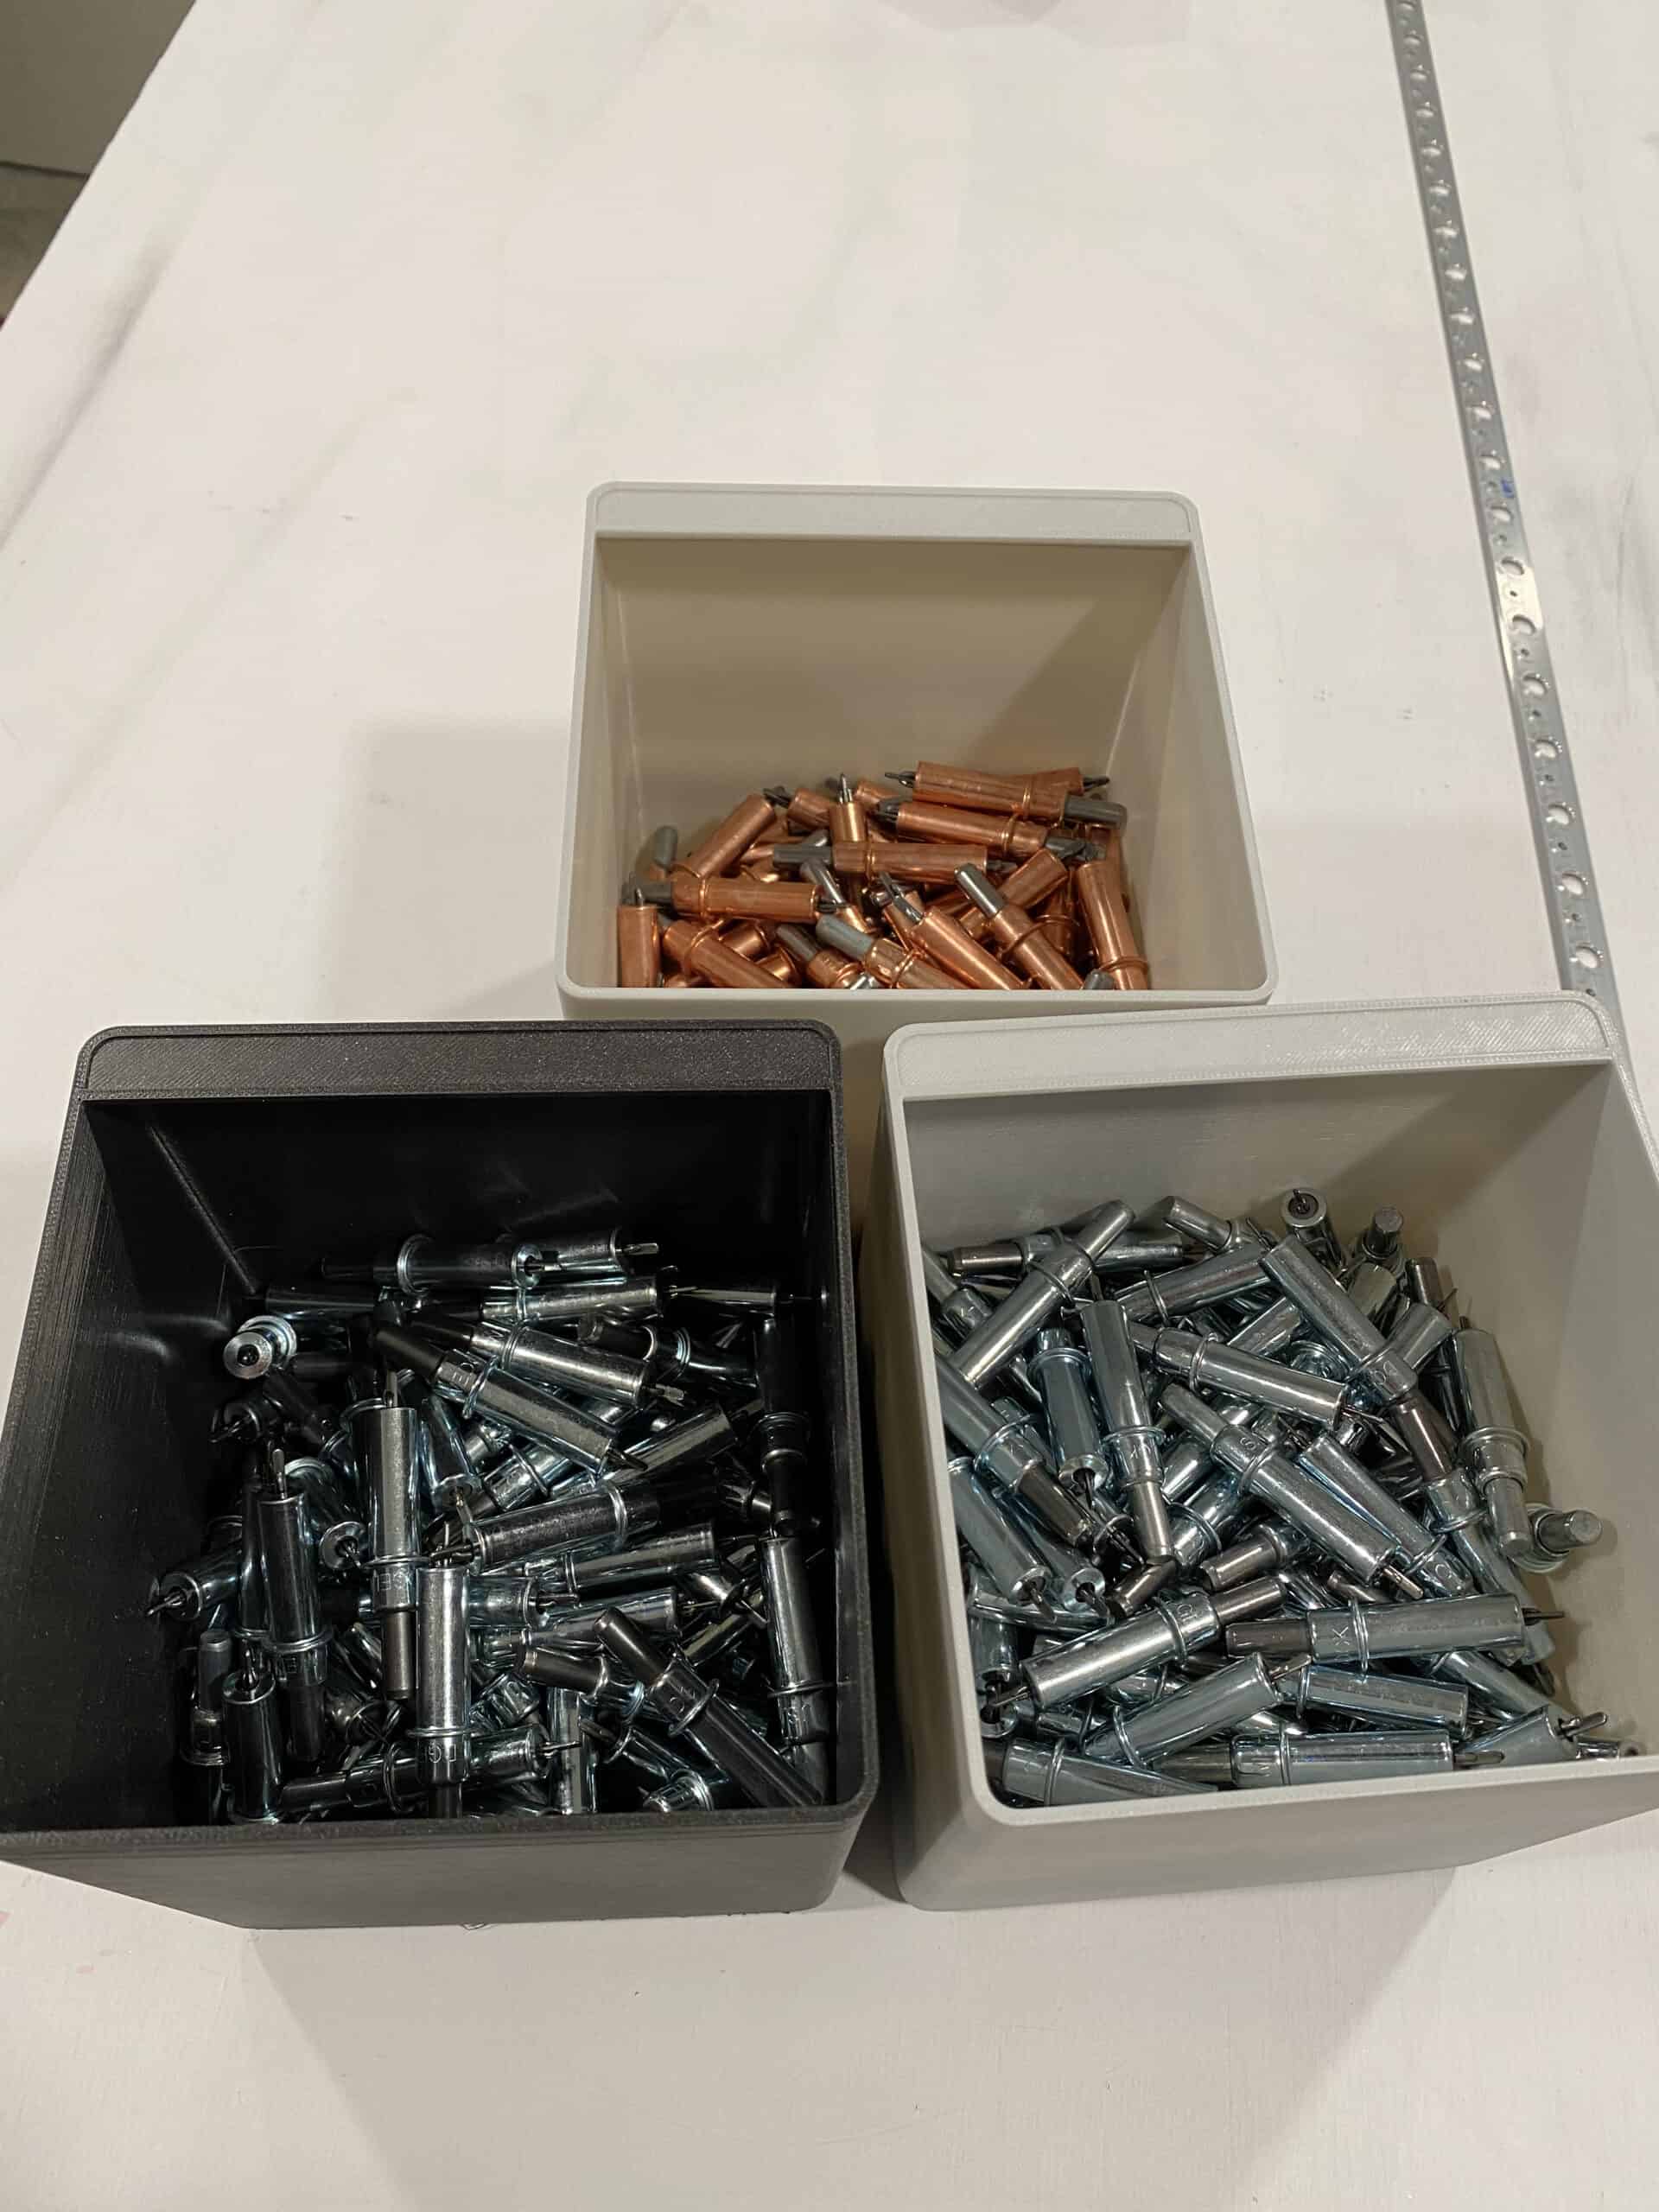
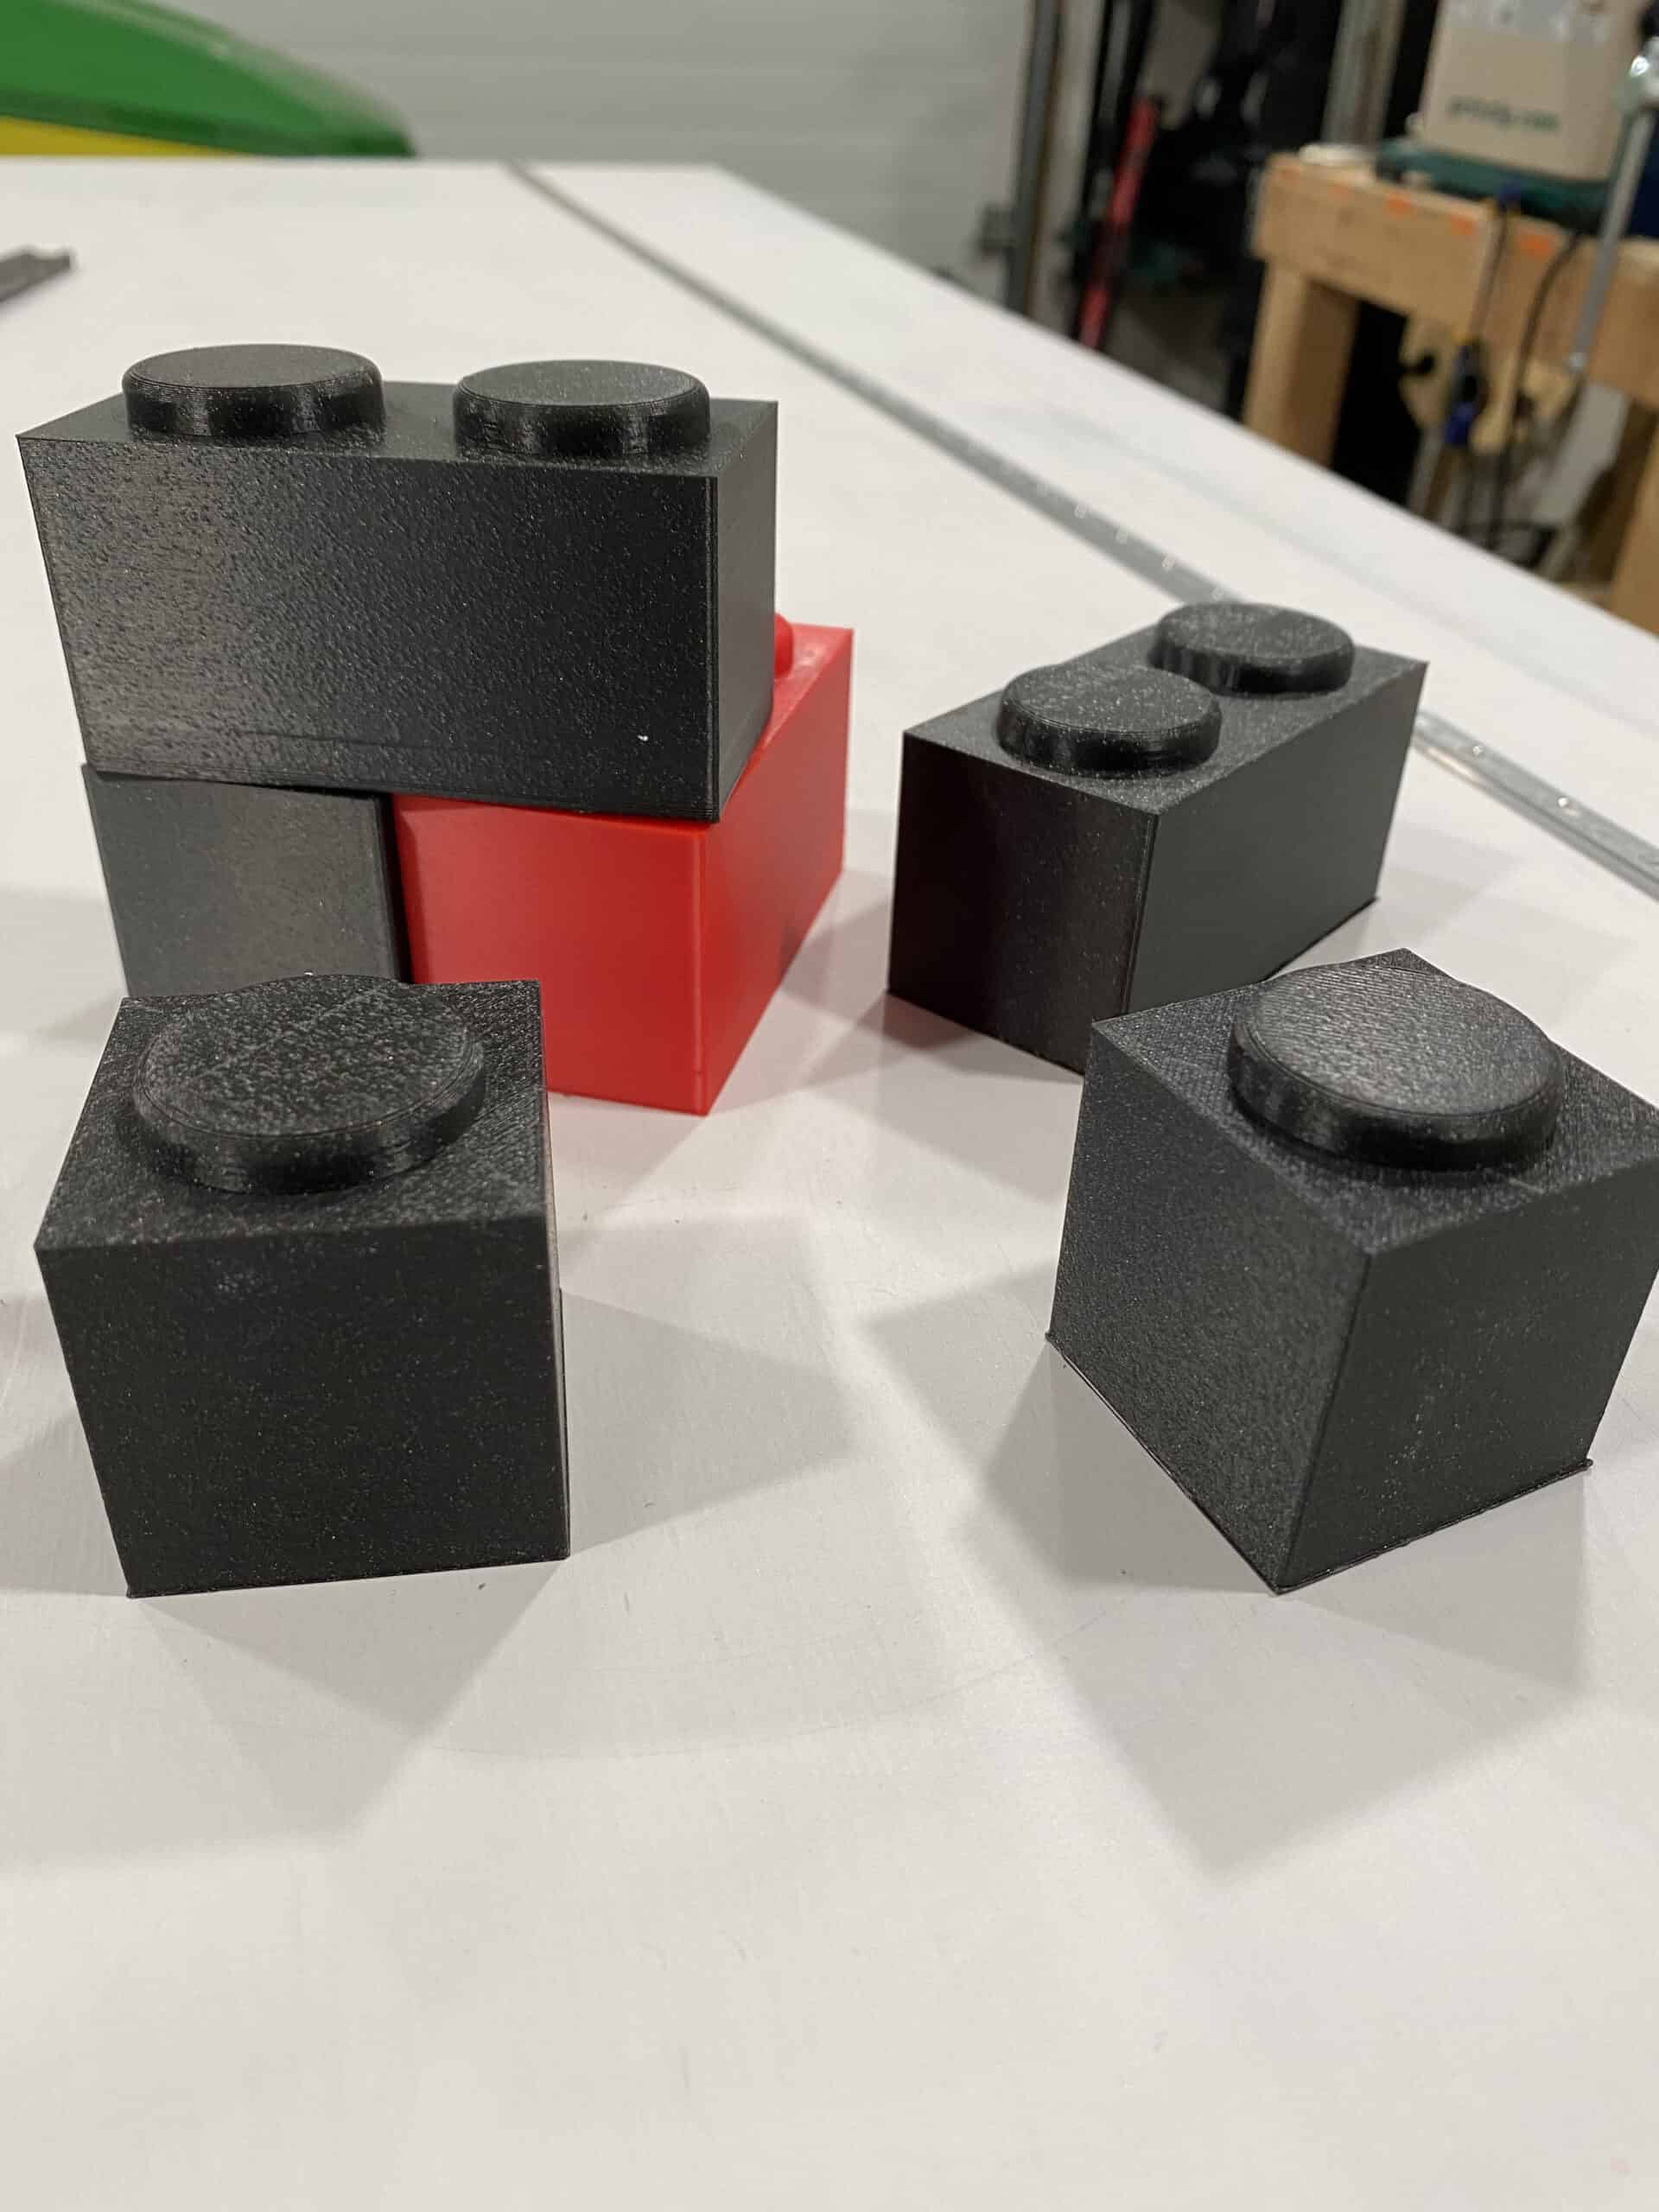
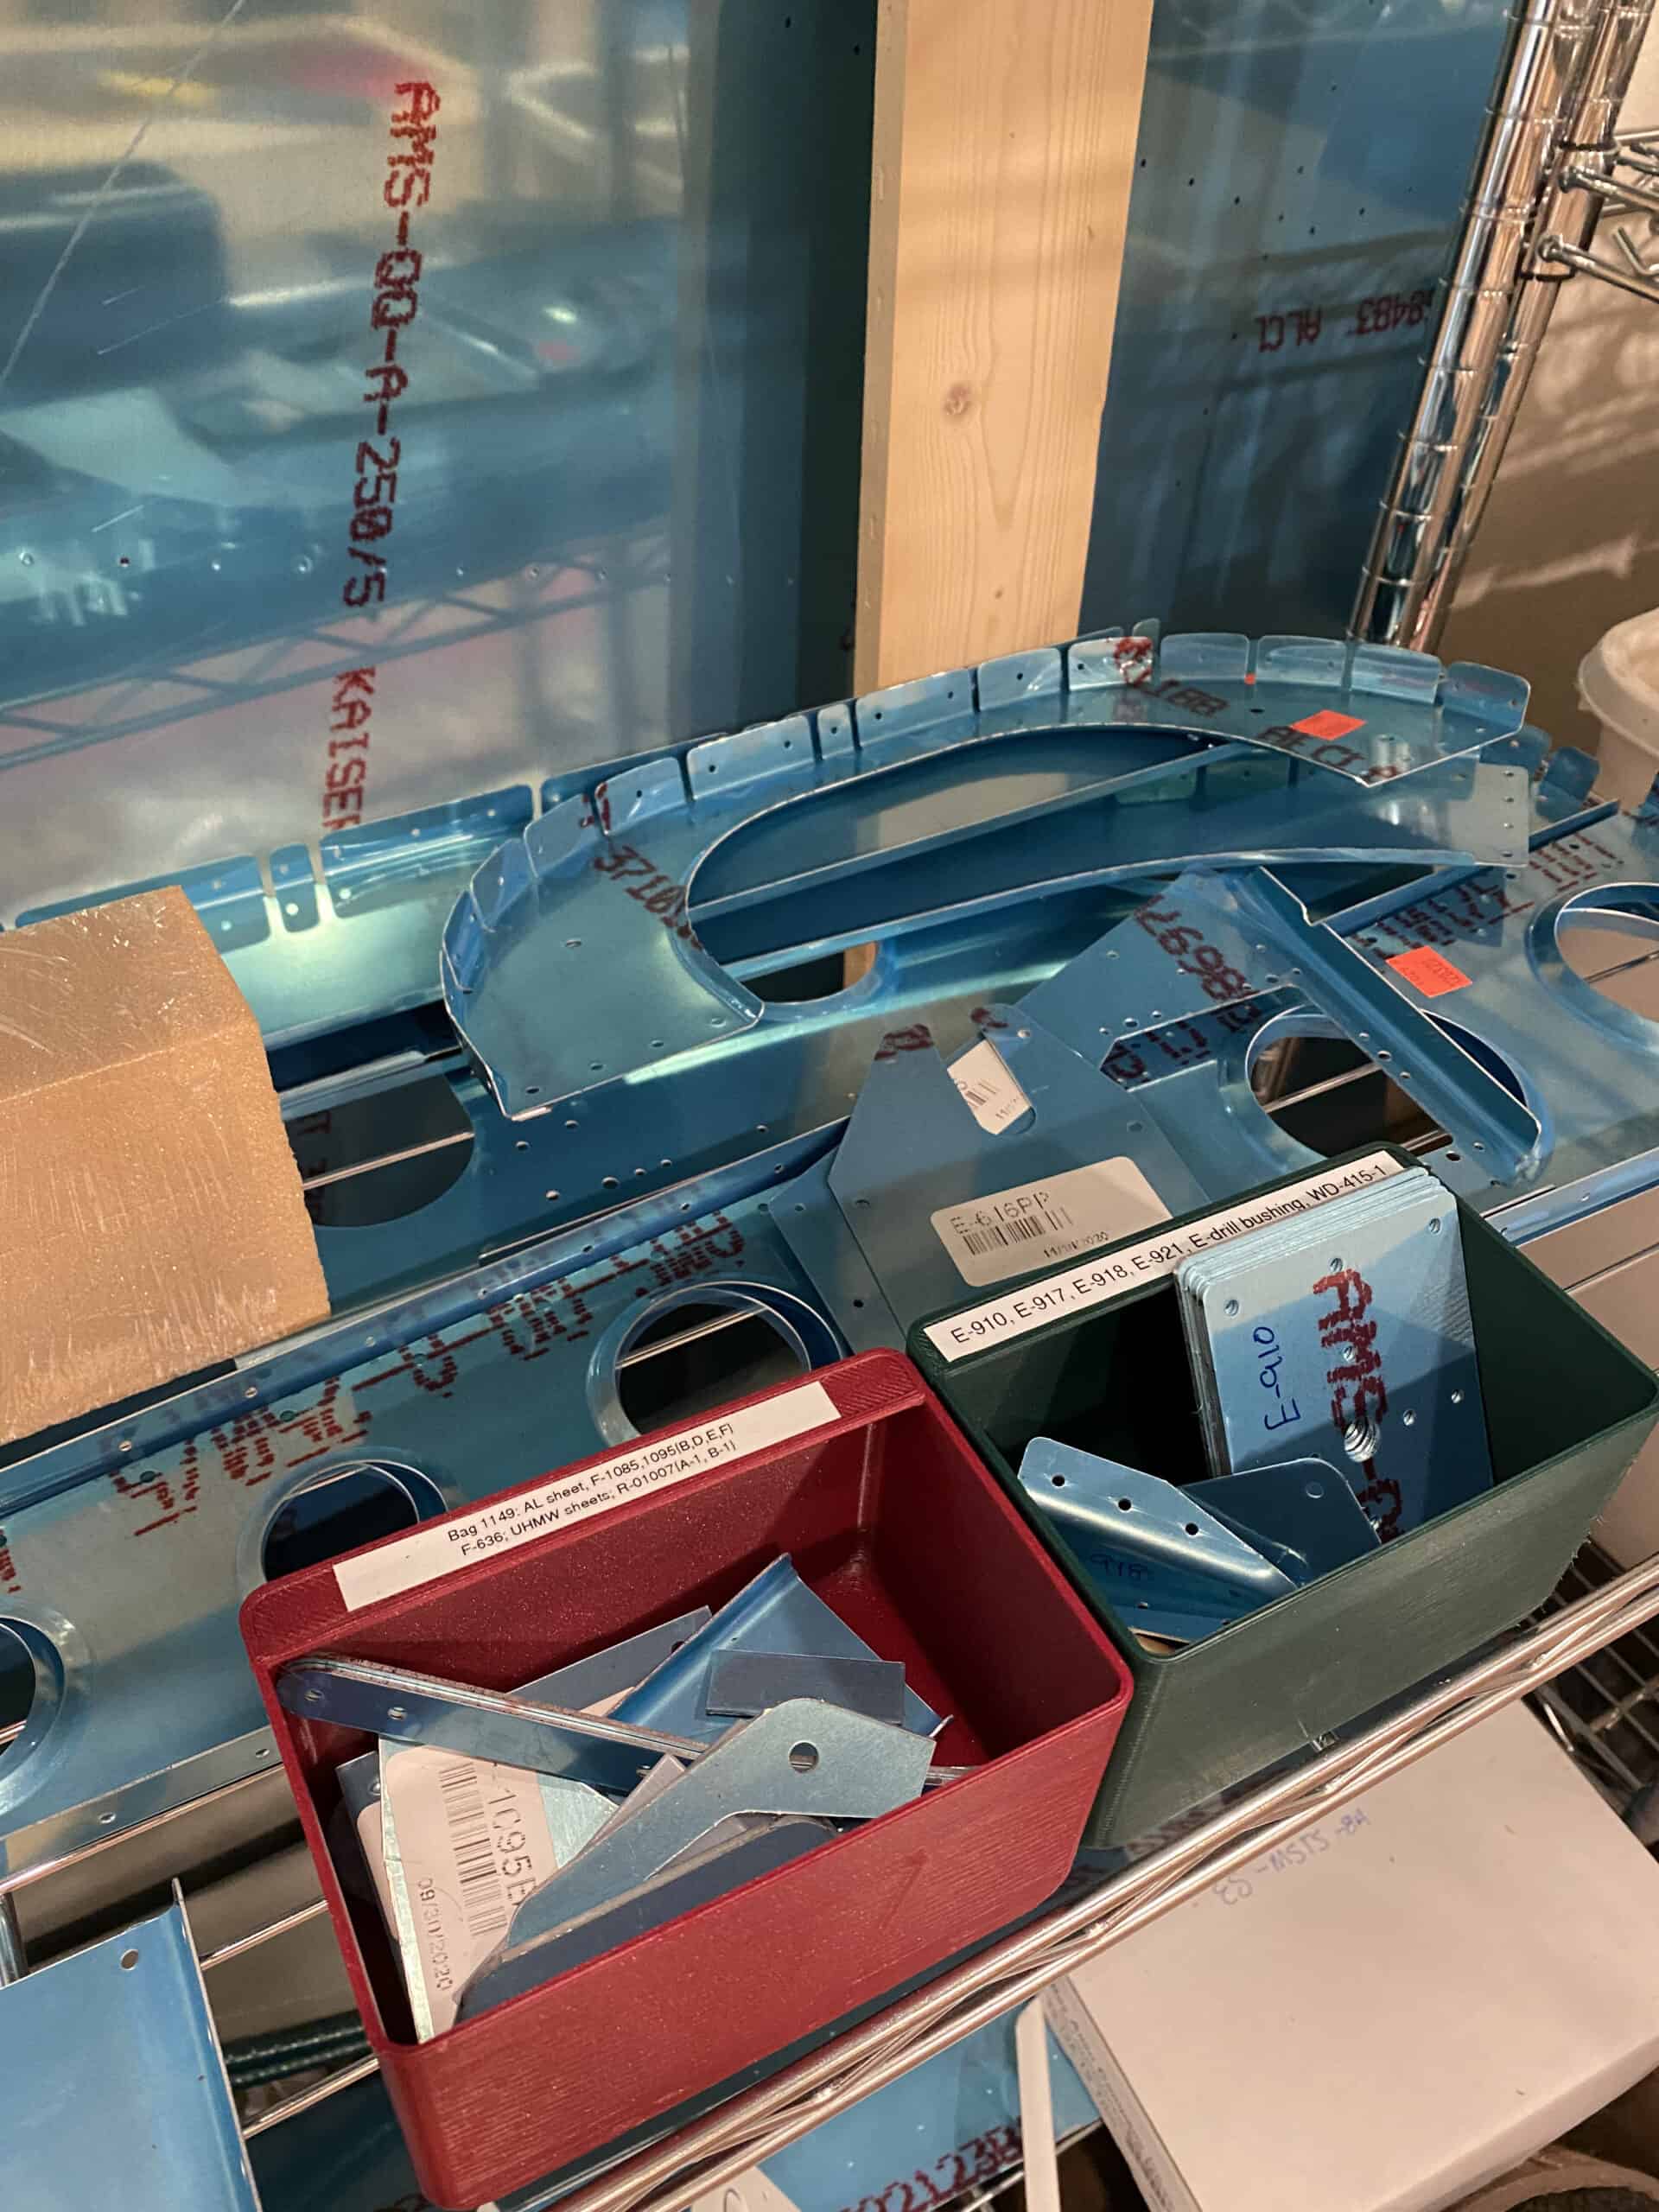
04 – Cleco Bins
I made a few different bins of varying sizes to hold Clecos – this is where my Clecos live when not in use and also where I put them when I’m removing them; I mainly use the ‘large’ bins for Clecos, the smaller bins are helpful for storing all manner of other smaller parts. I have these printed in ABS, but these work great in PLA too.

Cleco Bin Design 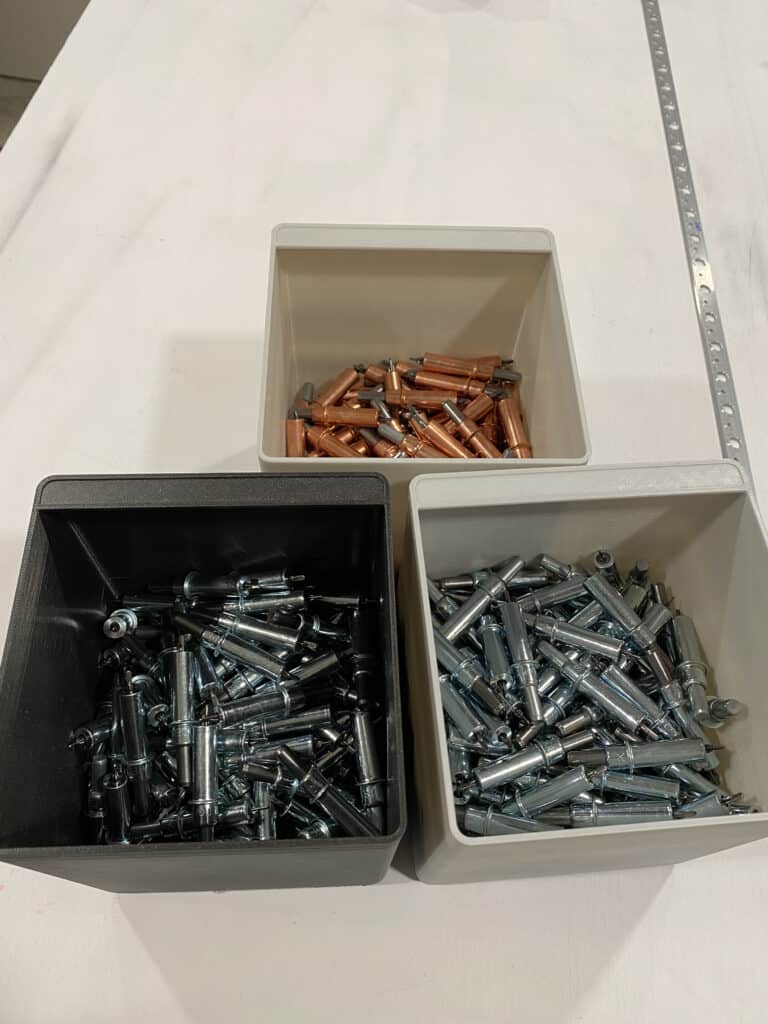
Cleco Bins (Large) 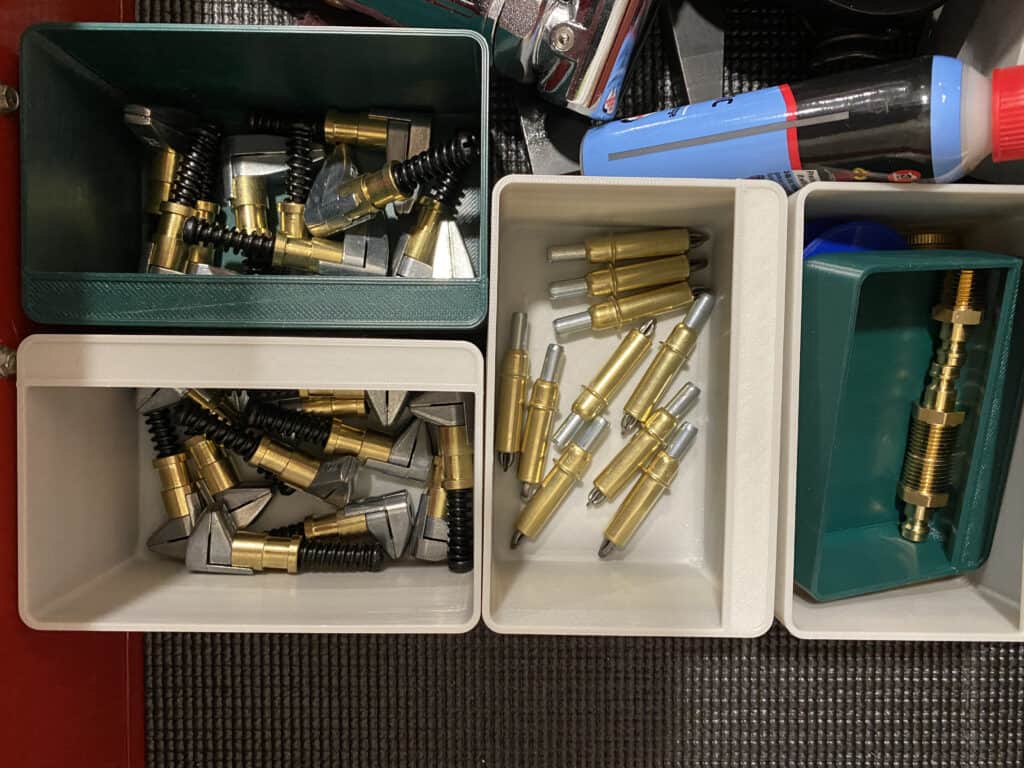
Cleco Bin Medium (pay no attention to the somewhat messy drawer)
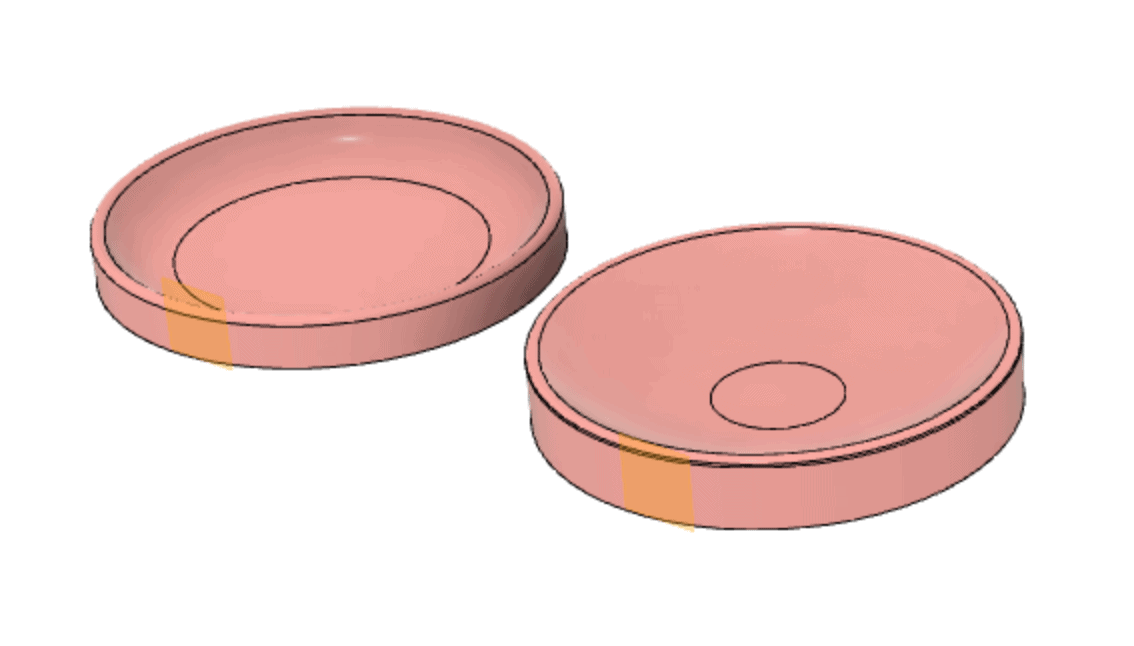
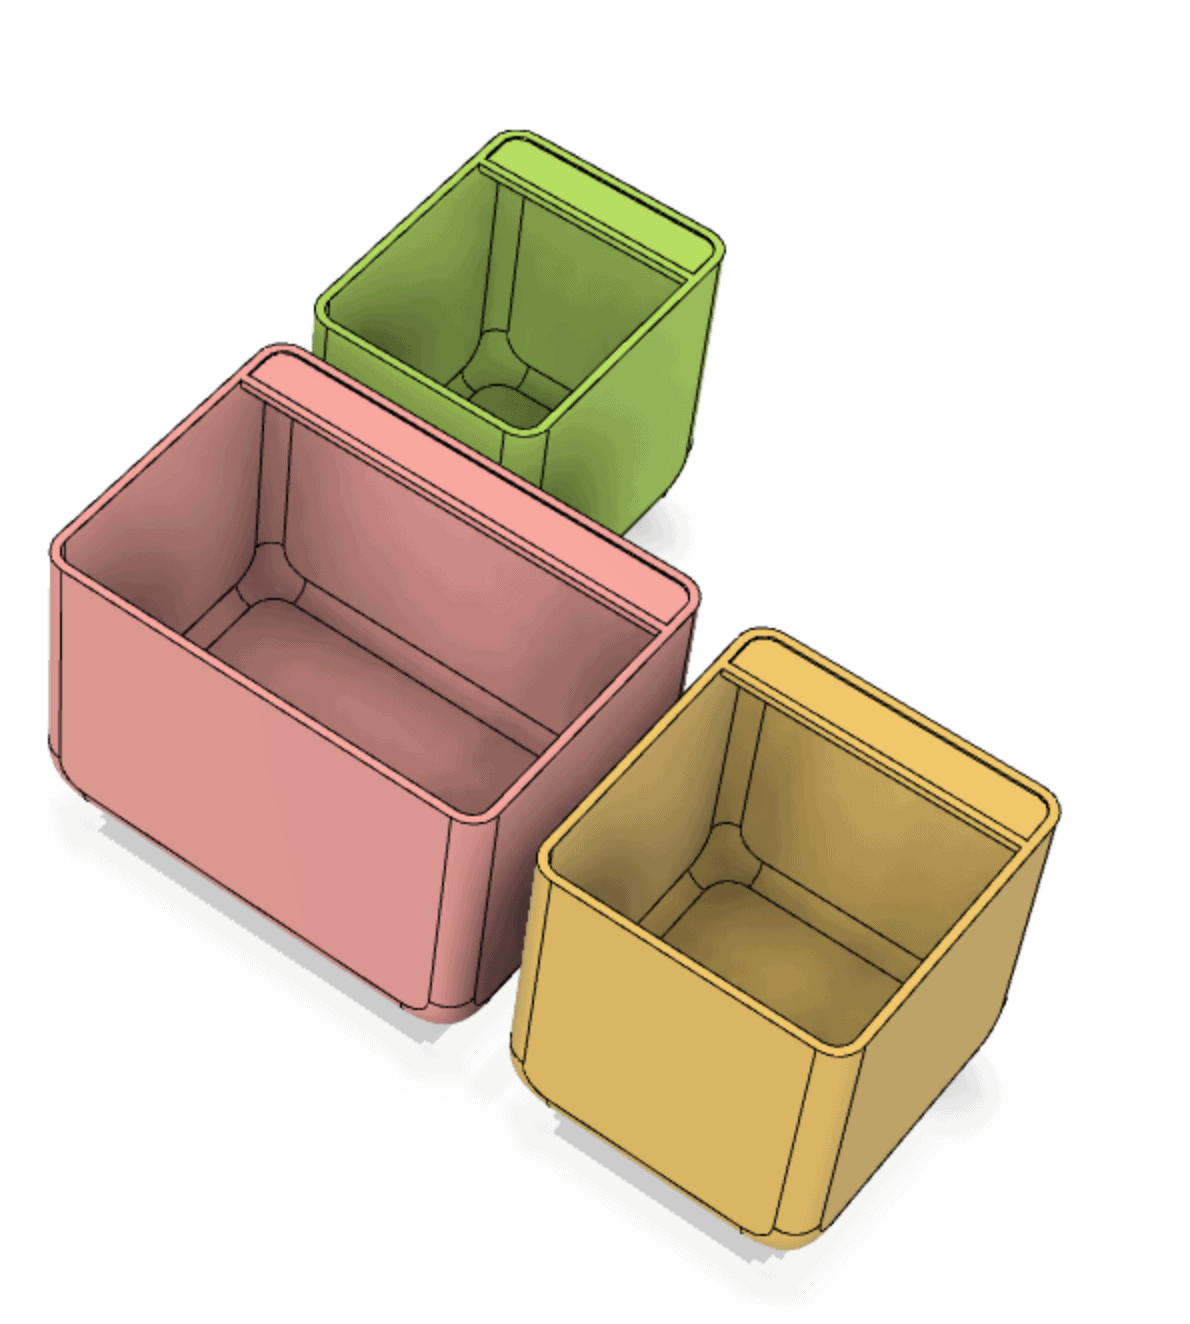
05 – Part Scoop
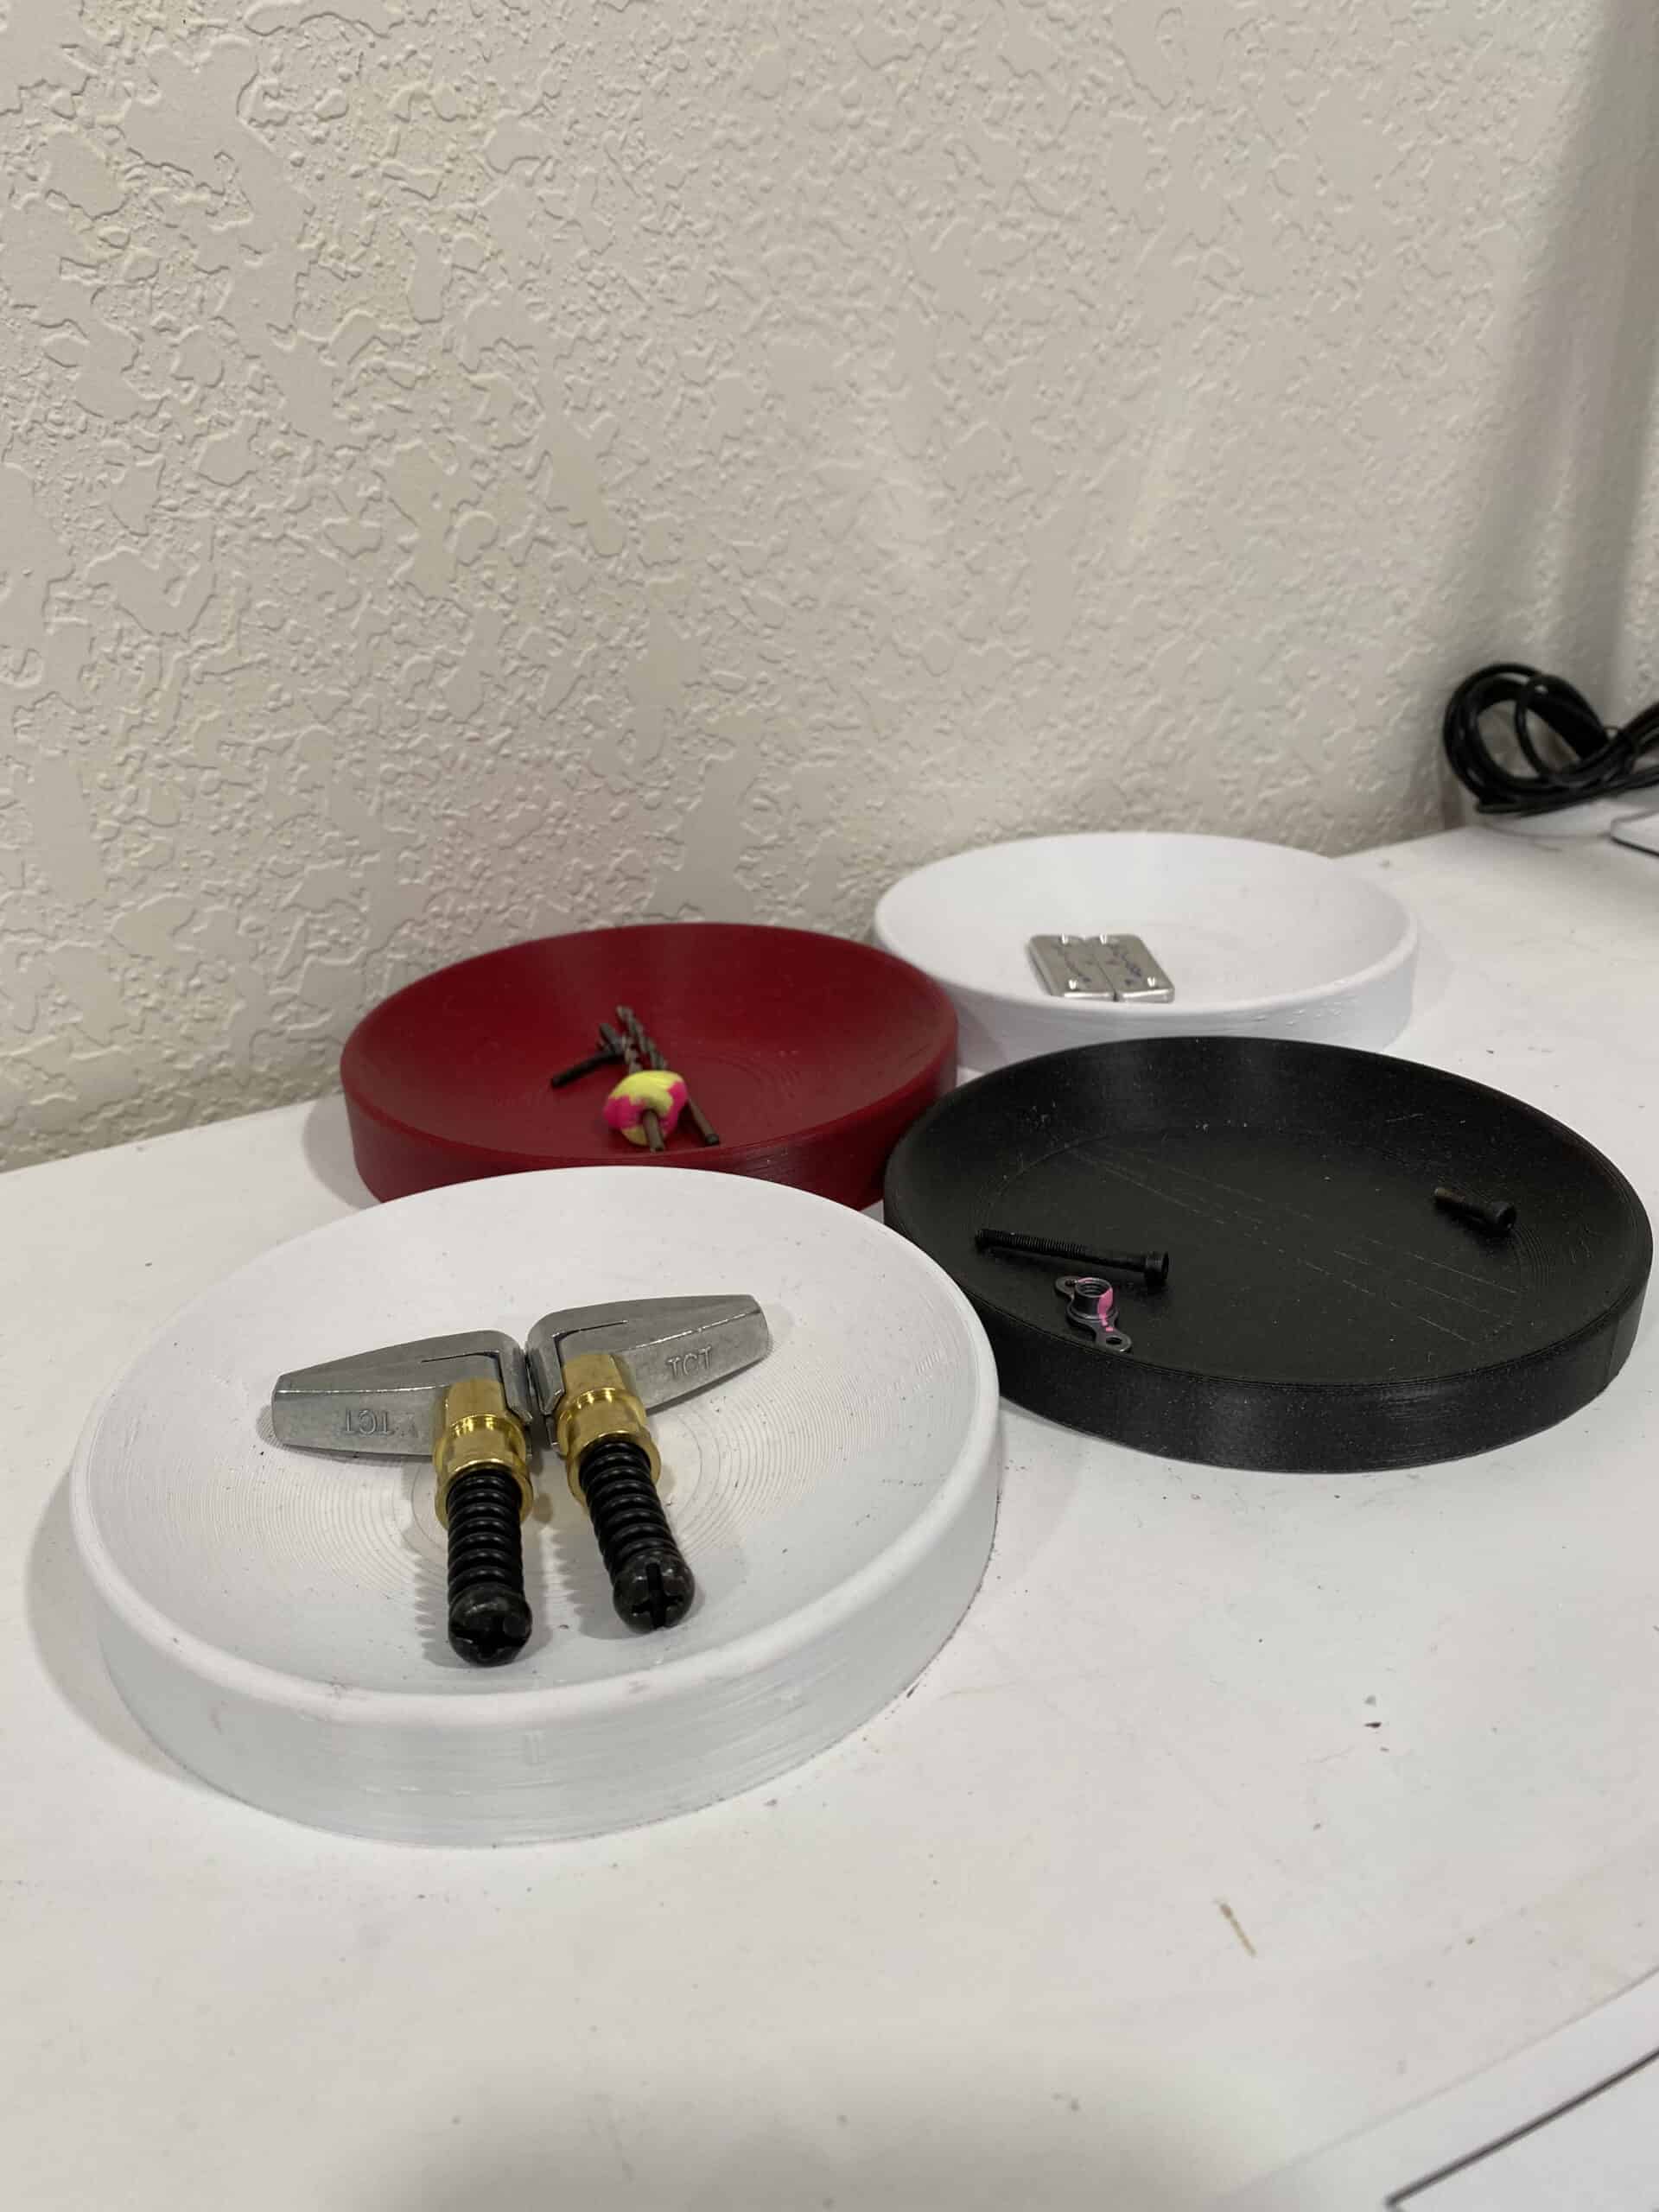
This is a simple round part scoop/tray that is particularly helpful for holding small parts and making it easy to retrieve said small parts (e.g. rivets, screws, nut plates, etc.). Print it in whatever is available, I have a couple of different styles, one that has more of a ‘slope’ throughout the entire tray (holds fewer parts but it’s easier to scoop), and another that has more of a flat bottom which holds more, but is a tad harder to get small parts out.

Two varieties: flat bottom and larger radius (easier scoop) 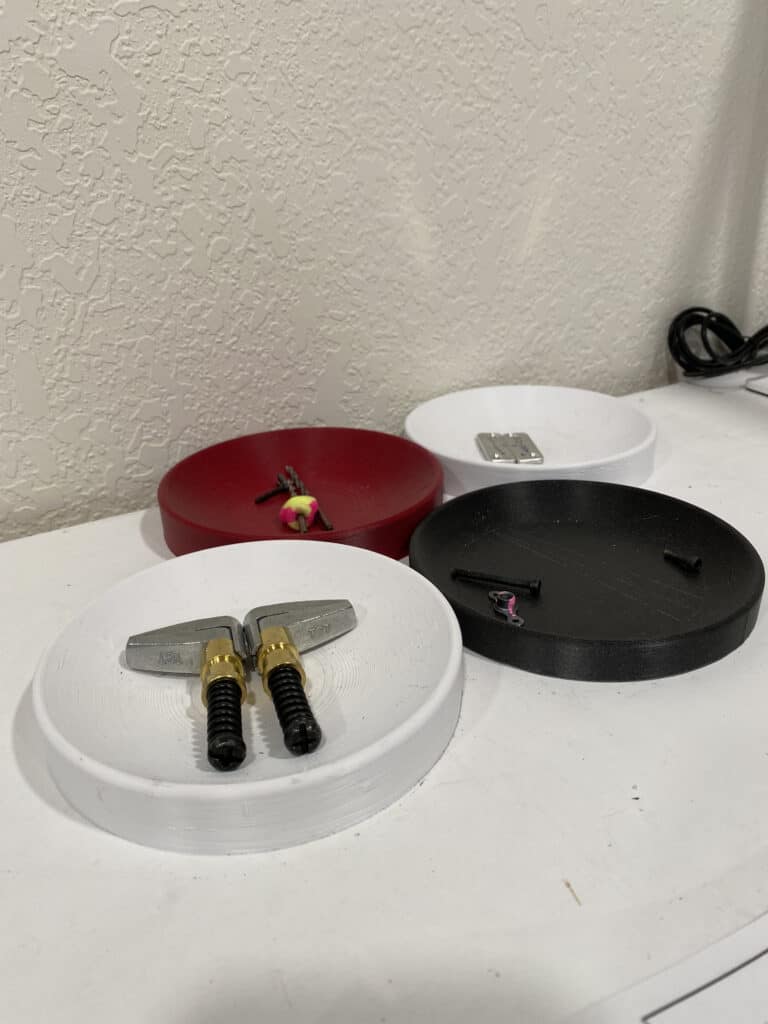
Part Scoop Trays (Black one is the flatter-bottom variety) Angle Aluminum Holder, printed in black PLA (Part scoop tray in background holding the cuttings)
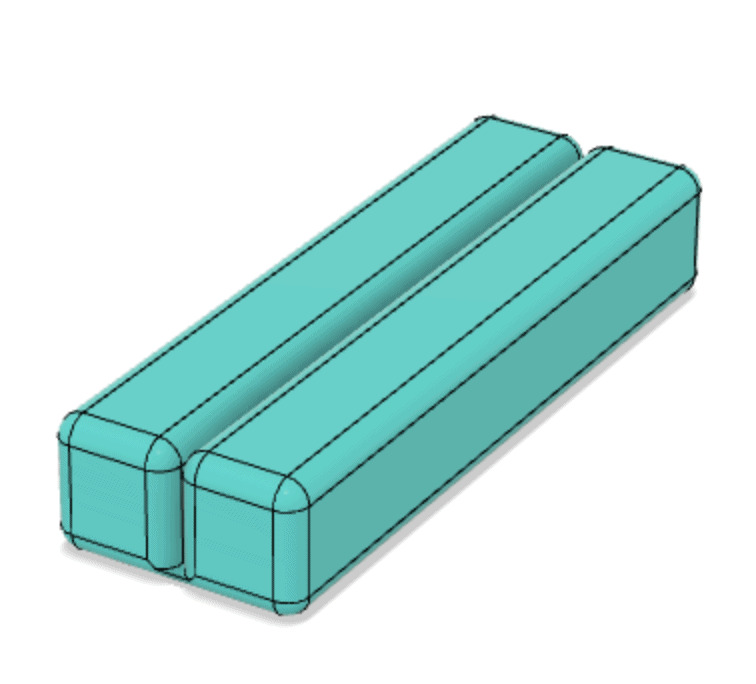
06 – Stack Blocks
These were born out of the need to block-up the rudder on my workbench (a 2×4 didn’t quite fit); so I just made some simple blocks that can stack together, so far I have a single and double block made – I’m sure I’ll make more of these over time; I’m already noodling on a variant to help with part elevation whilst painting.
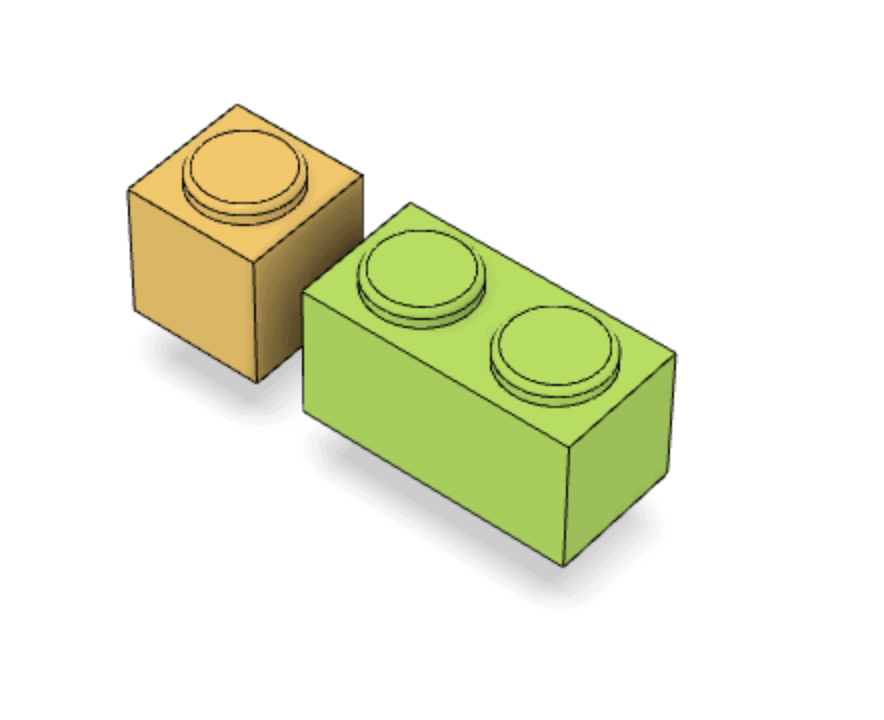
Stack Block Design 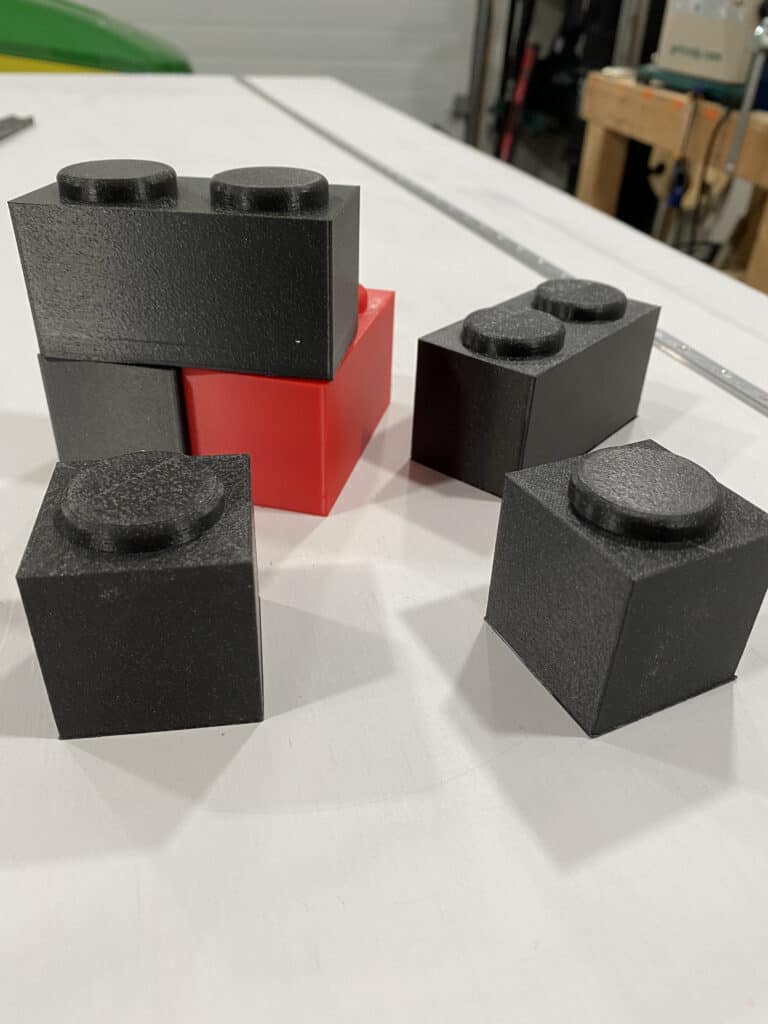
I frequently print a few of these with other small prints, it’s a good way to make use of a printing cycle Cleco holder, fully loaded – Red in the background is a stack block, there are three of these (stacked) to hold up the rudder
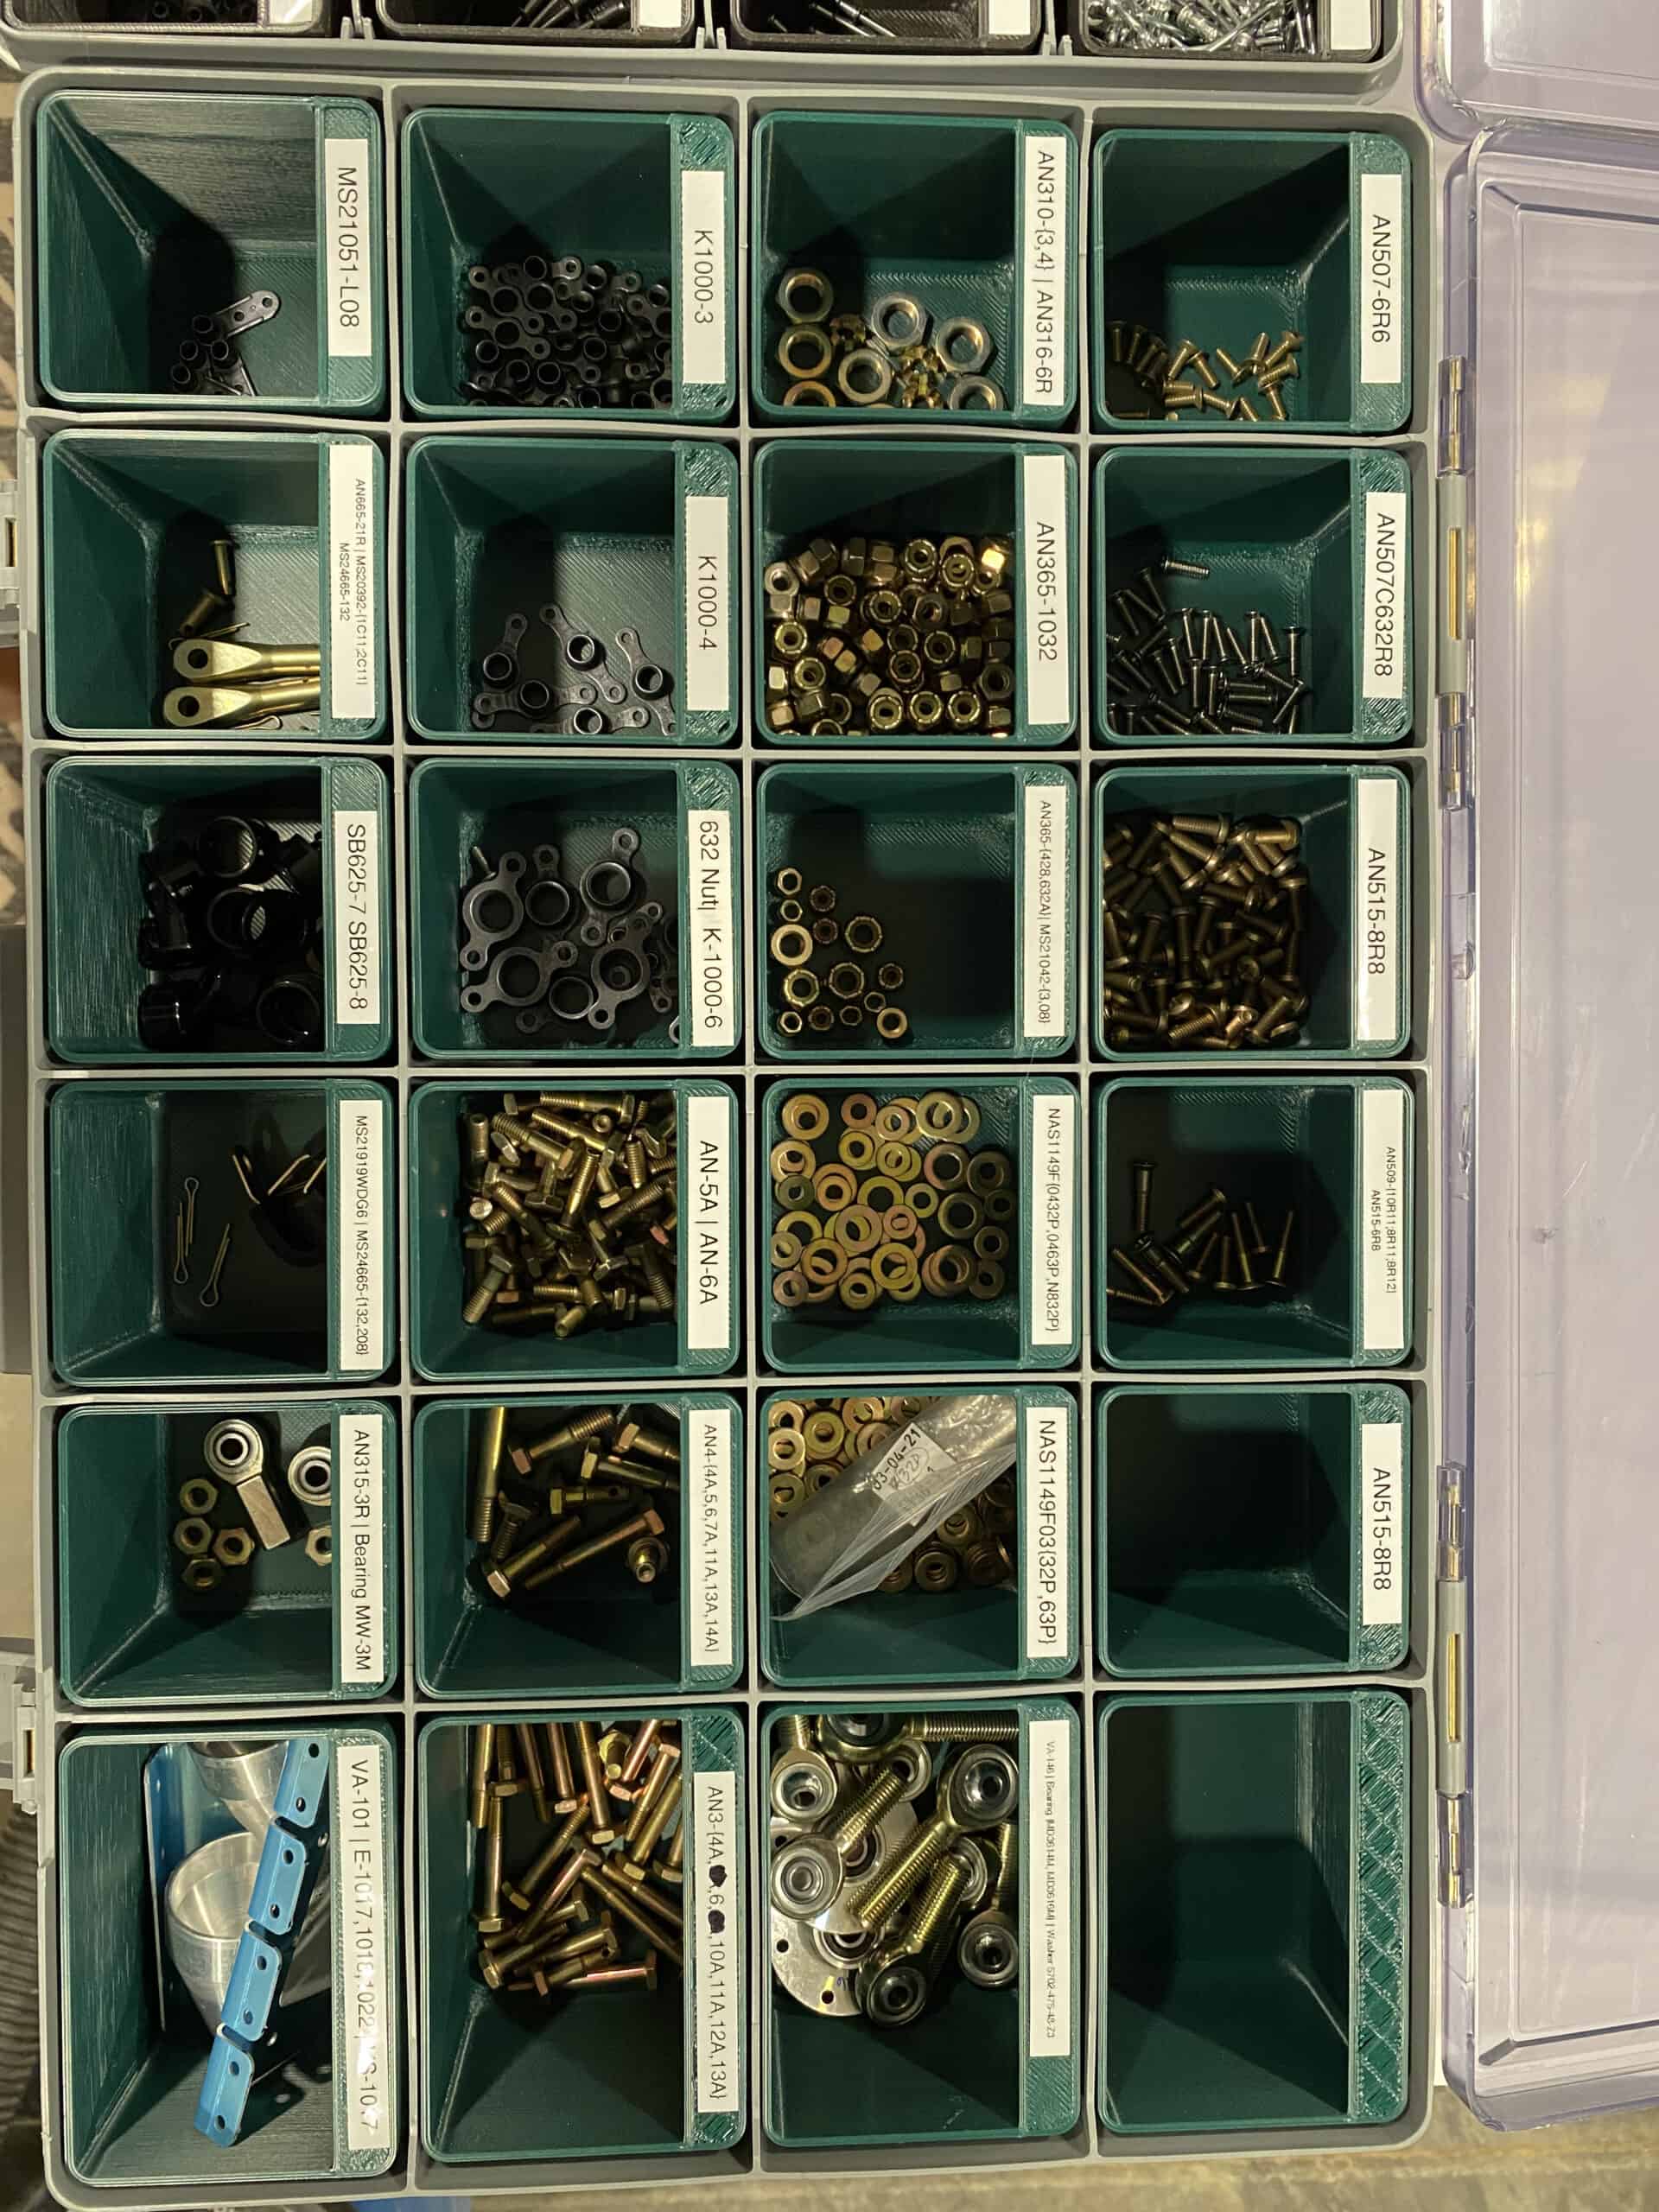
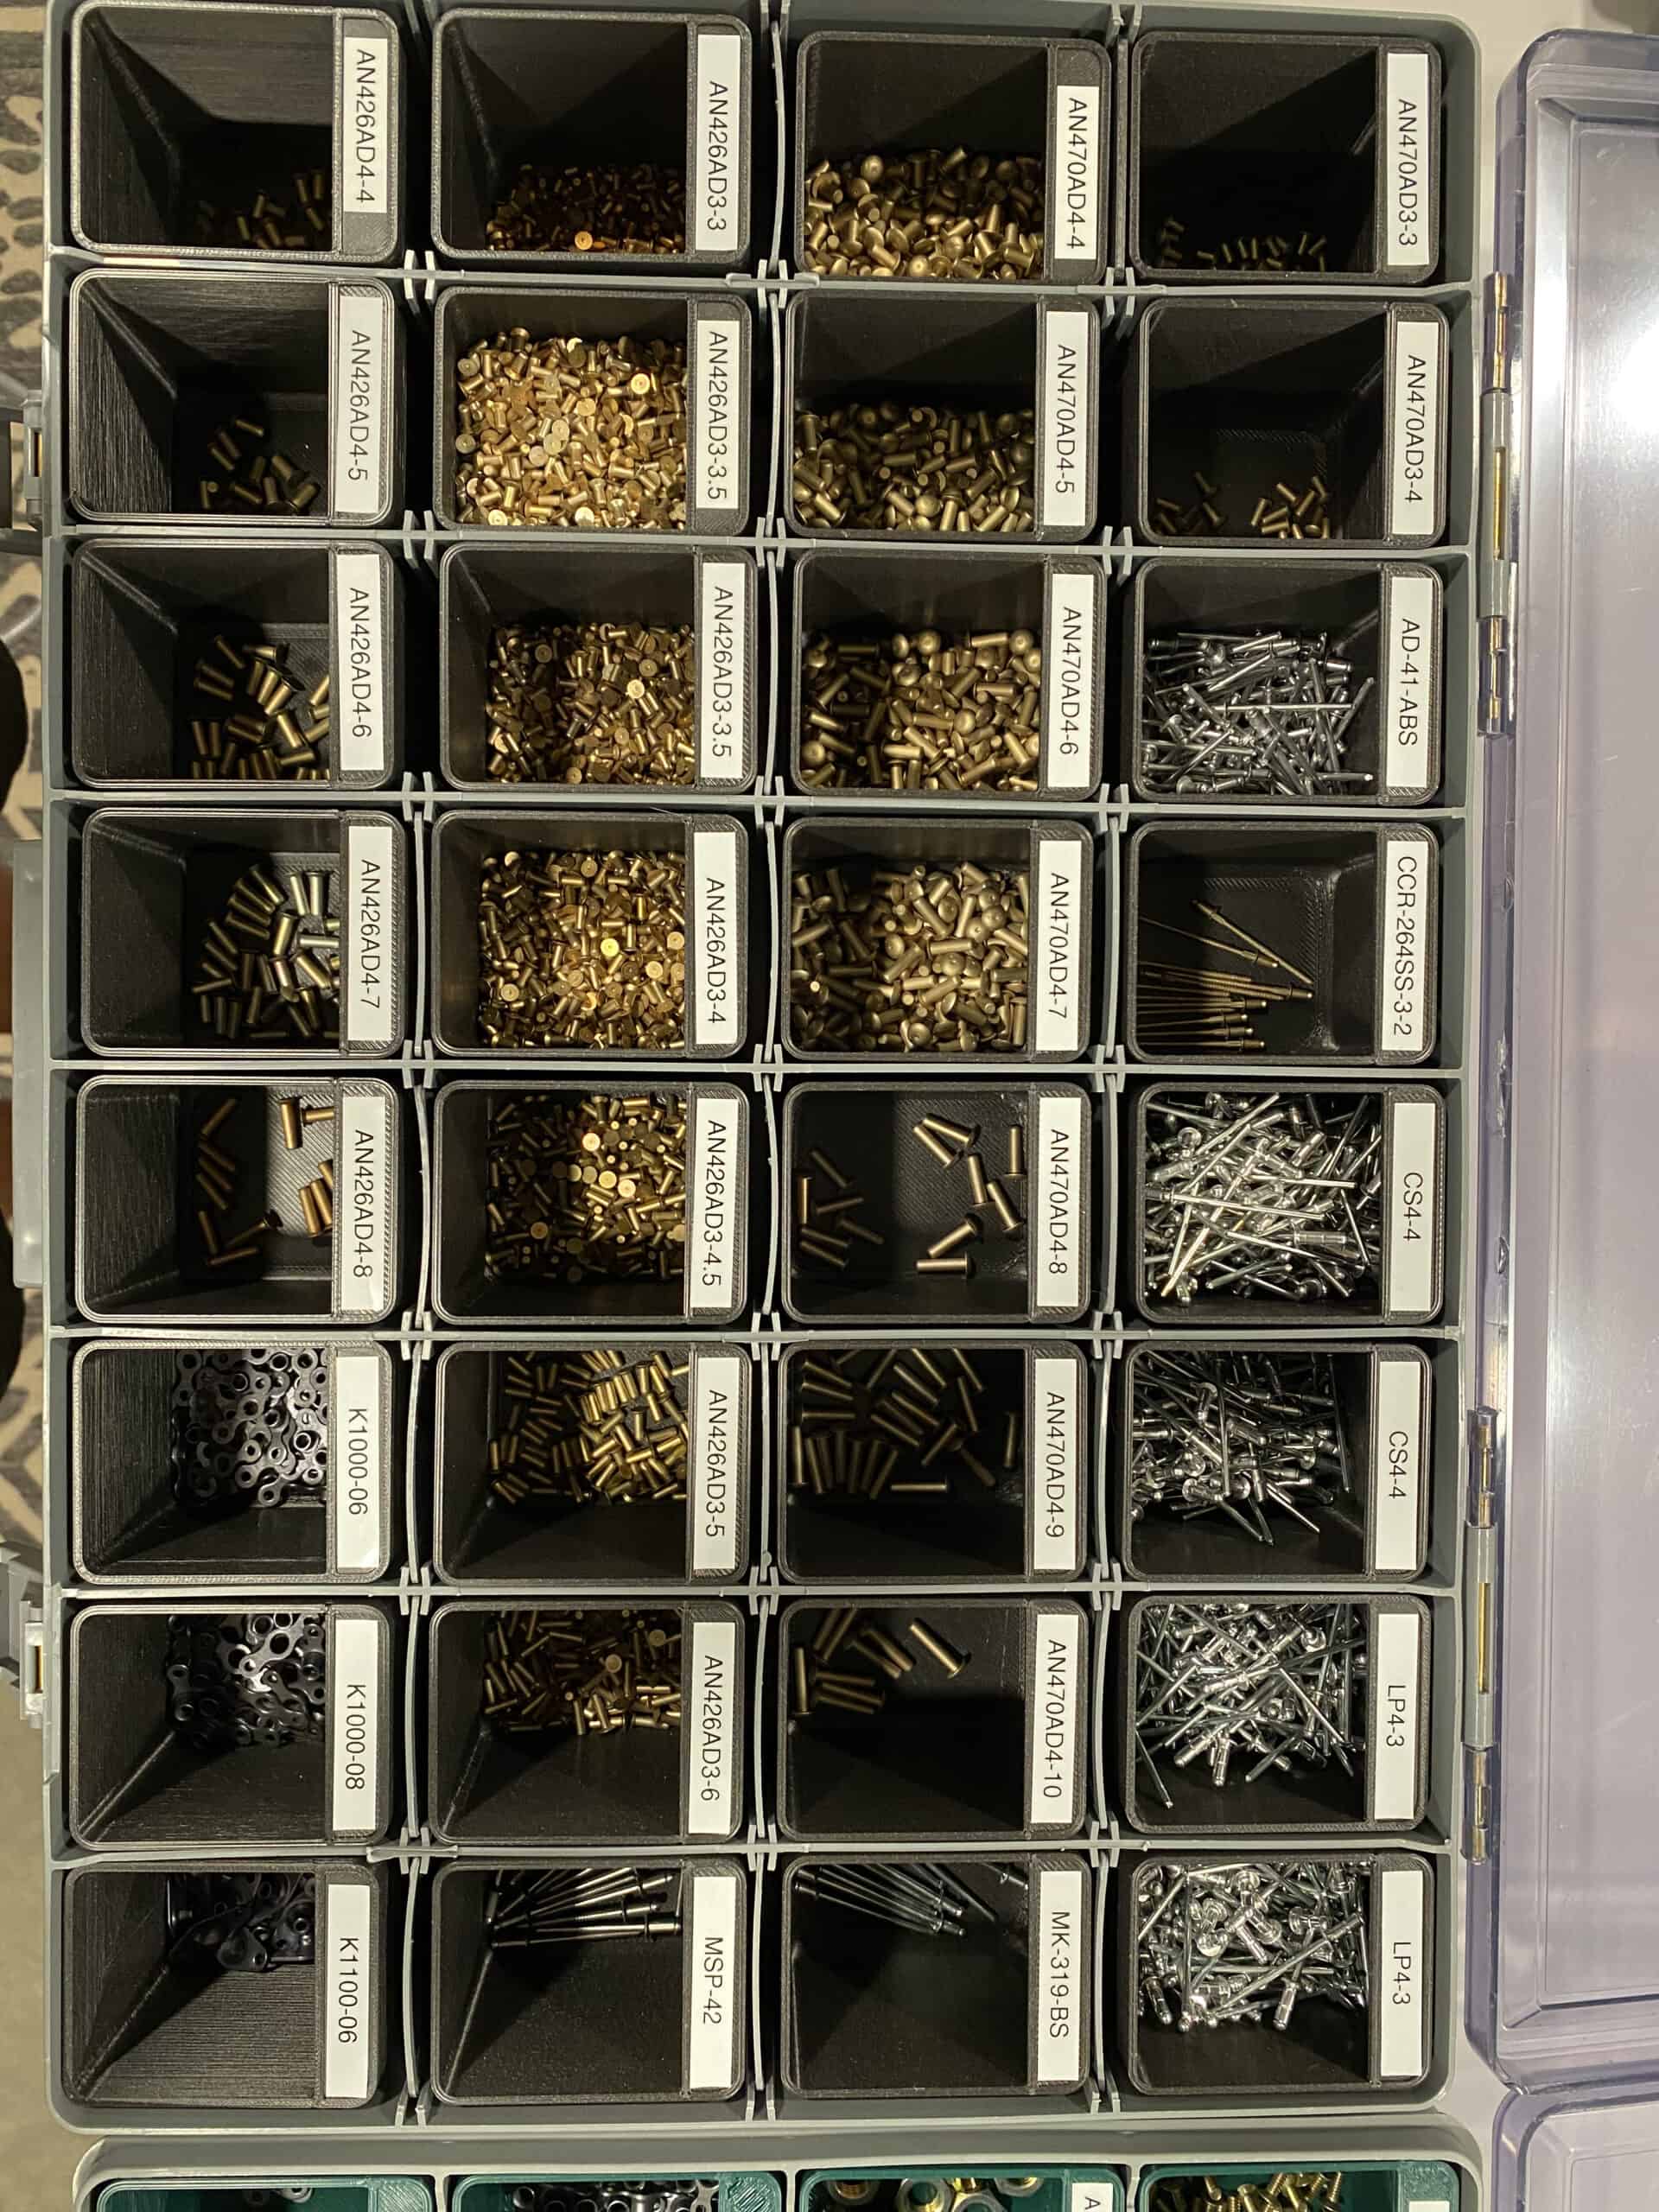
07 – Storage Case Bins
While awaiting delivery of my empennage kit, I previewed the BOM and realized that I was going to have A BUNCH of small parts on my hands in the very near future. I did some searching on VAF for how others had handled this, and found reference in one thread of someone using Flambeau cases (for the life of me, I can’t find that thread at the moment); anyways, I ended up getting the 1024-2, 24 Compartment Large Satchel Style Case, and the 1032-2, 8-32 Compartment Large Satchel Style Case. I then printed small part bins that fit each of the compartments so that I could easily pull out the parts from one compartment when needed, and replace when finished. I have these bins designed so they come right up to the surface of the cover, plus there’s a small angle piece that should prevent parts from falling out of each bin while moving around. I still haven’t done a carry/shake test because I’m way to scared I’ll be sorting rivets for days, but (in theory) it should prevent parts from moving around and makes for easy storage of a bunch of small parts.

Storage Case Bins Design 
This is the 24-bin case with organizers in place 
This is the 32-bin case variety, I prefer this size over the 24, but the slightly larger bins on the 24 are useful at times.
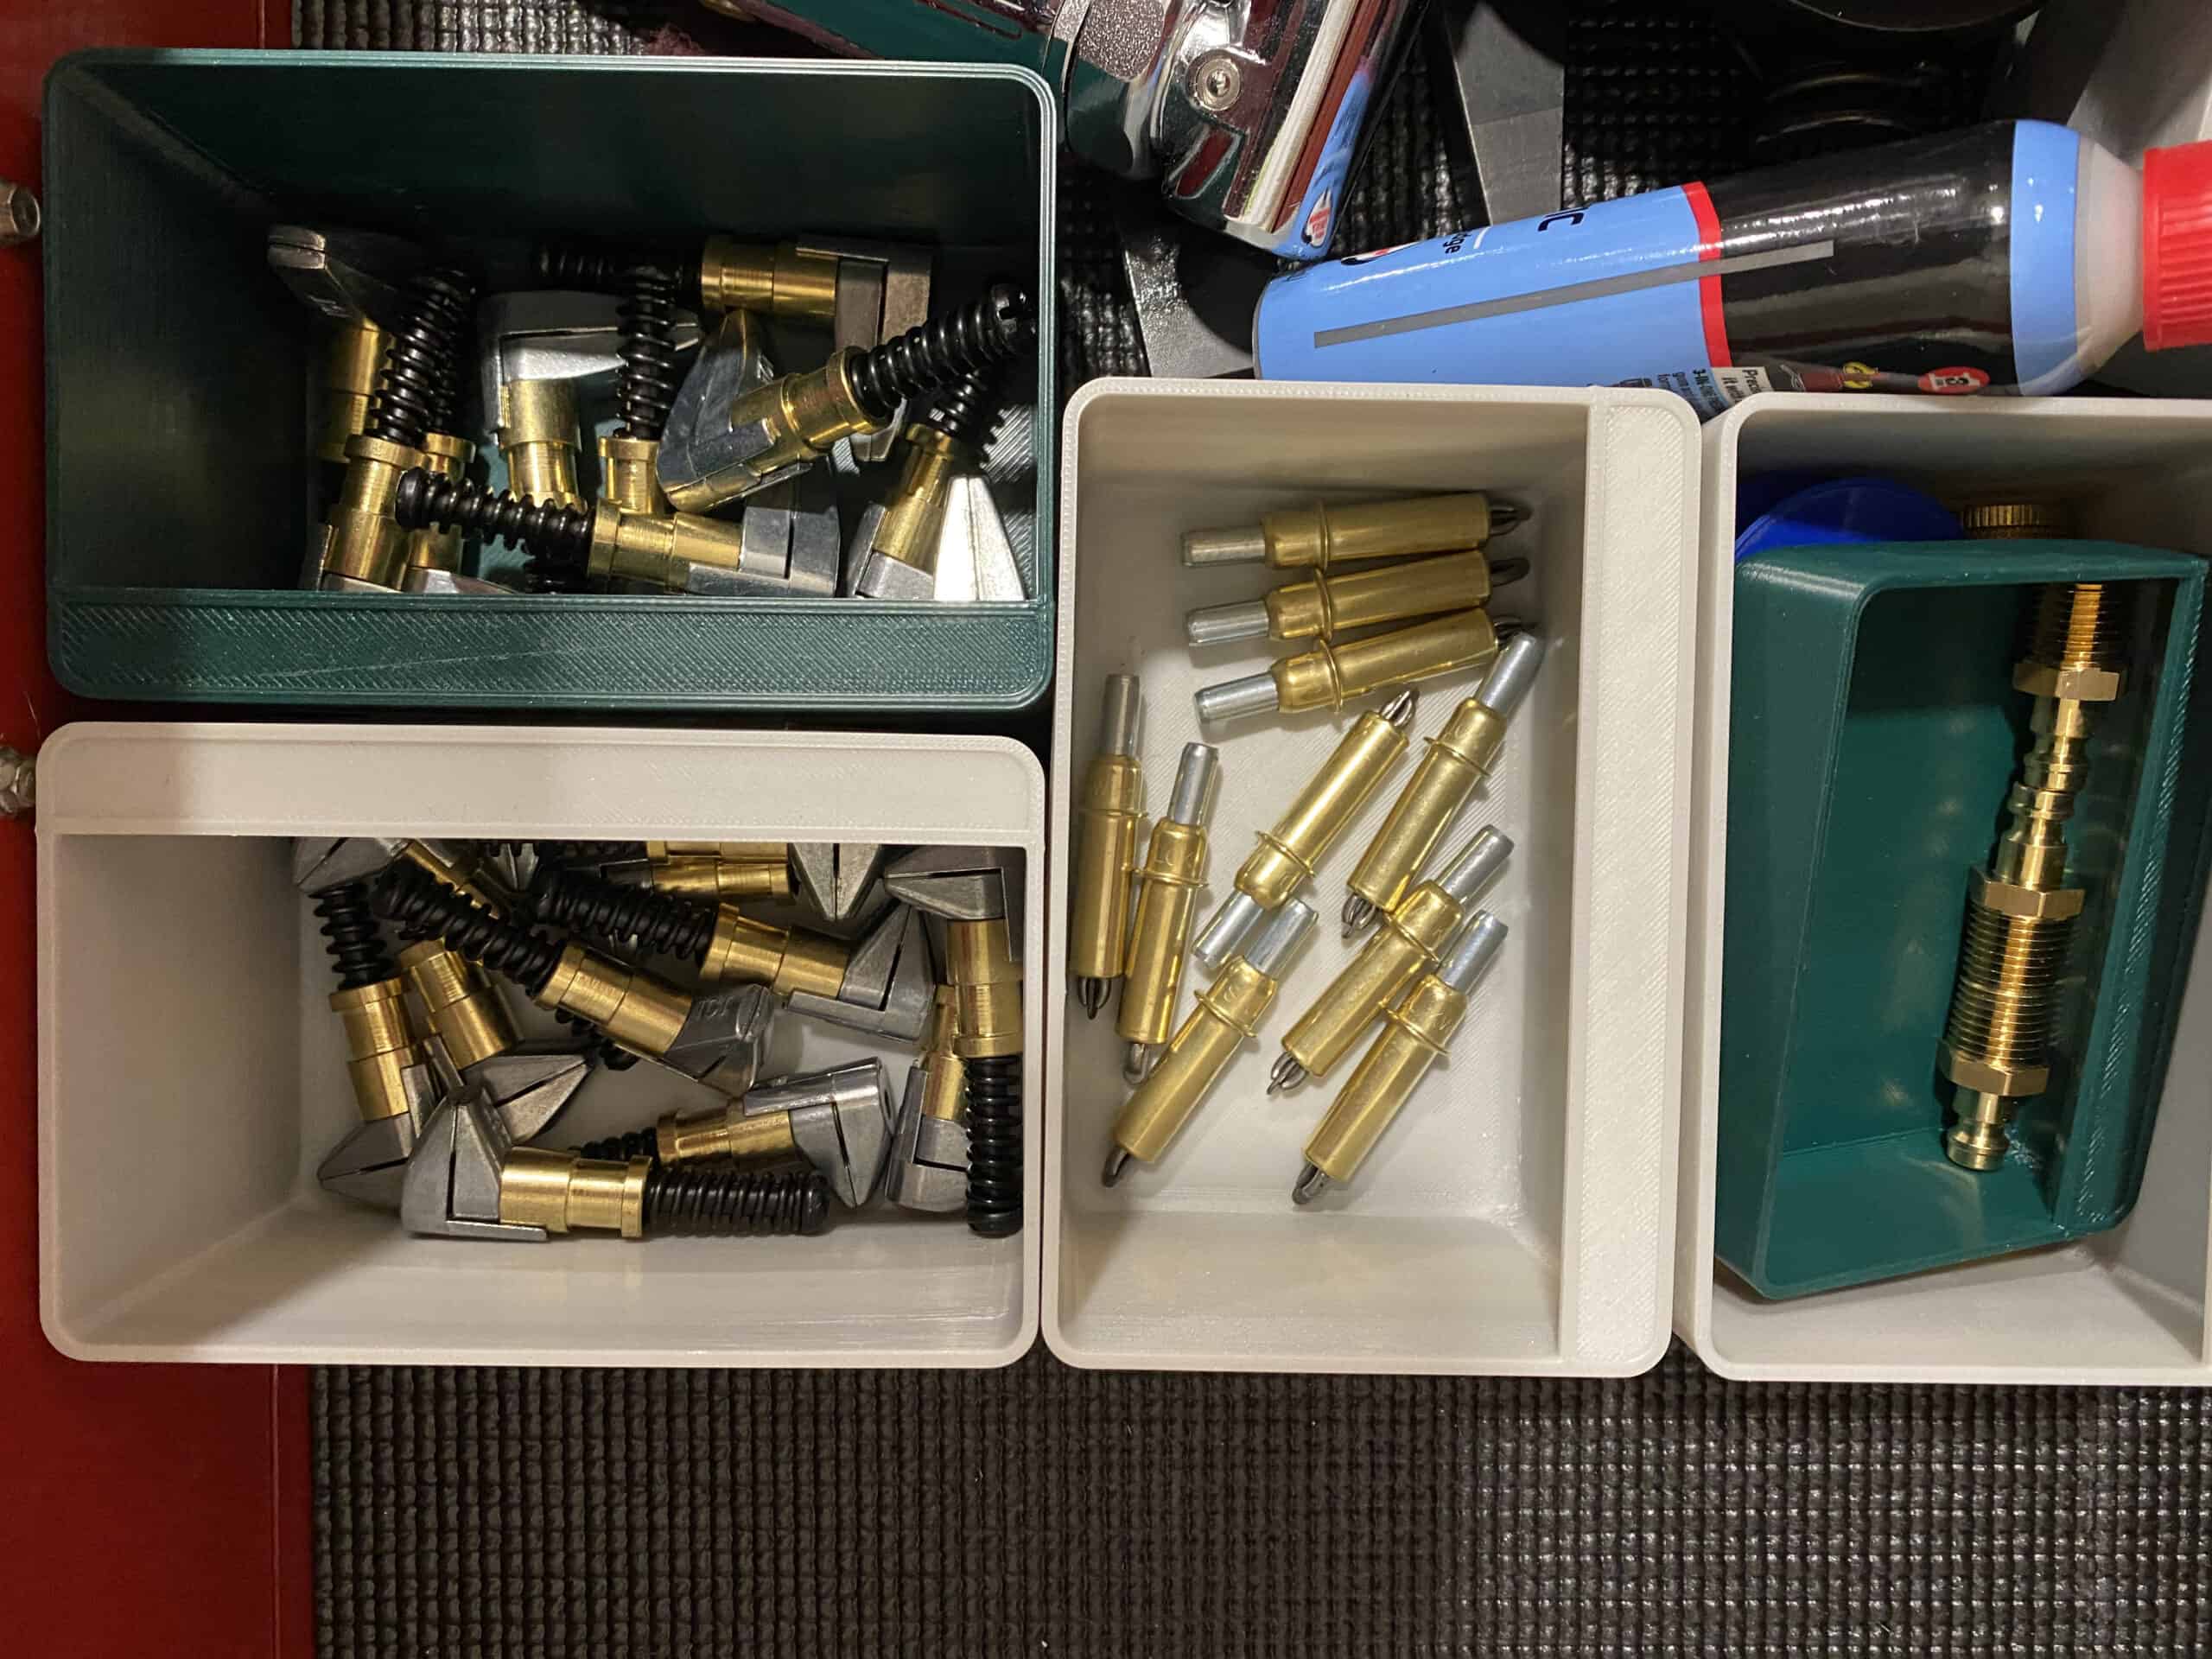
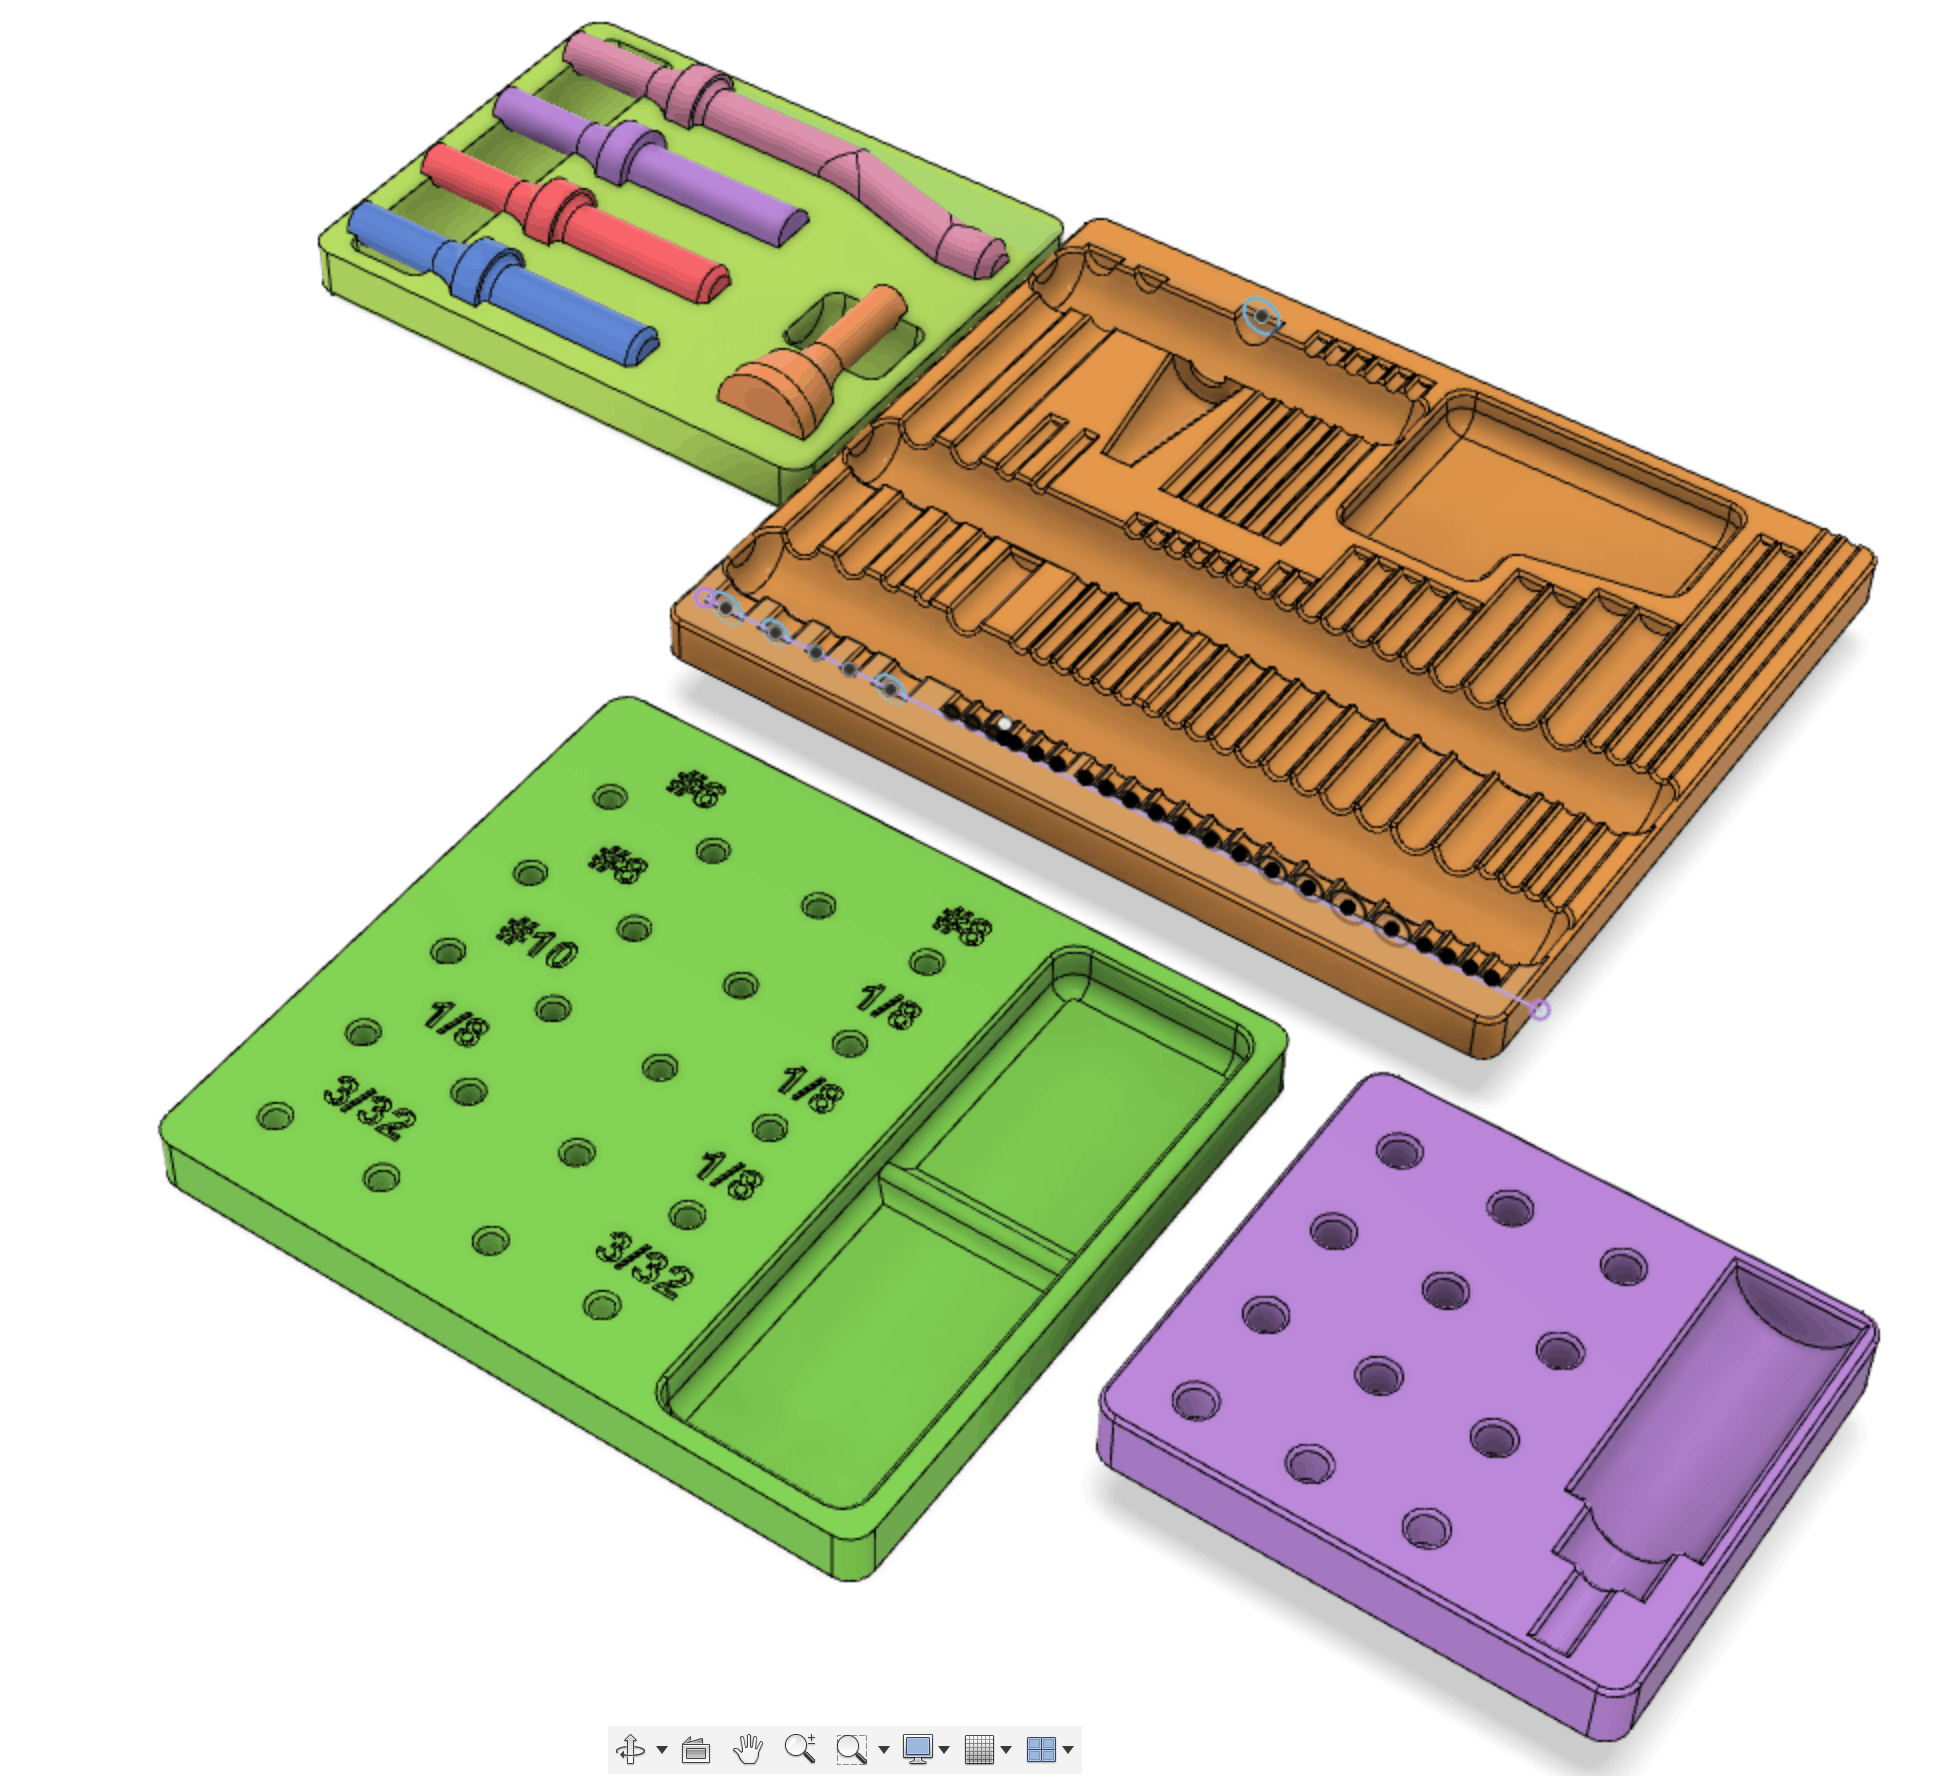
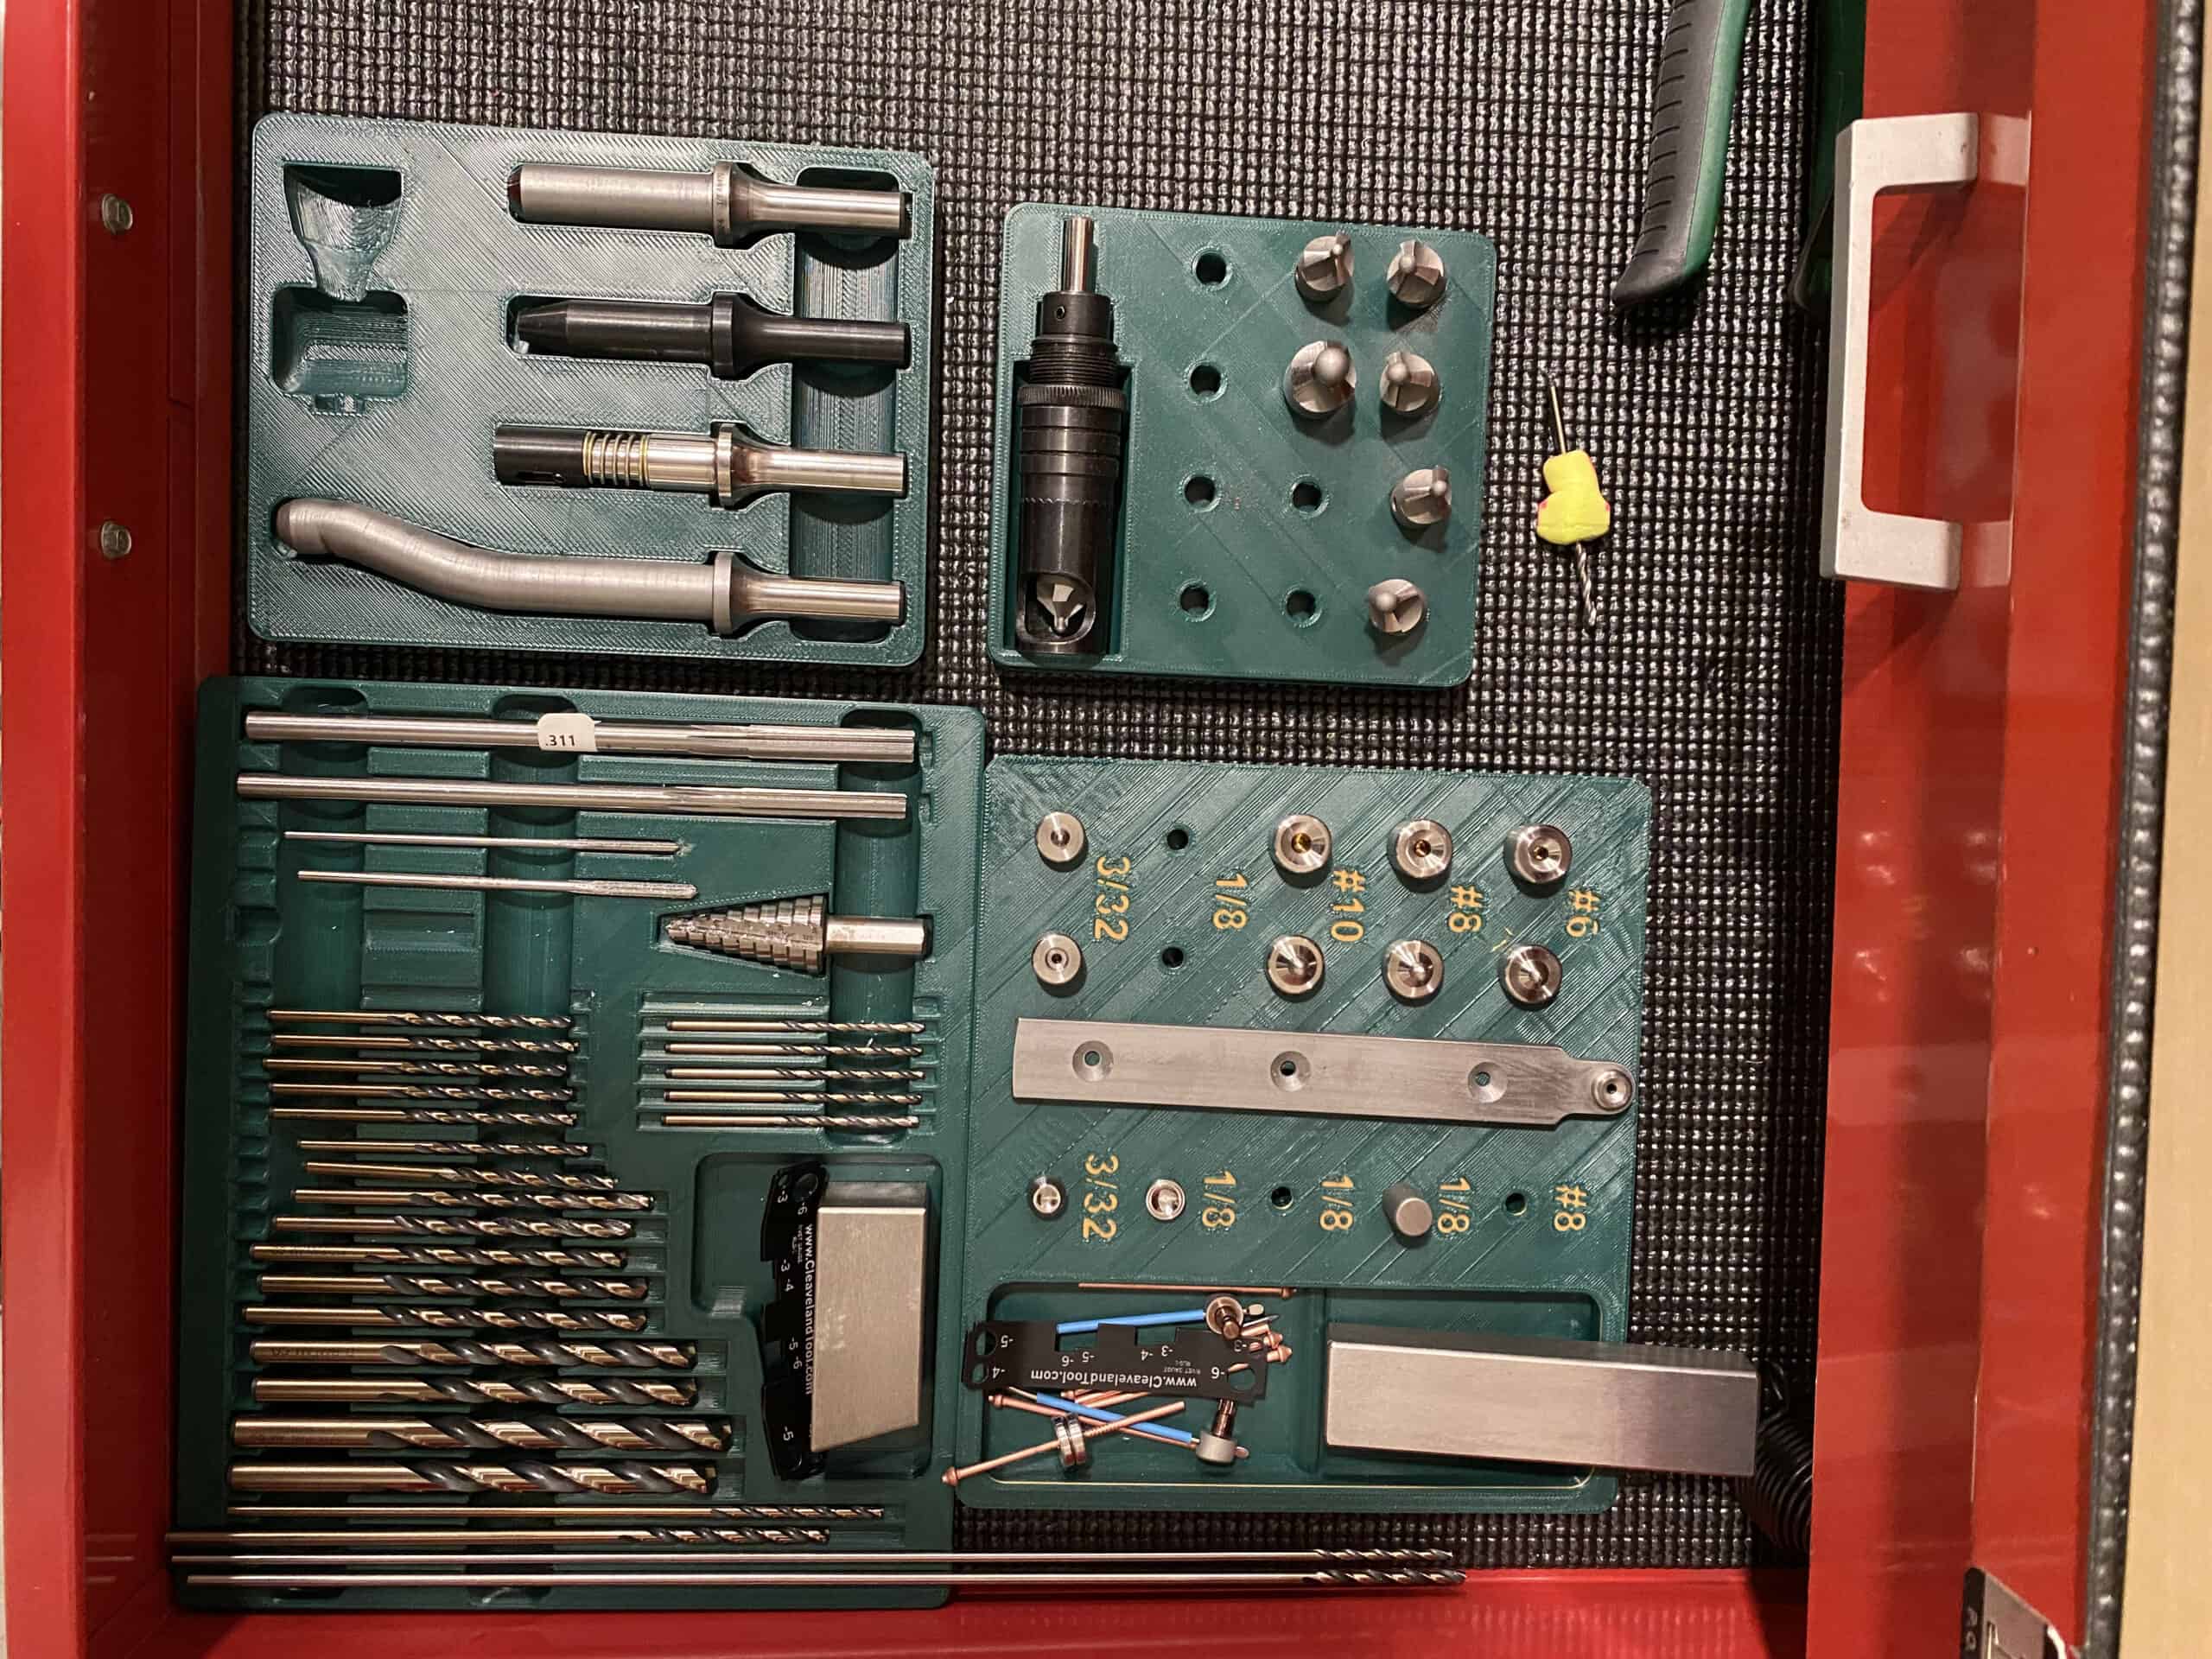
08 – Tool Trays
Of all the things I made, these are probably a bit over the top, however, they have been quite useful so far. When I received my toolkit, I realized that I had a TON of tools that I hadn’t necessarily used before, and that would easily get lost/misplaced/etc. unless it had a designated home. Based on that, I made 4 different tools tray:
- Rivet Sets – This has a place for all the rivet sets that come with the Cleaveland tools starter kits, and it’s an excellent way to keep the sets from rolling around in the tool drawer.
- Drills and Reamers – With all of the various drill bits that you get with the starter kit (because, you’ll need all of them at some point), I wanted some reasonable way to keep things in size-order; so this particular tray stores my reamers, and then all of my numbered and lettered drill bits (I later picked up some more fractionals, but haven’t found a great home for them yet, I probably should make a more generic tray for them at some point.
- Flat Squeezer Sets – Initially, keeping the size of these things straight hurt my brain, so I added numbers into the tray (for printing, I actually used a different color on the top most layer before the ‘cutout’, which is a fun (though mostly unnecessary) effect.
- Countersink and Cage Holder – This is the one tray I need to redesign – the cage cutout works great, so long as you don’t have the cage extended (e.g. max cutting depth), anything more and it’s too large for the cutout, however – it does work well. When I get around to improving this one, I’ll likely add another slot to home another cage (since I’ll probably be picking up another one of those soon as the back and forth and re-dialing-in of cages is getting old quick)

Tool Tray Designs 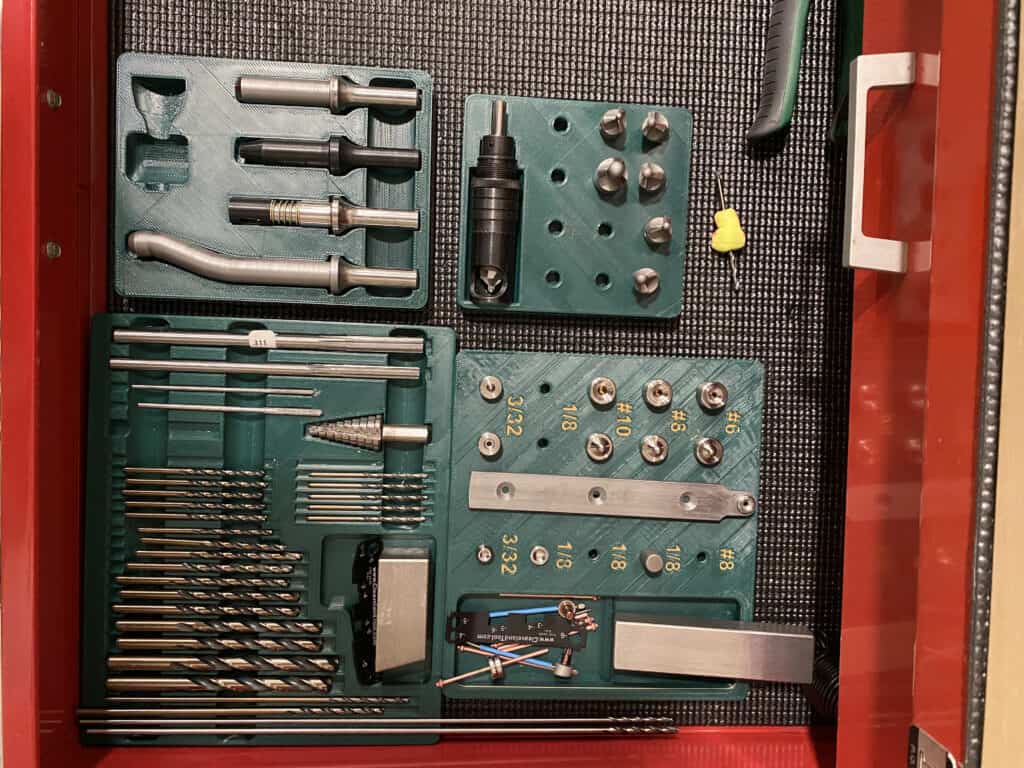
Tool Trays, shown in their home drawer of the tool cart
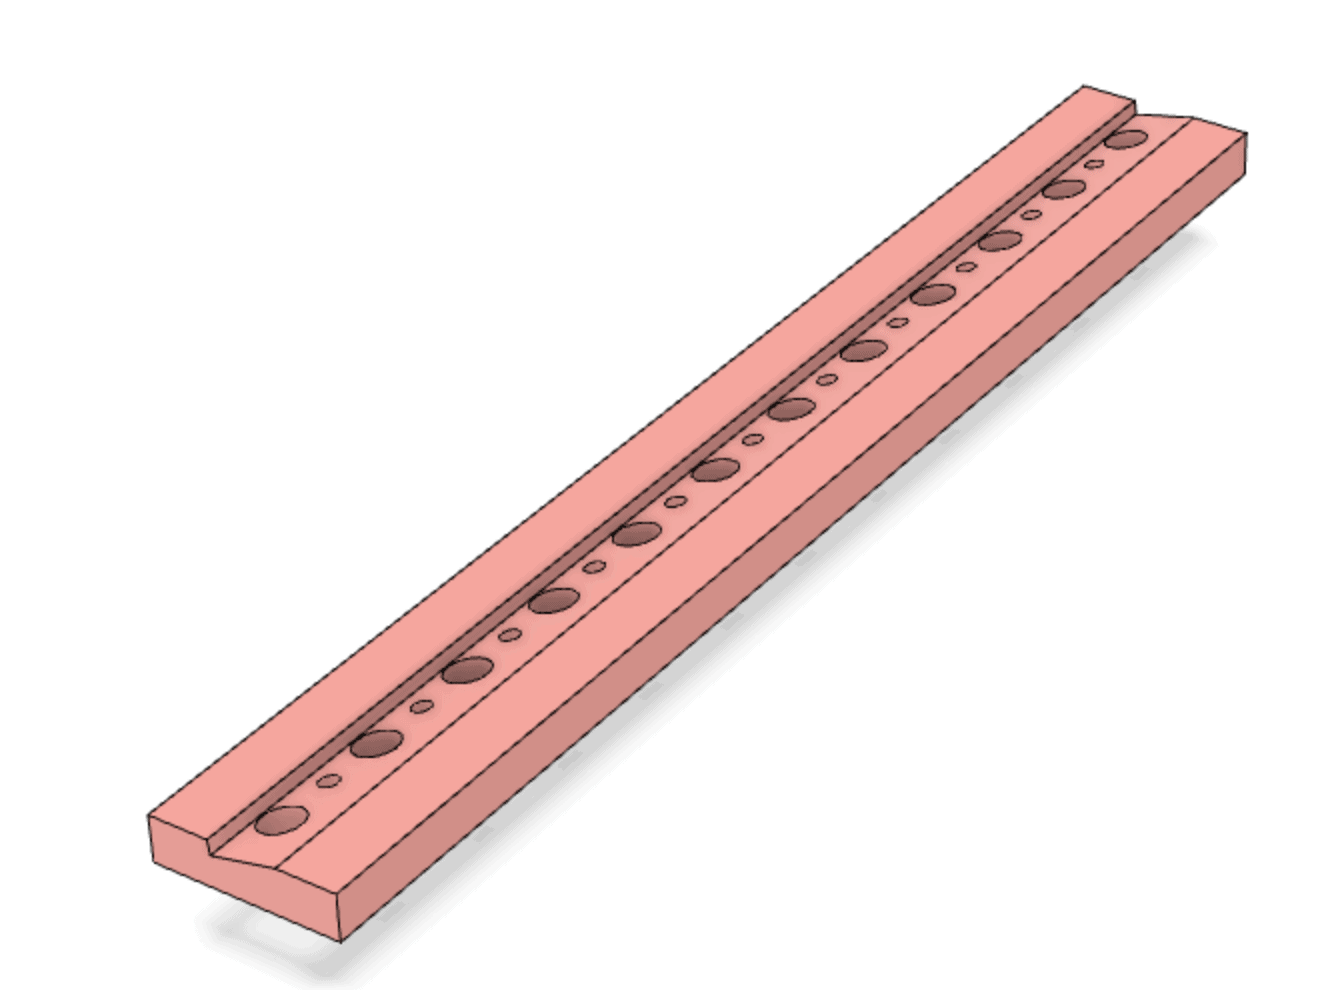
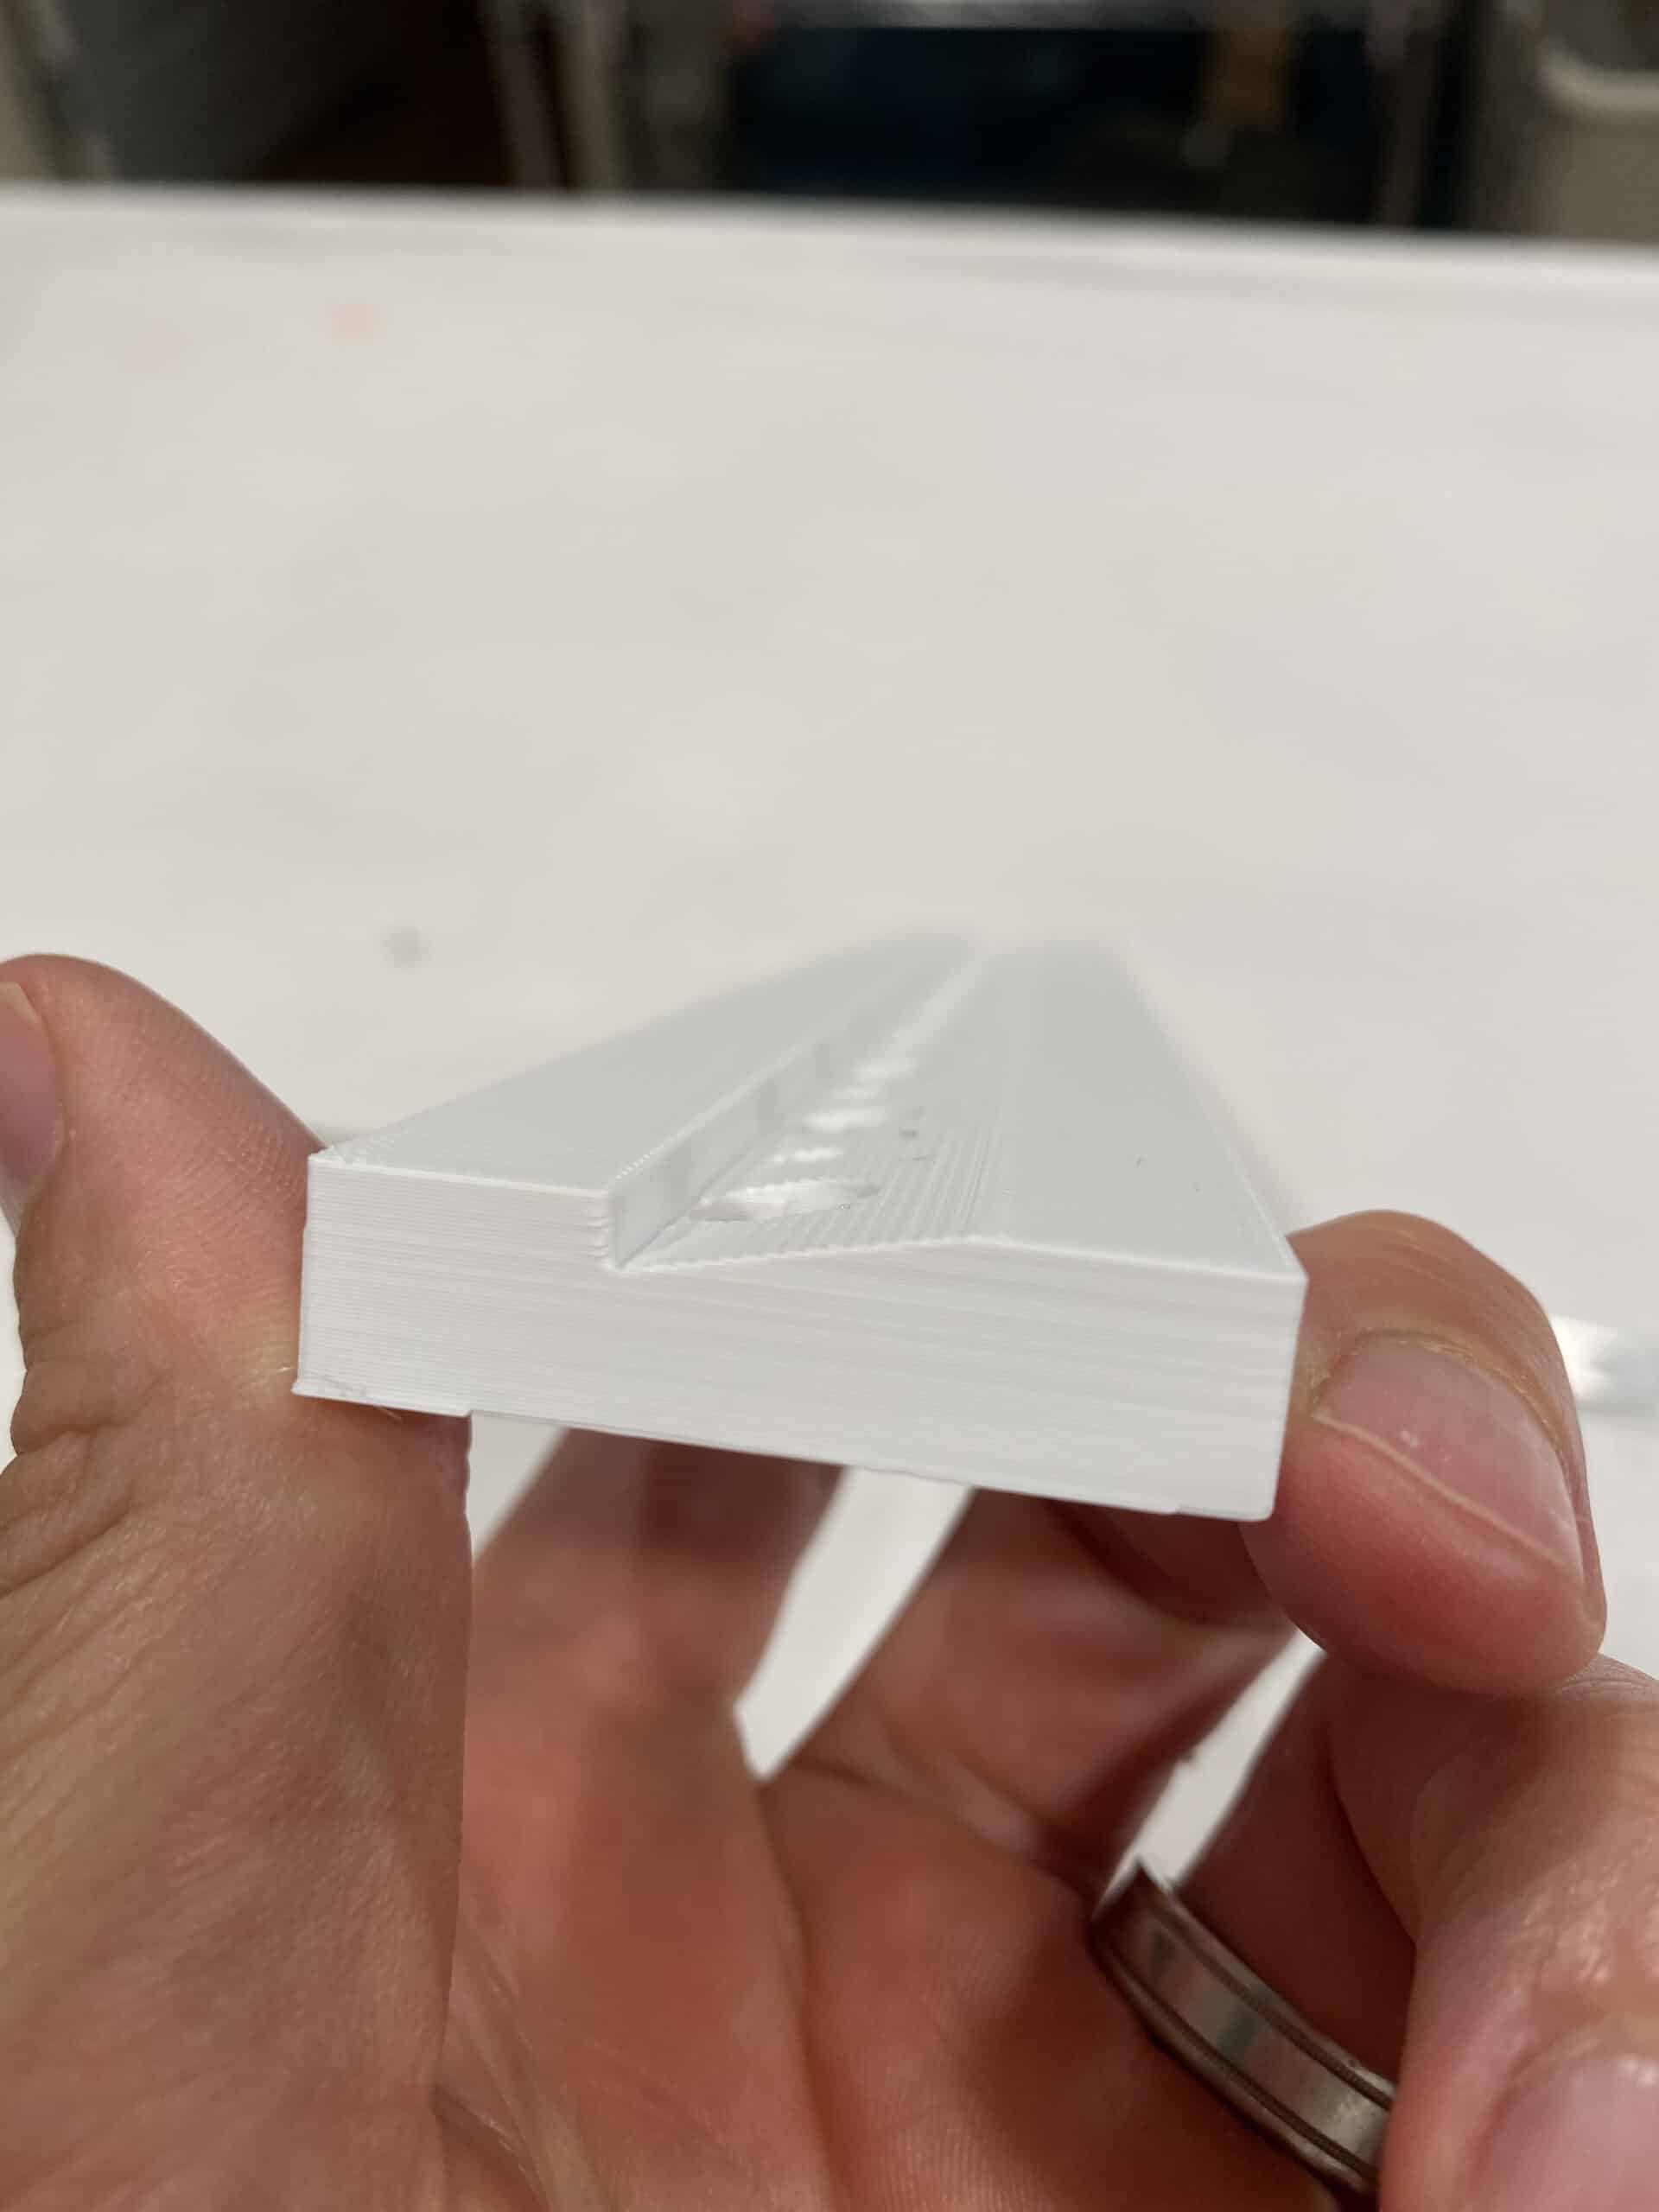
09 – Trailing Edge Jig
Well this little wedge of material can cause all manner of challenges it seems, one of which is getting the faces reasonably flat for machine countersinking. I made this jig (it’s about 12″ long) and I have created small and large holes in the jig that align with the lightening and rivet holes in the actual wedge material. To use this, simple place the wedge in the jig, align the lightening (large) holes on the wedge with the little holes in the jig, this leaves plenty of clearance for the pilot of your countersink while countersinking each hole. You’ll likely want to clamp this to a table (if you’re countersinking with a drill) or clamp it to your drill press table and then lightly clamp the wedge to the jig if you’re countersinking with a drill press. I printed this in PLA for a little more stiffness, though I actually got a little bowing in the 12″ long direction from the way the plastic cured; honestly, ABS might get better results, but material selection isn’t critical in this scenario since there are clamps and such in play.

Trailing Edge Jig Design 
Jig with wedge in place, I haven’t machine countersunk these yet 
Profile view of the jig
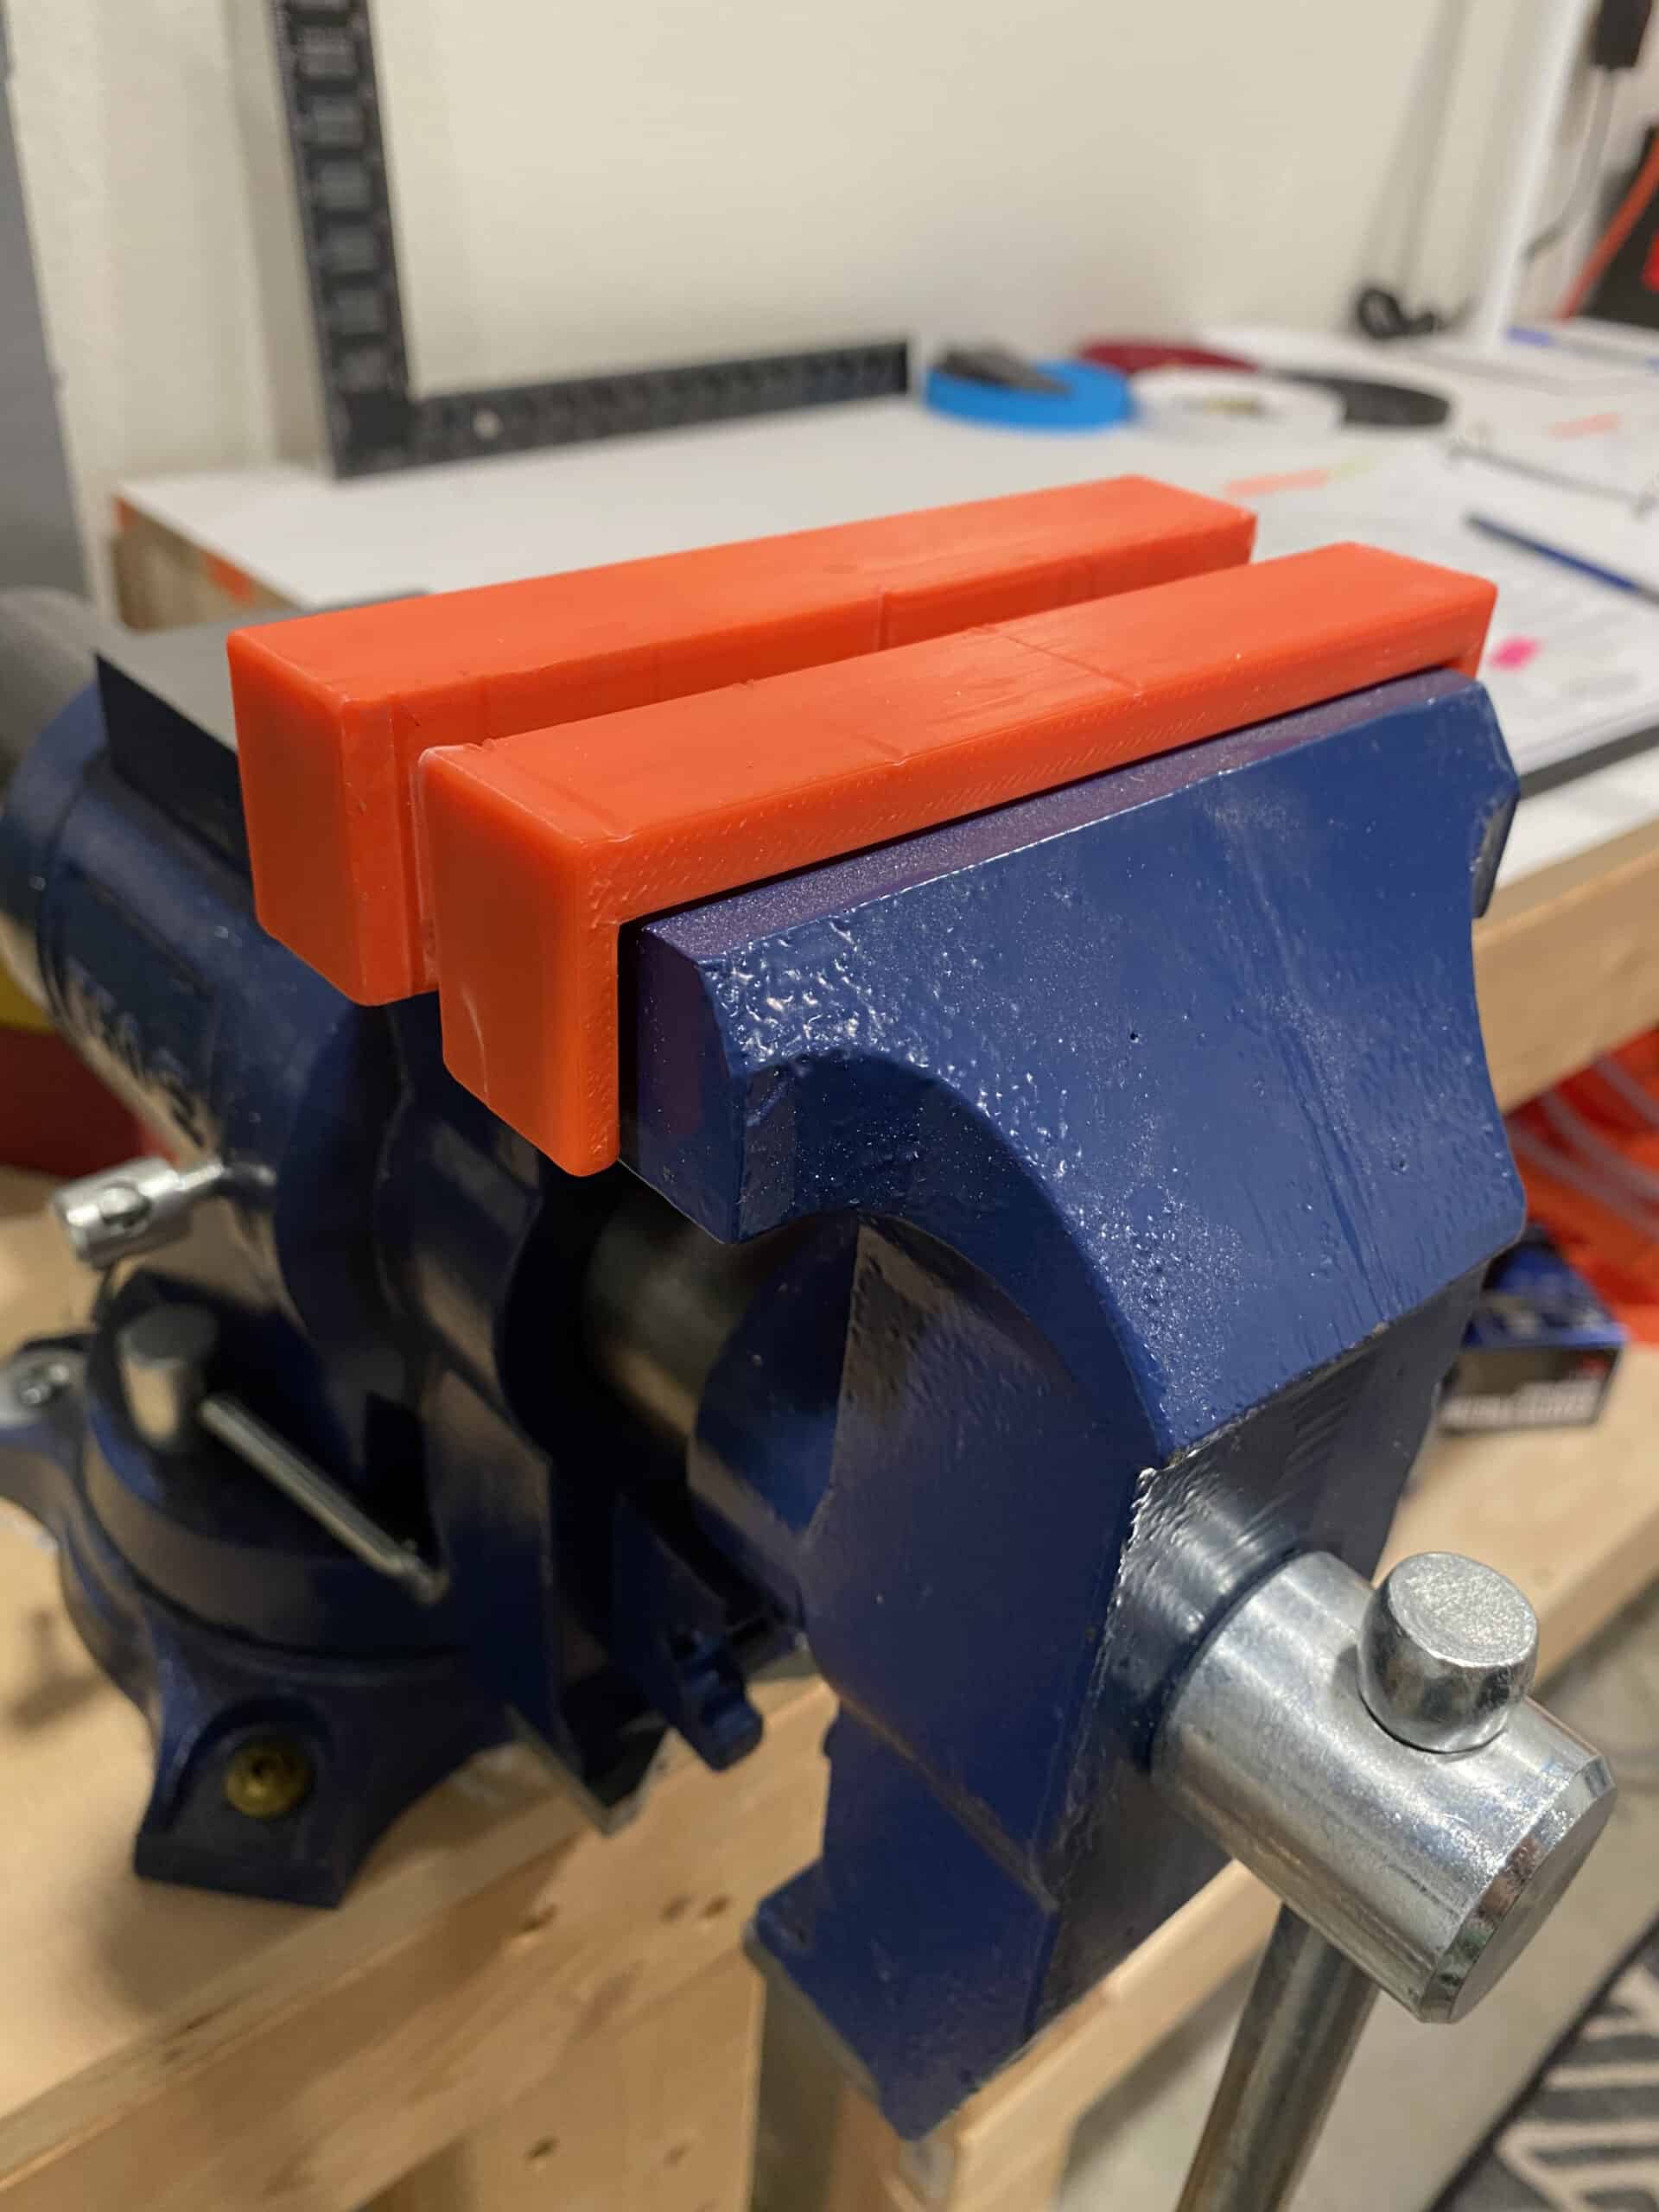
10 – Vise Jaw Covers
I’ve been quite happy with my vise so far, the one area of concern was the heavily knurled steel jaws marking up aluminum – so I made a quick pair of slip on jaw covers out of an Orange ABS. The fit on these jaw covers is super tight, a few hammer taps were necessary to get them to snap home – that means that when it comes time to remove them, it’ll likely be a destructive removal, but that’s okay as I view these as consumable items. The ABS will dent and mar over time, so I’ll just print a new cover when needed. This design is a bit different than the commercially available options that use magnets to hold the covers on, which is great for a commercial item – but for me, these cost about $2 in material per pair, so I appreciate the extra snug fit of the covers.

Vise Jaw Cover Designs 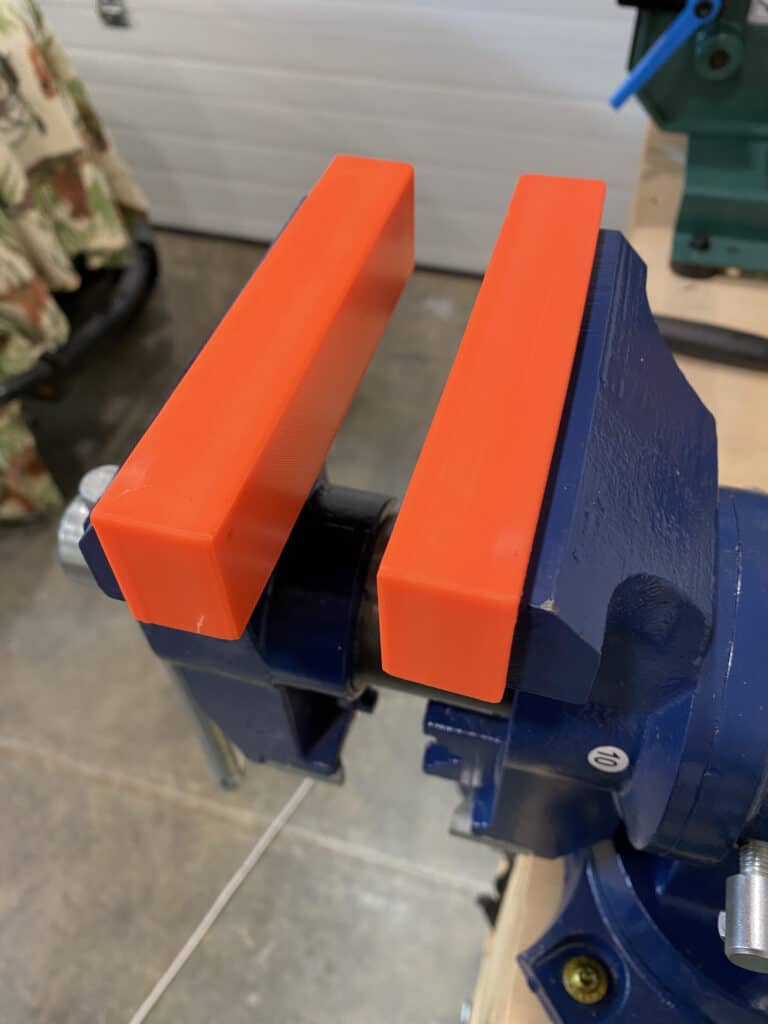
Vise Jaws, right after install 
Vise Jaws, after some wire bending abuse

11 – Wheel Leveler
This is probably the most intricate of things I’ve designed for the airplane factory so far, and also the least used. The inspiration for this piece was to accommodate a change in floor slope in my garage from a floor drain – if I have my table(s) positioned in a certain way, 1 or 2 wheels will be up to 2″ different in height from the rest of the wheels (which makes for a very wobbly work surface). So far, I’ve been able to avoid this table location (hence why I haven’t used this part much), but the general idea is that there is a large threaded insert that holds the wheel assembly – it was custom designed for the wheel size and lever dimensions of my caster. This fits into a larger threaded section which allows for the height adjustment. The testing of this part went well, it can be a tad challenging to get on the wheel (as it involves lifting the table up), but once it’s on it works great.
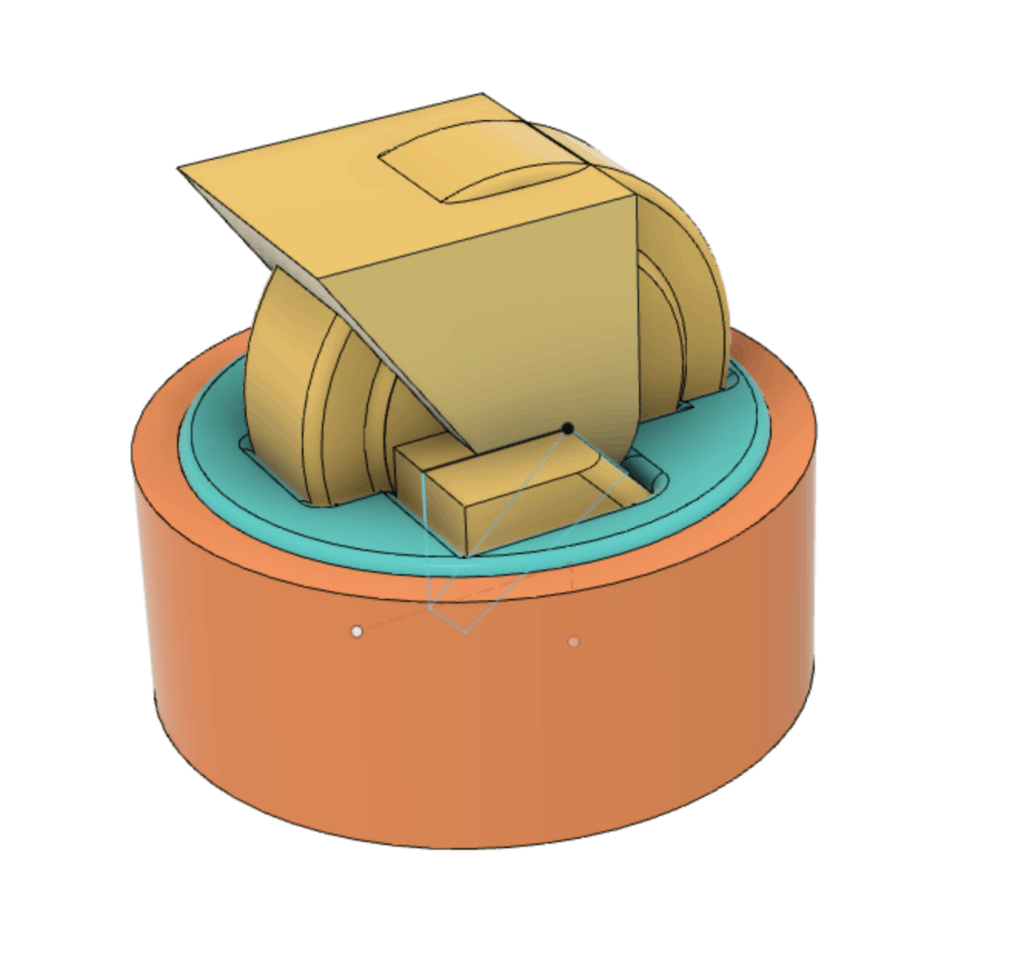
Wheel Leveler Design 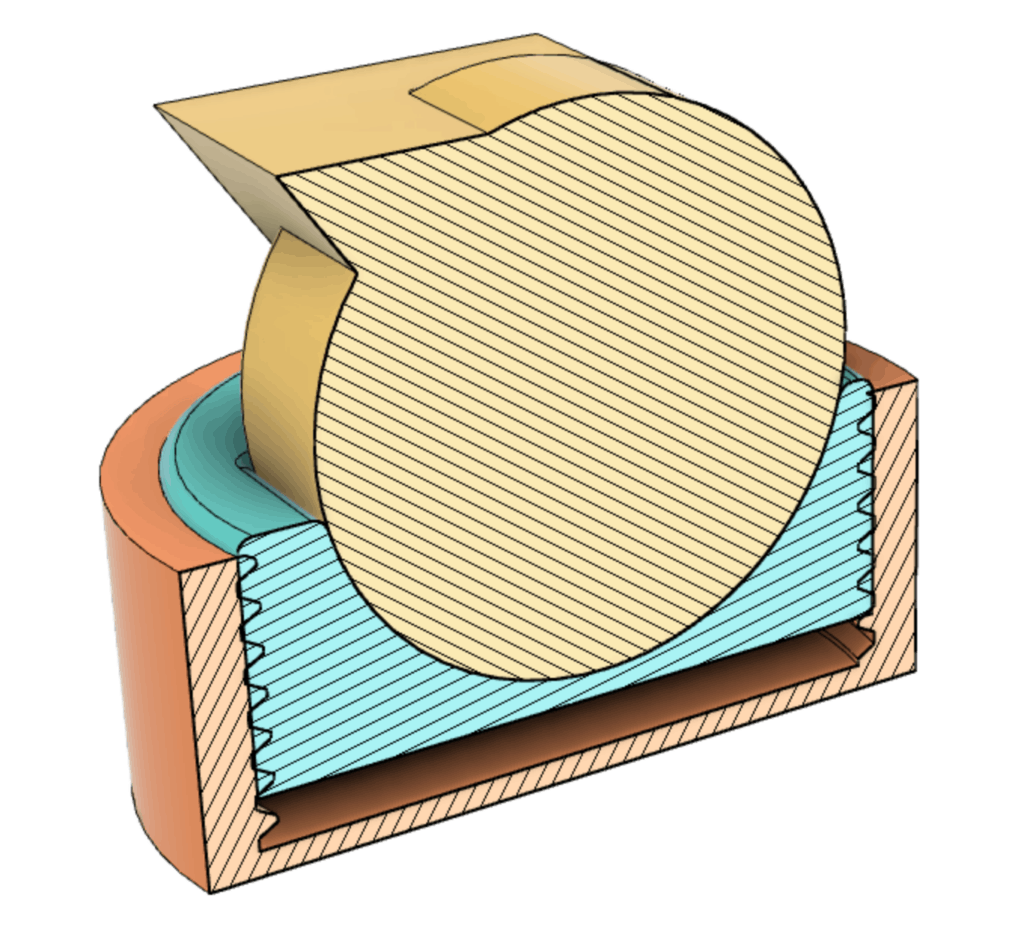
Wheel Leveler Design Cutaway 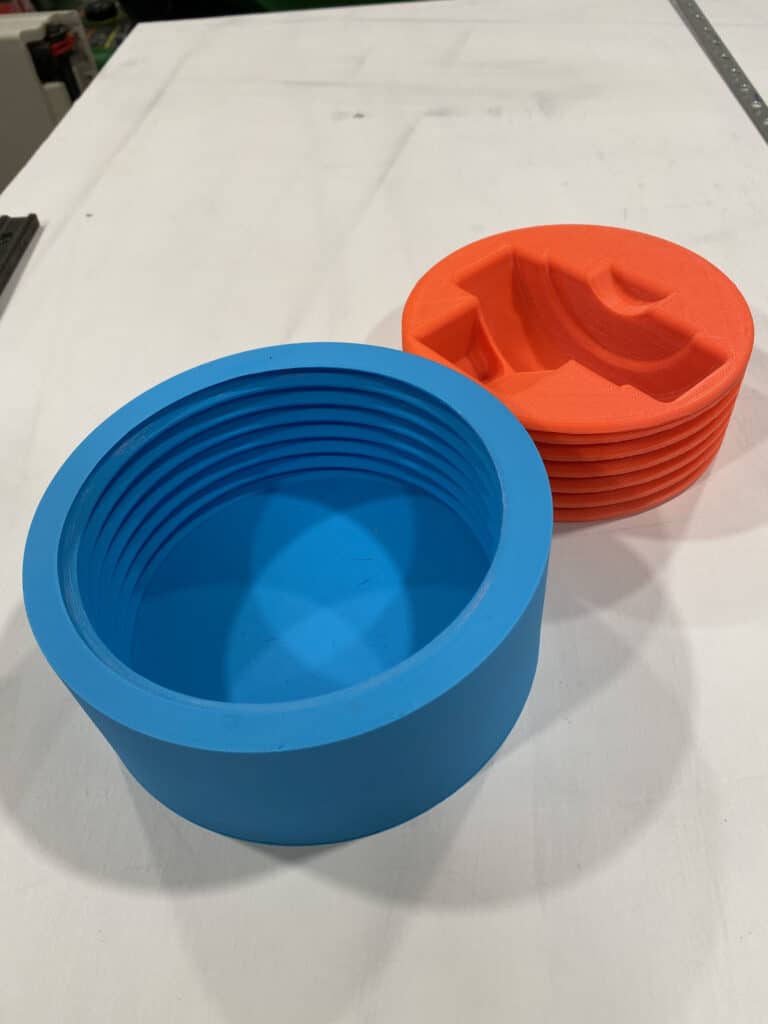
Wheel leveler – disassembled (I sometimes use the bottom part as a storage bin) 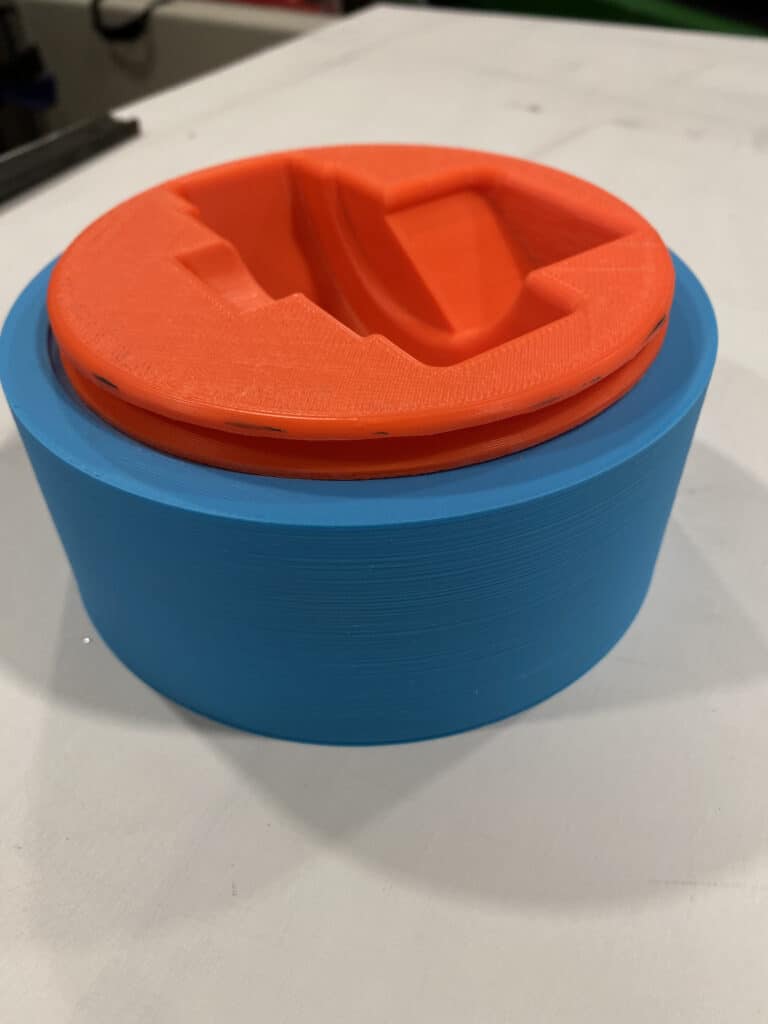
Wheel Leveler – assembled


12 – Wire Rack Label
This is a super-basic print, but has proven to be quite useful. When I was inventorying my parts, I would place them on the wire racks – after I had two sub-kits up there, I realized that it was going to become super difficult to find parts in the future. As such, I printed up a bunch of these labels, which took over the wire racks and are perfectly sized for 10mm label printer tape. The only regret I have here is that I organized by parts by the sub-kit they arrived in – which is fine, except I need to cross reference my packing list every time I’m hunting for a part. Next time, I’ll try to organize by the assembly section, which will require advance research, but will hopefully make part location MUCH easier.

Wire rack label design 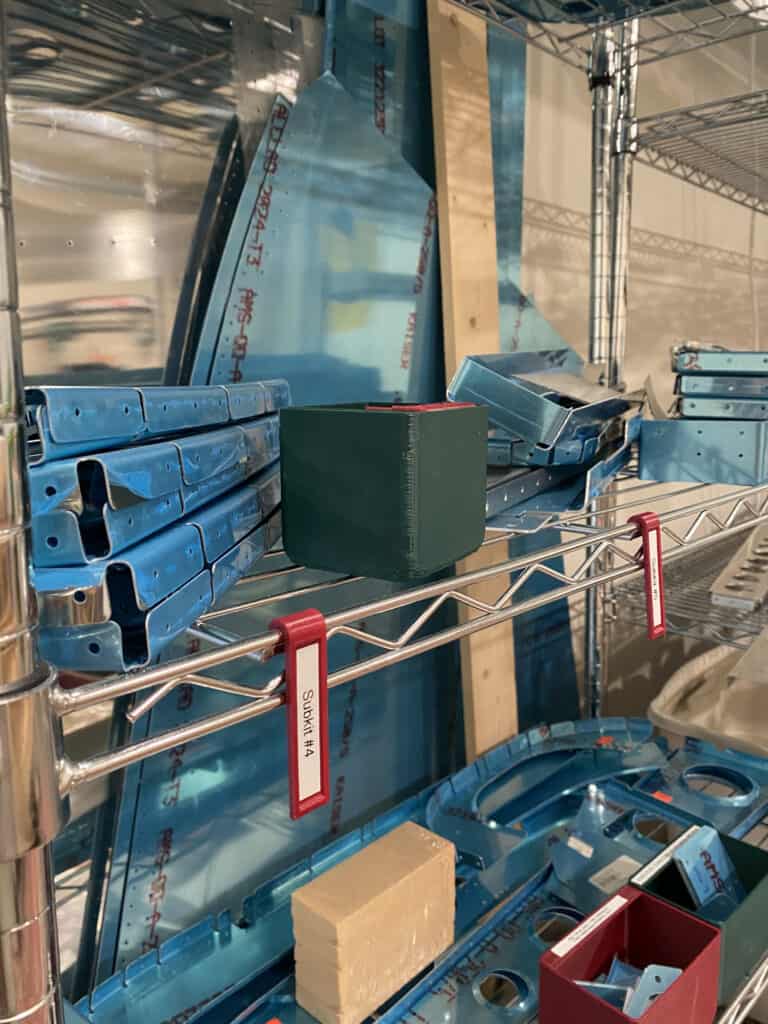
Wire rack labels in real life 
More part organization (no wire rack labels, but another view of the storage chaos)

Again, if you’re looking for the STL’s, they’re on thangs.com, here’s a direct link: https://thangs.com/jwilliams2020/JerAero-RV10-Assembly-Tools-23840. If you need some help with printing them, have any questions, or need any help – reach out!
